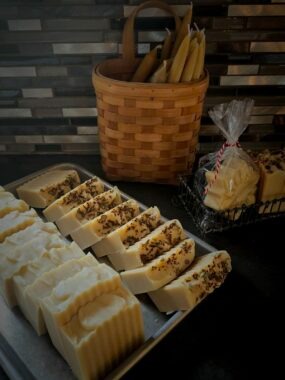
Servings: 14 bars
Equipment
- Digital kitchen scale
- Thick plastic or stainless-steel bucket
- Stainless-steel stockpot
- Immersion blender
- Spatulas or spoons for stirring
- Rubber gloves
- Silicone molds*
- Safety glasses (optional)
- * For hand-cut soap, a rectangle mold set in a wooden box is perfect. Amazon and soapmaking websites carry these. One batch will fill it just right. The molds with individual cavities shaped like rectangles, ovals, snowflakes, flowers etc. are fun, too. These can often be found on the clearance racks at craft stores for different seasons and holidays.
Ingredients
- 22 ounces olive oil
- 7 ounces coconut oil
- 2 ounces shea butter
- 1 ounce castor oil
- 9 ounces goat milk frozen or slushy
- 4.5 ounces sodium hydroxide lye
- Essential oils and/or dried herbs optional
Instructions
- First, I always begin by weighing out my milk and then freezing it so that it is at least slushy. I like mine frozen almost solid. This is to prevent the milk from burning as the lye heats it up. Transfer the frozen milk into the thick plastic or stainless-steel bucket.
- While the milk begins to thaw a bit, mix the oils in the stockpot and heat just until the coconut oil and shea butter are melted. Remove from heat. I have a double kitchen sink and it works well to put the milk in one side and the stockpot of oils in the other.
- At this point, I put on my gloves to protect my hands from possible splatters. Weigh out your lye into a dry container. Slowly begin adding small amounts of lye to the milk while stirring. (A spatula or a stainless-steel spoon works well for this.) Continue stirring until the milk has thawed a bit, then add a little more. I repeat this step five or six times until all the lye has been added. NEVER add your milk to the lye, always add lye to milk. When the lye is completely dissolved, stir it into the oil mixture.
- Using an immersion blender, blend the mixture until the soap has been brought “to trace.” Trace is when the oils, milk, and lye have emulsified and the mixture is thick enough to easily see the marks of the blender after lifting it out. Be sure to turn the immersion blender on for a bit and then off for a bit as you blend, as using the blender constantly can create a false trace.
- Add any essential oils or fragrance oils at this point, along with any dried herbs. Mix well with a dedicated soapmaking spatula or spoon, and pour into molds.
- I like to pop my molds into the freezer, so the soap doesn’t darken during saponification (the chemical reaction in which the oils react with lye to form soap). I usually leave it in the freezer for a day and then at room temperature for another day before removing the soap from the molds. To help the soap pop out cleaner and with less smudging, stick it back into the freezer for an hour before removing the soap from the molds. At this point, if your bars require cutting, the next few days are best. In my experience, waiting too long can make cutting difficult as the bars harden. A crinkle cutter blade adds a fun touch.
- Let bars of soap cure in a dry place at room temperature for at least 4 weeks before using or gifting.
Notes
Note: All of the ingredients are by weight
Tried this recipe?Mention @homesteadlivingmagazine or tag #homesteadlivingmagazine!