Right now, calendars are empty; it’s your choice what you put on them, especially in the garden. Let’s take a look at how to find the right set up, timetable, and strategy for starting seeds indoors.
Set Up
Starting seeds indoors is very simple and effective. This process gives seeds a controlled environment to germinate and start off healthier than seeds planted directly outdoors. Too often in spring, seeds that are directly sown encounter less than ideal circumstances: they are washed out of their proper spacing, the wind interferes, sunlight is low, birds eat seeds – the list goes on. Most of these problems are out of your control, whereas starting seeds indoors allows you to control the environment as much as possible.
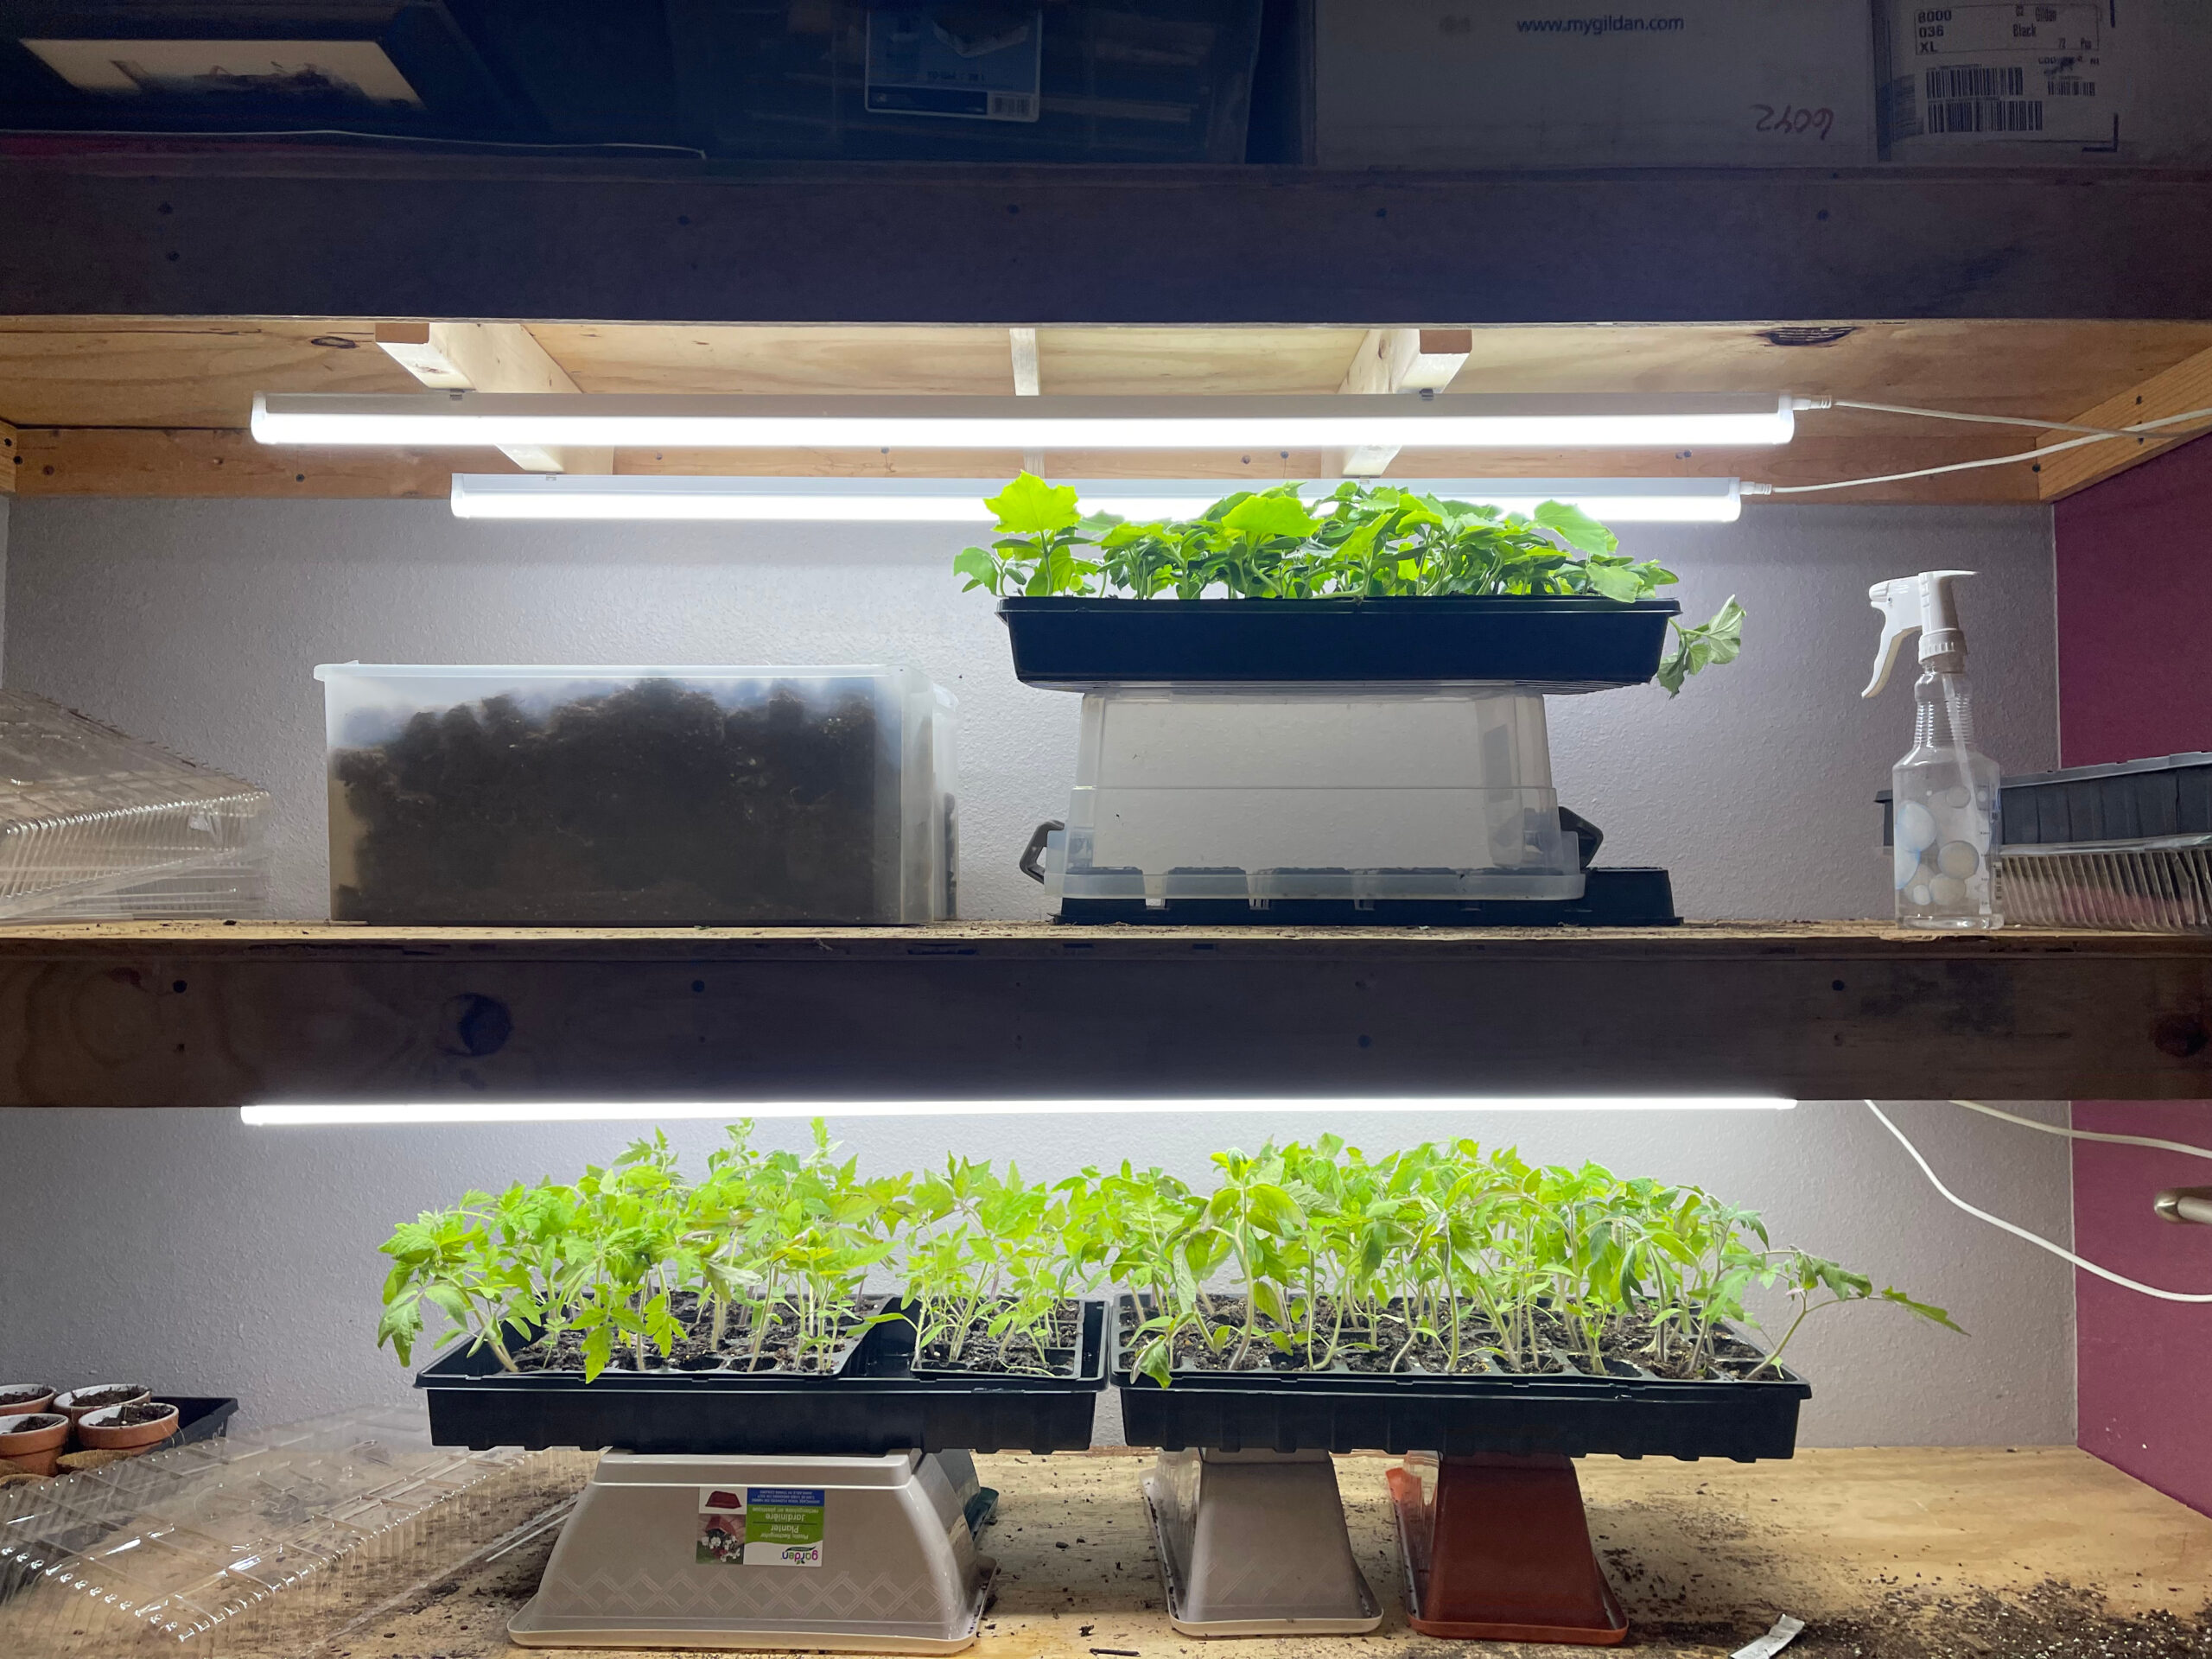
To get started, there are several options available for seed trays, lighting, and soil. Here is a look at what I find to be inexpensive products that can be found most places.
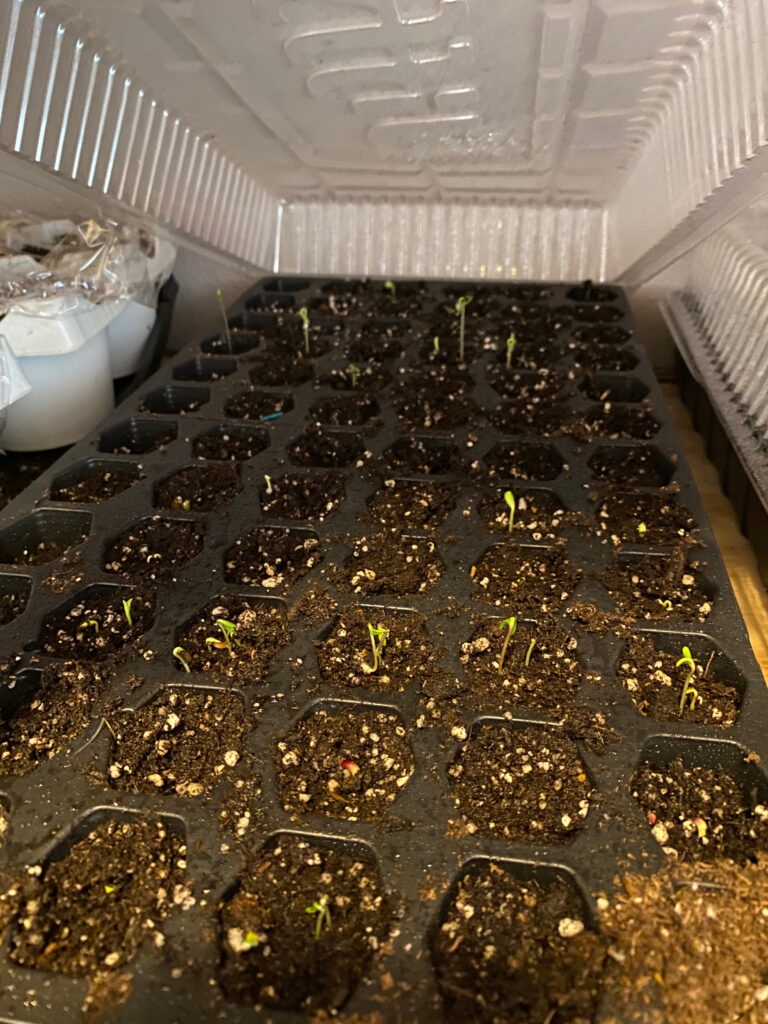
- Seed Trays – 72 cell trays are the most common. You will want a set that has a bottom tray to hold water and a top dome to create humidity.
- Lighting – You can get as fancy and expensive as you want in this category. The University of Maryland Extension explains, “Many gardeners use inexpensive and widely available ‘shop lights,’ 4-ft. long lightweight metal fluorescent fixtures that take two T-8 fluorescent tubes. T-8 fixtures and tubes are more energy efficient than T-12 fixtures and tubes.
T-5 fluorescent fixtures and tubes are another option. They are relatively expensive but typically allow for more rapid and robust plant growth. Unlike T-8 tubes, the T-5 tubes can’t be used in a T-12 fixture (common shop light).”
Several sites and stores have great options for lighting. I like to add a lighting timer to make sure the lights stay on for a set amount of time every day and it stays consistent day after day. - Soil – Seed starting mix is so named for a reason. Several ingredients go into this mix to create loamy, nutrient-rich soil that is best for seeds to germinate and grow roots. Pellets are another option to use. As long as it is marketed for seed starting, it should work. Regular soil or potting soil is not your best option at this point of the process.

- Shelving & Lighting Stands – Shelving units are necessary for rigging up the lights and having somewhere to put your trays. Do not pick anything with drawers or bookcases that will block light. Consider the amount of water that will drip and spill on this set as well and make sure your shelving is conducive to that.
- Seedling Mat – With warm season crops, heated mats can help with germination. However, if your seed room is above 60°F (15.5°C), it is not necessary.
- Plant Markers – Make sure to mark not just the type of crop you are growing, but the variety.
- Spray Bottle – Before germination, use a spray bottle or mister to moisten the soil. Streams of water displace and damage seeds. Spray bottles are the best way to hydrate the seed without any force.
- Watering Can – Once seedlings emerge, you will want to use a watering can to water from the bottom tray so the roots can soak up the water.
Timeline
Planning spring and summer harvests starts with the right timeframe to make the most of every square inch of your garden. Getting an early start is key to maximum production, especially in areas with shorter growing seasons. The most important part of this process is properly identifying your USDA Plant Hardiness Zone. These zones provide a standard way for gardeners and growers to know which plants are most likely to thrive at a location.

If you are not sure what your USDA Hardiness Zone is, a quick Google search for “USDA Hardiness Zone” + “[your area]” will tell you.
This information will not only tell you which plants thrive and are hardy in your growing zone, but it will get you to the most important date for planning spring gardens: your last frost date. While the last frost date may not always be 100% accurate to the day, it is extremely helpful in knowing when to plant your garden. After your last frost date, it is safe to plant annuals. Vegetables and crops are mostly considered annuals because they do not last year to year.
The difference indoor sowing can make is a head start of 6-8 weeks. You can plant seeds in the ground after the last frost, or you can have seedlings germinated and leafed out. Some can even safely get to the flower stage and are ready for pollination by the time they get planted outside!
Seed packets will say what temperatures the plants grow best in and will give you a days-to-harvest date. Ideally, you will want your seedlings to be 6-8 weeks old when you move them outdoors. If it is a crop that does not tolerate frost, starting seeds 6-8 weeks from your last frost date will be the best way to find the seed-starting date. Cold-hardy plants can be planted outside 2-4 weeks before your last frost date.
Succession planting is key to maximizing production. Plan to sow seeds outdoors every 2-4 weeks after the initial planting. That way, when the crop is finished producing, another round is ready to pick.
Another important step to add to the timetable is 7-14 days for plants to “harden off” before you plant them outdoors. “Hardening off” refers to a period of time the tender plant can gradually get acclimated to wind, sunlight, temperatures, and outdoor trauma. To do this, expose the seedlings to the outdoors during the day and bring them in each evening. You’ll want to expose them for only a few hours on the first day and gradually increase the time they spend outdoors until they’re acclimated to the outdoor environment.
Your timeline should have dates marked for the last frost date, seed starting, succession plantings, a hardening off schedule, and planting date.

Strategy
Your overall strategy will include selecting seeds, preparing equipment, setting a schedule, and monitoring for seedlings.
While monitoring, keep in mind:
- Seed room humidity should range around 65-75%.
- Seed room temperatures should be 68-77°F (20-25°C).
- Make sure there is good air movement. You may need to bring in a fan.
- Be prepared to adjust the height of the lights. The lights need to start very close to the plants. You can choose to hang your lights so that they can be raised above the plants as they grow, or you can stack things under your plants that can be removed as the plants get taller. Once leaves form, you will not want the lights close enough to burn the leaves.
- Be prepared to adjust the timing of the lights. At the beginning, the plants will need 16 hours of lighting. Once they sprout and form leaves, timing will need to gradually decline to lesser hours so the leaves won’t burn.
- Make sure watering is convenient. You will need to water nearly every day because the amount of soil per seedling is small and dries out easily. Seed rooms near bathrooms and sinks will serve you well as it saves you time and steps each day.
- Once seedlings are getting close to the hardening off stage, introduce an oscillating fan. The fan will simulate wind and allow the plants to create a stronger root system.
- If flowers form, you can use Q-tips to hand-pollinate so that fruit will start to develop.
Learn as You Grow
Like gardening outdoors, seeds rooms require a lot of monitoring and adjusting. Fungus gnats, bacteria issues, and leggy seedlings are all issues (among others) that may creep into your indoor plantings as well. If you monitor, remain adaptable, and respond to any issues early on, your indoor seed starting will be successful.
Growing plants is a journey gardeners love. Although growing indoors is more controllable, we must remember that when we work hand-in-hand with nature, we can’t control everything. Learning from and following homesteaders in your area will definitely increase your knowledge and perhaps even save you from some hard knock lessons. Enjoy the process and reap the rewards of an extended garden season by starting your seeds indoors.


Leave a Reply