My husband, Zach, grew up on a dairy farm in Wisconsin, as did his mother, father, and grandparents on both sides. My mother-in-law, Maggie, often talks about how her grandma kept a jar of milk on the counter and how it always seemed to be thick and ready for use.
As I write this, I look over at my own jar of coagulated milk sitting on my bread box. I call it clabber. It is a fermented dairy product that I feed everyday; in return, it feeds us. Where some people keep sourdough starter, I keep this sour milk as my contribution to my family’s gut health, and I use it as a bacterial culture for all of my cheesemaking.
I have an old cookbook that I often flip through because some of my favourite recipes are tucked between the pages of this 1950s treasure. Written by a collection of elderly women, the pages speak of a time of transition, a melding between new ways and the ways they grew up with. You can just as easily find a recipe for jello salad as you can a hearty home-cooked meal with from-scratch ingredients.
I skip over the jello salad and instead focus on the recipes that call for home-grown ingredients. One of my favourite features of this book is that many of the dairy recipes call for either sweet milk (presumably meaning fresh from the cow) or sour milk (something similar to my clabber culture). You don’t see books like this anymore. Most recipe books these days will call for a selection of different dairy ingredients: yogurt, sour cream, cream cheese, buttermilk … the list goes on.
We have come to expect choices, and as much as I romanticise the “old days” and how it “used to be done,” I still find myself living in a modern world, making modern recipes that call for various different dairy products. We eat sour cream on our tacos and cream cheese on our bagels, yogurt with fruit in the morning, and cottage cheese alongside our dinner. Our life has become accustomed to more than just “sour milk.”
With this modern-day mentality in mind, I used to make many different dairy products each week using multiple different recipes. It would take me hours, and, looking back, some weeks it just didn’t happen. To make yogurt, sour cream, cream cheese, and cottage cheese all with different recipes and cultures was all consuming and time-wise, frankly impossible for most.
When I started keeping a clabber culture, all this changed. Instead of starting from scratch for each individual recipe, I instead began to see clabber as a springboard for all of the other dairy products I needed on a day-to-day basis.
Today, I want to show you how to start and care for a clabber culture as well as how to use this culture to make sour cream and cream cheese.
Before we get started, anyone who knows me personally knows the word “clabber” because I’m quick to chat about it. Just as a baker raves of the leavening powers of a good sourdough starter, I will regale you with tales of how clabber has changed the way I make cheese and cook for my family. That, of course, is a story for another day, perhaps one that I will tell in my upcoming book .
But what I will say is this: To me, the act of keeping a clabber culture is so much more than food preservation; it’s also an act of ensuring a continuity of the past. My children will grow up, and maybe they will also keep a clabber culture. But even if they don’t, just as Zach’s mother remembers her grandma’s sour milk on the counter and shared the story with her children, I hope so will mine. Tradition is kept alive not by constant use, but by word of mouth, a tiny time capsule ready and waiting for the next interested participant, a legacy that continues for generations to come.
Starting a Clabber
I describe creating clabber as being as simple as leaving a jar of raw milk to ferment on the counter. It *is* almost that simple, but there is a secret, especially if you want to use it for cheesemaking! The key to delicious clabber is to feed it just as you would feed a sourdough starter. This helps to cultivate and feed the good bacteria in your clabber and will make it strong for cheesemaking.
Step 1
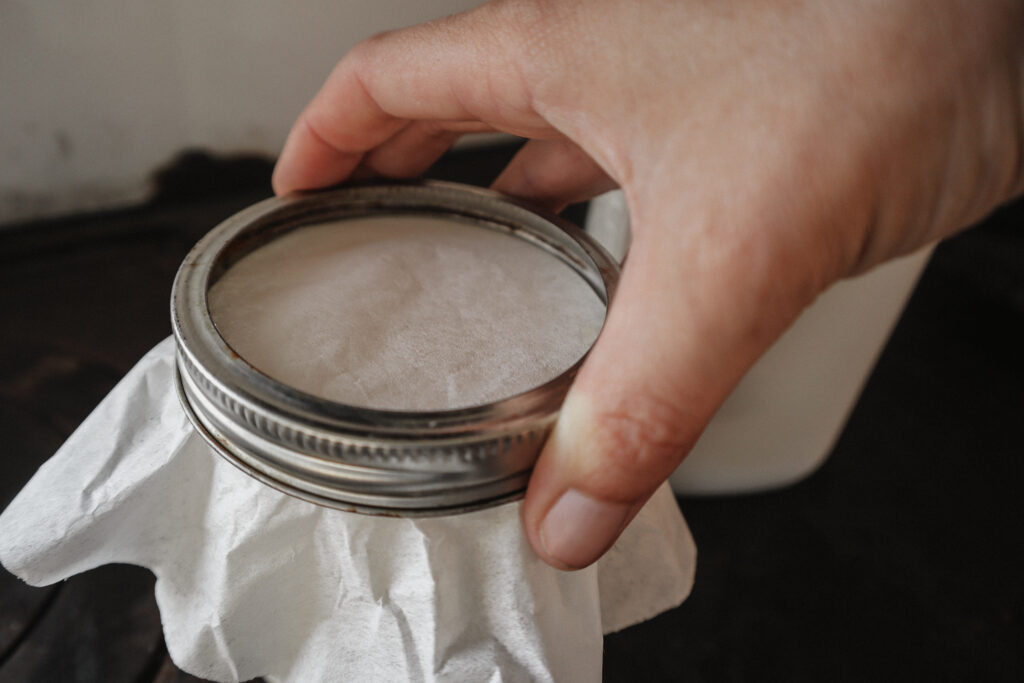
Fill a clean pint jar with fresh, raw milk (bonus points if it is still warm from the udder). Cover the jar with a loose lid (I like to use a coffee filter with an elastic band.) Set your clabber culture on the counter until it coagulates. Depending on how warm your house is, this first ferment will usually take about 2-3 days.
Step 2
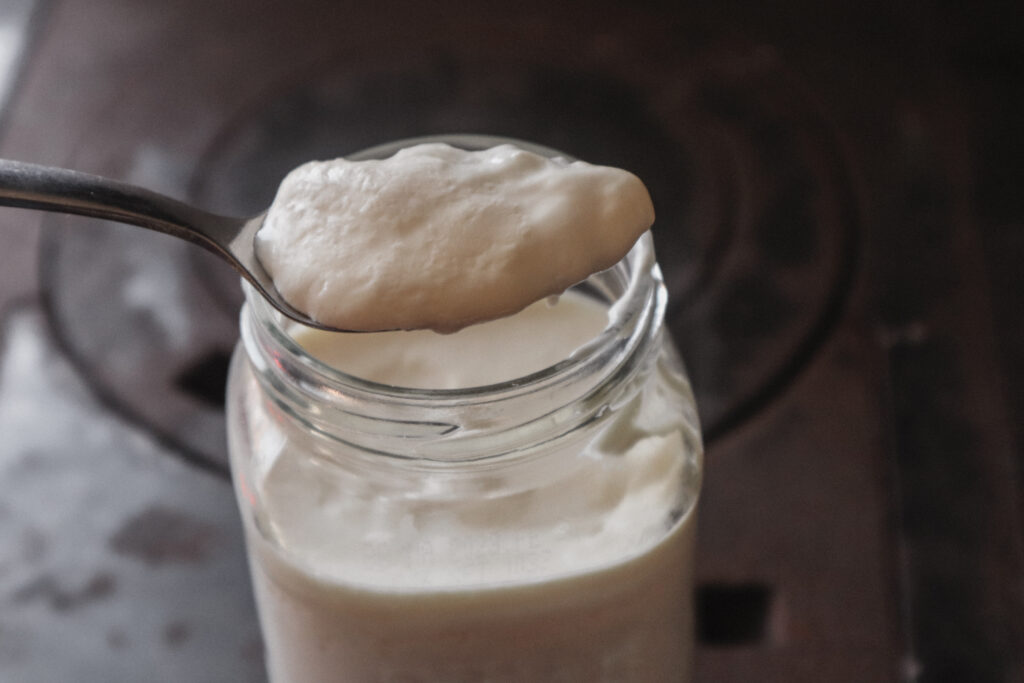
After a few days of sitting on the counter undisturbed, your clabber culture will resemble yogurt.
Take 1 tablespoon of the clabber and add it to a new, clean pint jar . The remainder of the clabber culture can be discarded. (I use this discard in all sorts of recipes around the kitchen.) Fill the jar with fresh raw milk, mix the jar, cover with a loose lid, and leave on the counter to coagulate. This second coagulation will happen a lot quicker. In fact, you may see coagulation in as little as 12-24 hours.
Step 3
Once you see coagulation, take a tablespoon of the clabber, add it to a clean pint jar, mix in fresh raw milk, cover with a loose lid, and again let it ferment until it coagulates.
Step 4
Once you have repeated this cycle of feed-ferment-discard, feed-ferment-discard several times, your clabber is “well-fed” and you are ready to use your clabber culture in recipes! You’ll know your clabber is ready to use when it is thick, tastes good, is NOT separating into curds and whey, and has been fed in the last 24 hours. It can take up to 3-4 feedings to establish a well fed clabber culture that is good for cheesemaking.
If you notice that your clabber culture has developed a yeasty taste, has separated into curds and whey, or develops fermentation bubbles, you should refrain from using it for cheesemaking, and repeat the feed, ferment, discard process until you achieve the criteria for a well fed clabber.
Now that your clabber is ready to make delicious dairy products, I recommend that you start with clabber sour cream or clabber cream cheese. I’ve provided my recipes for both below.
1 quart raw heavy cream 1 tablespoon well-fed clabber Stir clabber into heavy cream. Cover with a loose lid (I like to use a coffee filter) and let sit on the counter for 12-24 hours until thick.
Once thick, move to the refrigerator. Your sour cream will thicken more in the refrigerator as it cools. This sour cream lasts about 1 week in the refrigerator.
Tips for success
A common problem with making homemade sour cream is over-fermenting it. Once sour cream over-ferments, it will taste yeasty and unappetizing. You can tell that your sour cream is on the verge of over-fermenting if you see bubbles forming in your cream. If you see any bubbles (even the smallest bubble) in your sour cream, move it to the refrigerator.
Typically your sour cream will be ready to move to the fridge in about 12 hours. It should be on a similar schedule to your clabber culture, though heavy cream does over ferment more quickly, so pay note to my previous tip.
Always use the freshest possible cream for best results.
Clabber Cream Cheese
1/4 cup well-fed clabber 1 gallon raw milk Salt Feed 1/4 cup well-fed clabber to 1 gallon raw milk. Let sit at room temperature loosely covered until it coagulates (approximately 12-24 hours).
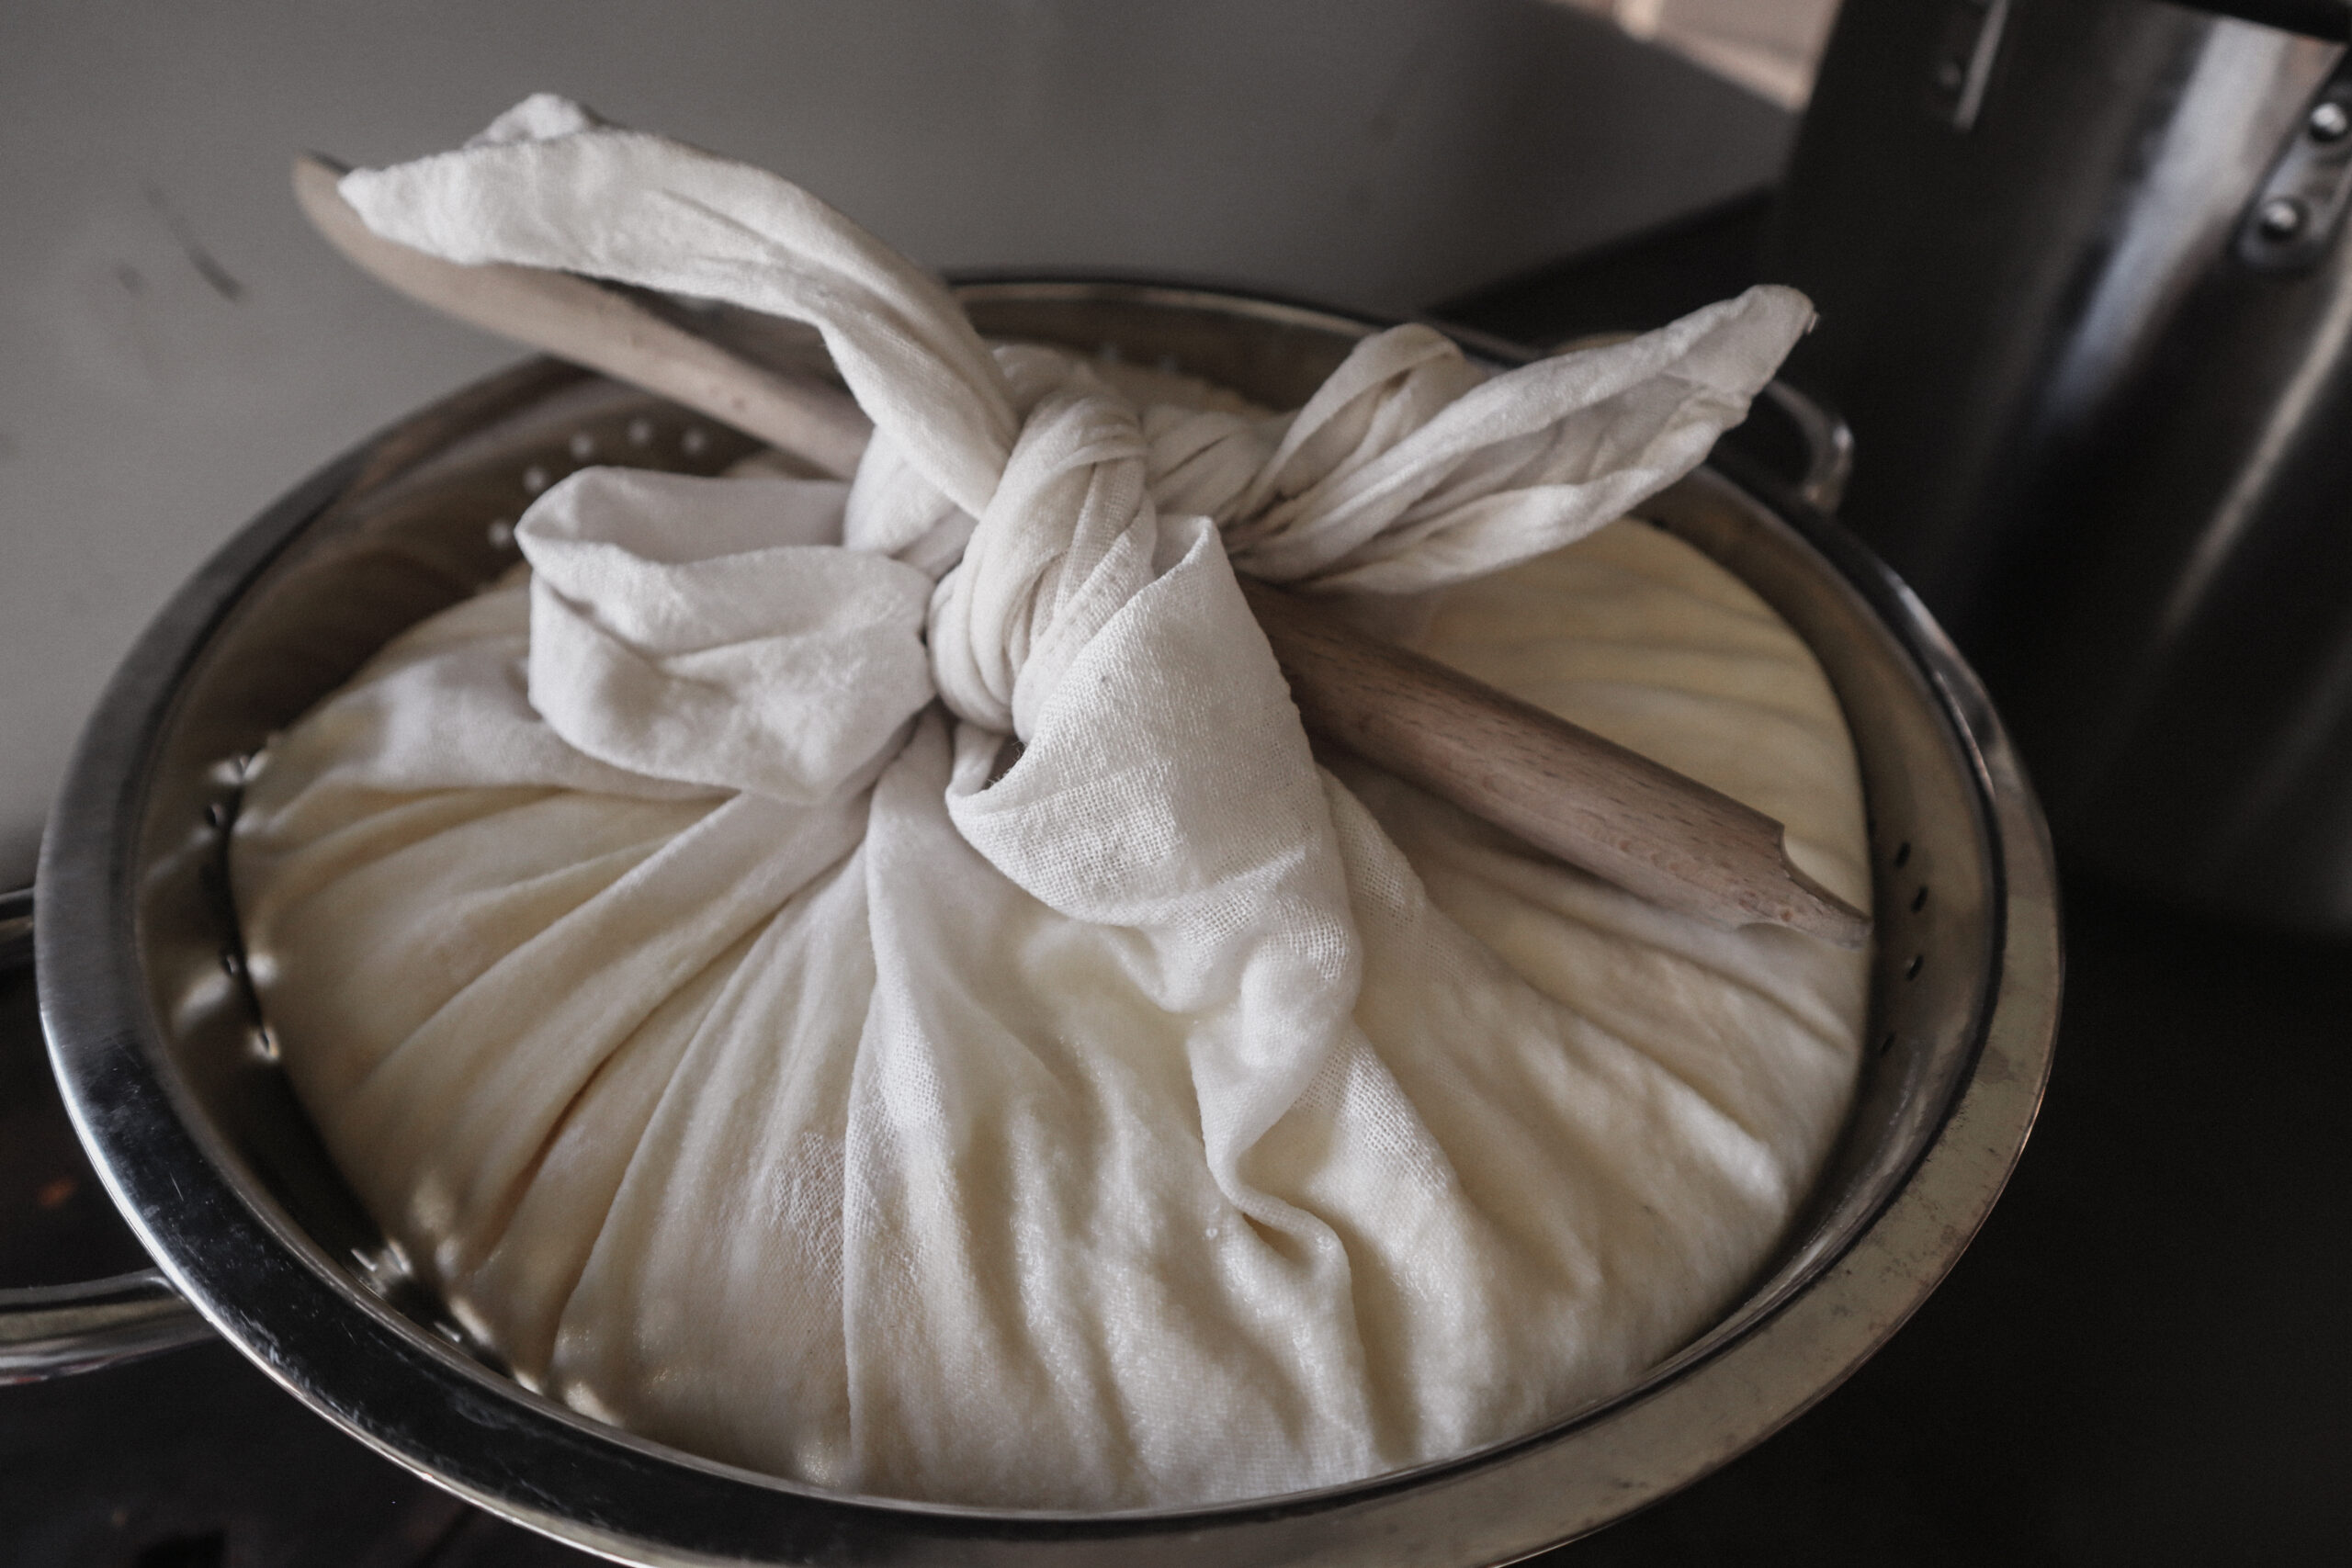
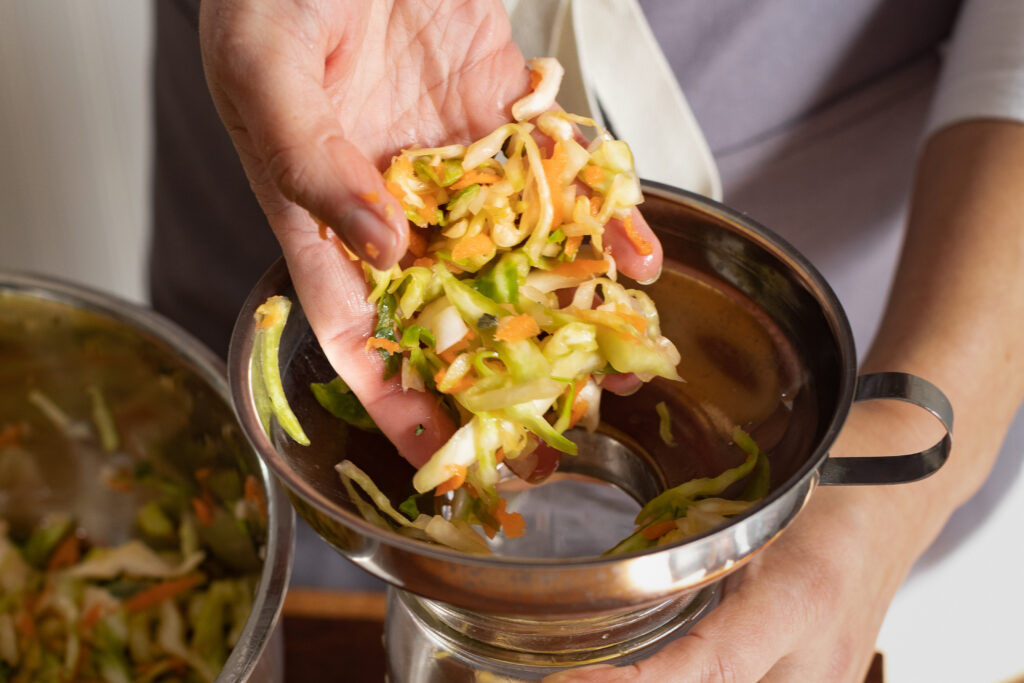
Once it has coagulated, strain it through a cloth-lined strainer for 12 hours or until it resembles the consistency of brick cream cheese from the store. You can strain it at room temperature, but if you find it is becoming too strong, move it to the fridge to continue straining.
Once desired consistency is achieved, remove from the strainer and knead in salt to taste. It will keep 1-2 weeks in the refrigerator and freezes well.
Tips for success
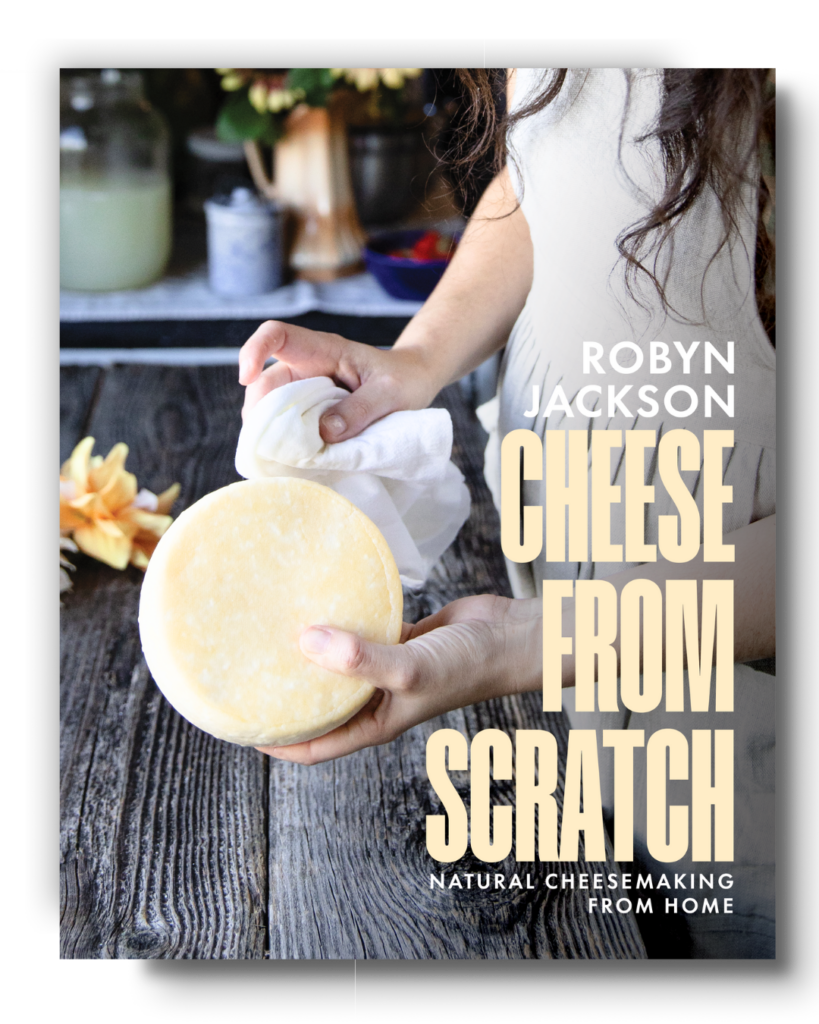
CHEESE FROM SCRATCH BY ROBYN JACKSON
Cheese expert Robyn Jackson from the Cheese from Scratch blog and The MilkMaid Society has finally collected ALL of her cheesemaking wisdom, advice, and recipes into one, beautiful book: Cheese From Scratch !


Leave a Reply