There’s something magical about a fruit crisp that feels like summer in a spoonful; simple, and deeply satisfying. Maybe it’s the bubbling fruit juices that stain the edges of the pan, or the golden, buttery topping that smells like a hug from the oven. For me, it’s the fact that it comes together without much fuss, using what’s ripe and ready—especially when that means pears.
On our homestead, pears often ripen quietly while all the attention is on tomatoes, zucchinis, and the high demands of harvests in the garden. But when the pears are ready, they are ready, and suddenly, there’s a beautiful abundance that needs to be used up fast.
The trick with pears is that they don’t ripen well on the tree. If you wait until they feel soft to the touch while still hanging, the inside is often already mealy or beginning to rot. Instead, pick them when they’re still firm but just starting to change color and give slightly near the stem. You can ripen them at room temperature and then store them in the fridge to extend their shelf life until you’re ready to bake or can them.
Why You Should Add Homemade Pear Crisp to Your Recipe Box
It’s one of those desserts that doesn’t require perfection: bruised fruit, overripe fruit, even pears that are just beginning to soften will all shine here.
If you don’t have fresh pears, this recipe works beautifully with canned pears you’ve put up earlier in the season. Just be sure to drain them well. Fruit crisps are one of the best ways to use home-preserved goods, whether that be water-bath canned, frozen, or dehydrated and rehydrated in a bit of warm water.
This pear crisp is our go-to because it checks all the boxes: it’s seasonal, it’s flexible, and it makes the house smell like heaven. The topping can be made with oats, nuts, or even some ground-up sourdough discard crackers if you’re feeling adventurous. It works just as well with apples or plums later in the season and berries earlier in the season, but pears have this floral, mellow sweetness that makes them feel a little extra special in a crisp.
Another thing I love about this recipe is that you can mix up a big batch of the crisp topping and keep it in the freezer. That way, when the fruit starts piling up, you can just toss it in a baking dish with the filling ingredients, sprinkle on the topping, and have dessert in the oven in under 10 minutes. This is especially helpful for those long summer days when other projects have your attention, but you still want to have a dessert for the family or you’re having guests over for a special occasion.
You can also assemble the whole crisp ahead of time and freeze it unbaked. When you’re ready to use it, pop it straight into the oven from frozen—just add an extra 10–15 minutes to the bake time. It’s a great way to preserve excess fruit for the winter months when you’ll really appreciate a taste of summer.
If your pears are very ripe and juicy, you might find a bit of juice pooling as you slice and prep the fruit. Don’t toss it! That raw pear juice is full of flavor and can be added to kombucha, mixed into a shrub (a traditional fruit-and-vinegar syrup used to make refreshing drinks), or stirred into homemade popsicles for a light, fruity kick. At our homestead, we try to use everything and waste nothing.
Fruit crisps make a thoughtful homestead-style gift. Assemble one in a disposable or thrifted pan, add a handwritten baking instruction card, and drop it off with a jar of homemade whipped cream or yogurt. It’s the kind of gift people don’t forget.
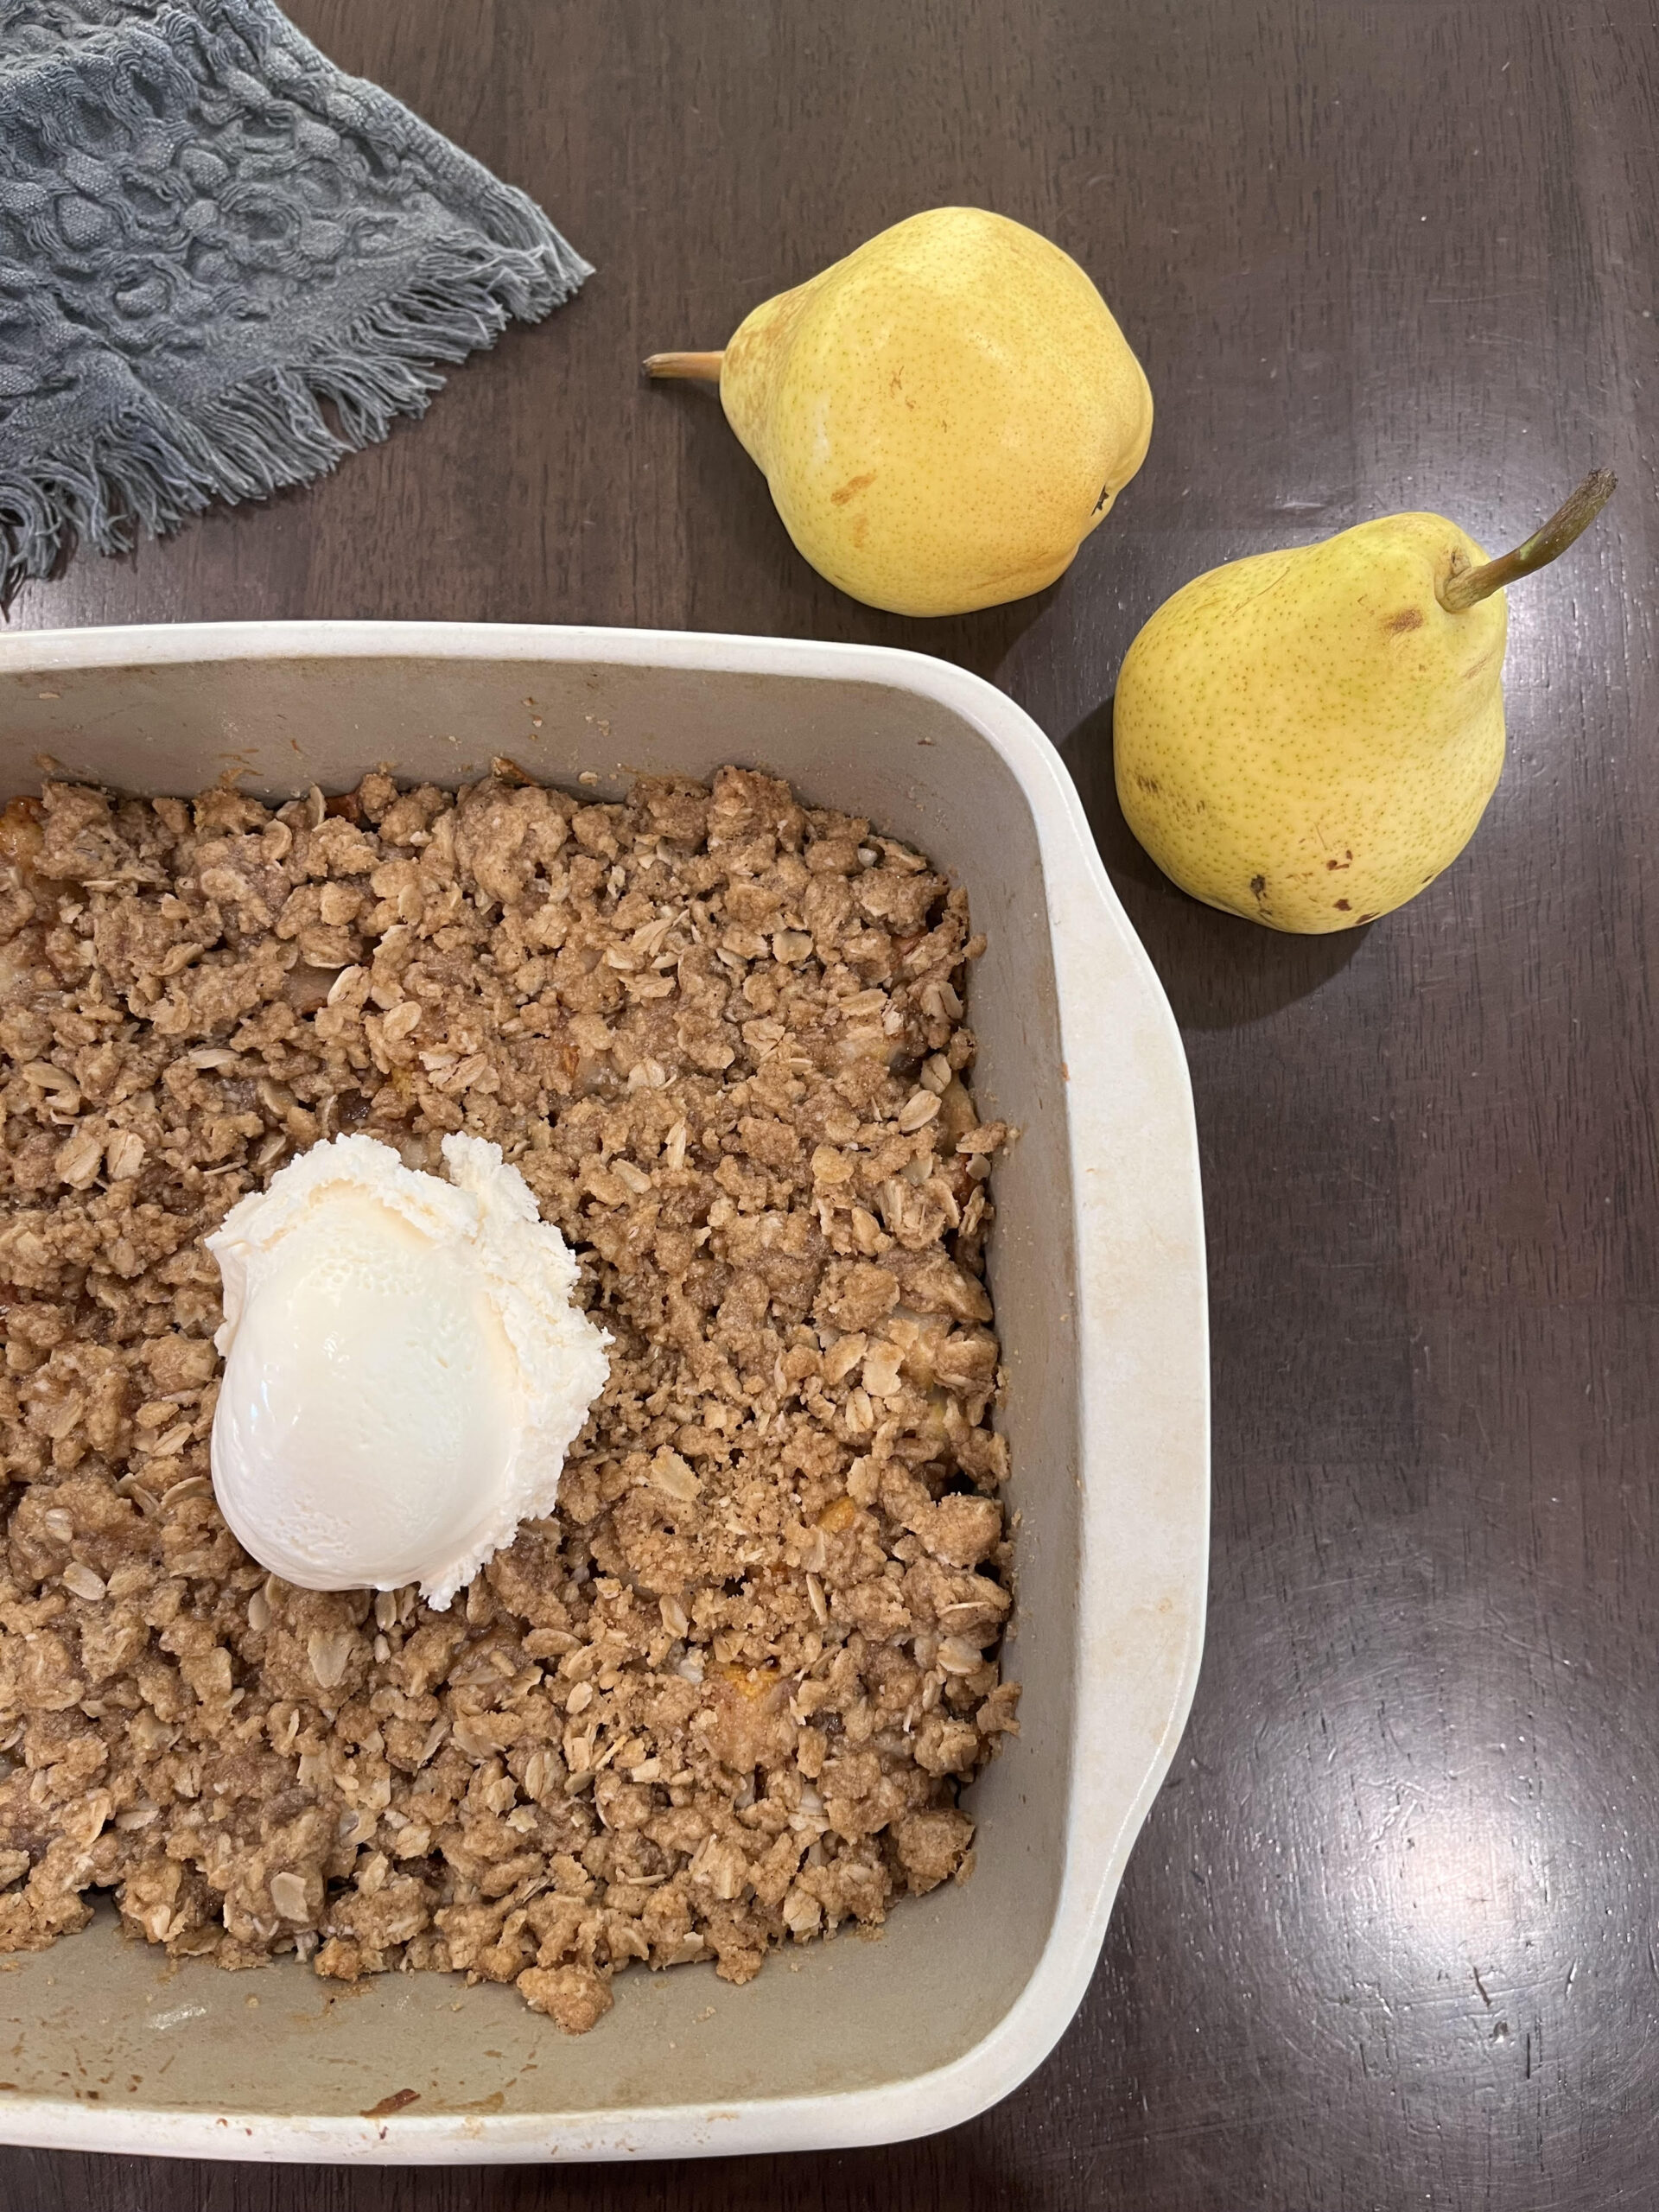
Whether you’re making this to serve warm with a scoop of vanilla ice cream on a slow Sunday evening with friends or family, or you’re eating it cold out of the fridge on a busy weekday morning (yes, it counts as breakfast), this crisp is one of those simple pleasures that make seasonal eating so rewarding.
Sometimes the simplest recipes are the ones that stay with us. A basket of pears, a little butter and oats, and suddenly you’re reminded that these slow, ordinary moments are the ones that matter most.
Ingredients
Ingredients
*For the Filling*
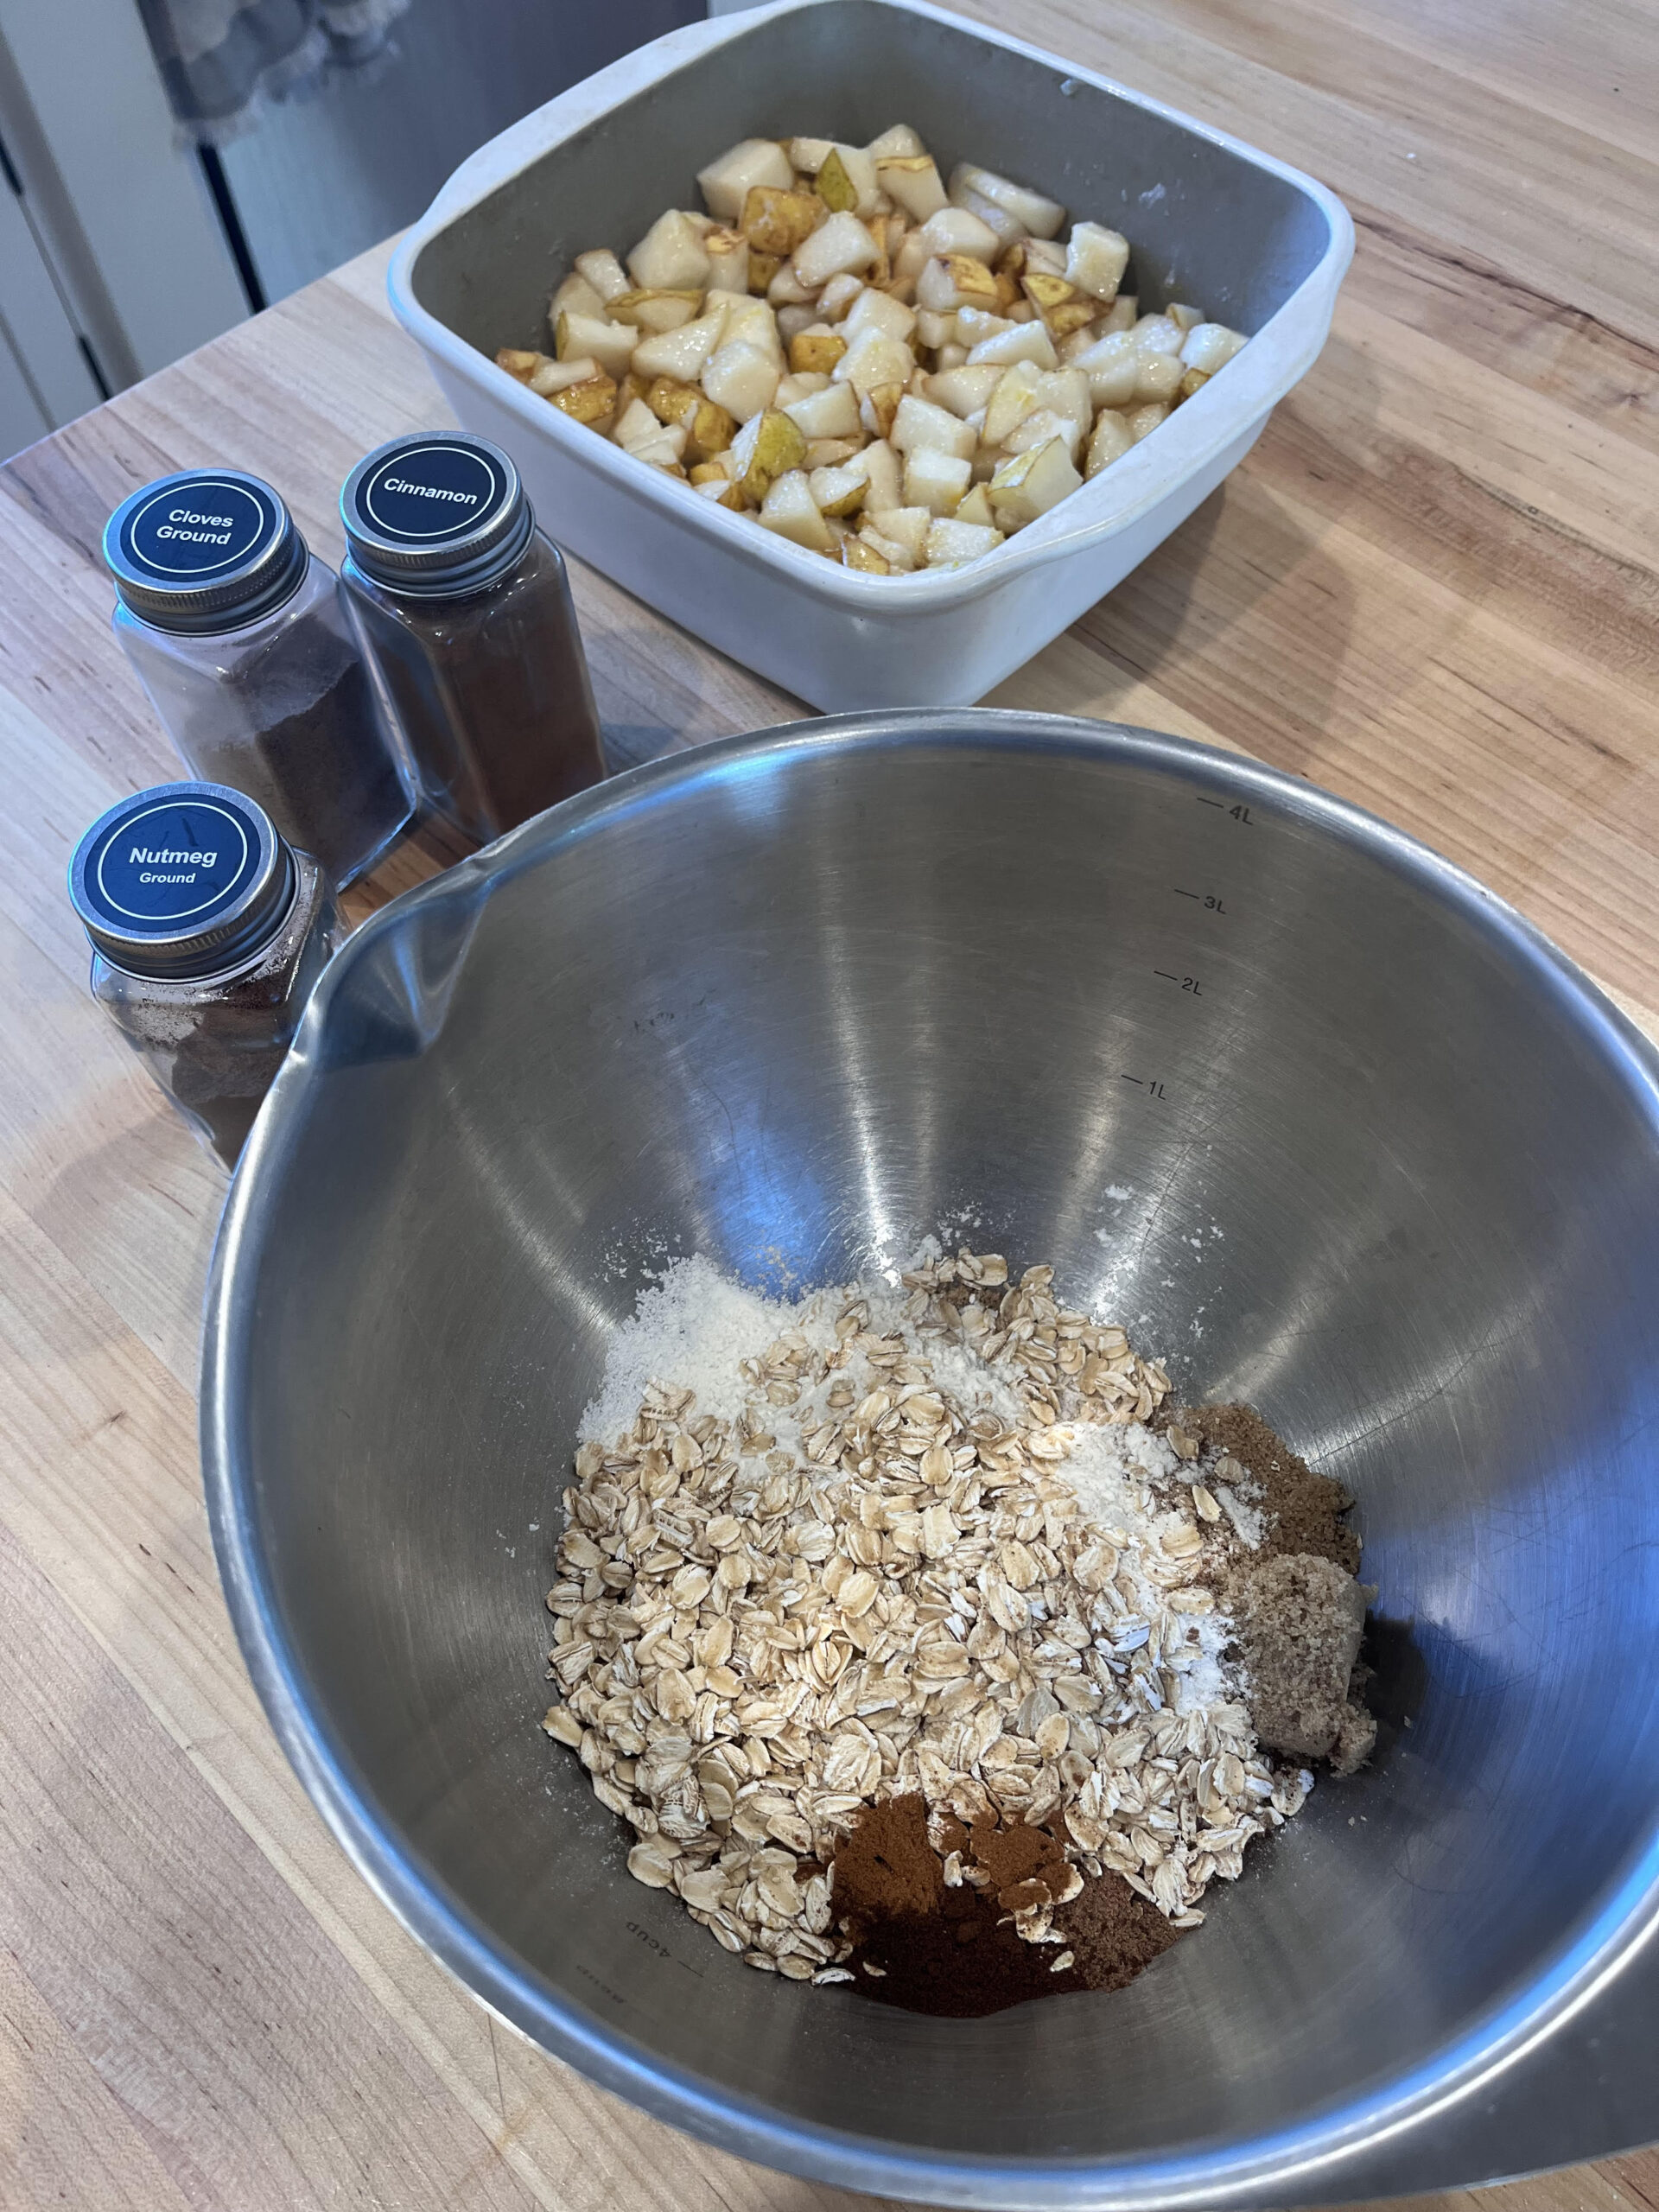
- 4 cups pears 4-5 pears, cut into 1-inch cubes or slices
- 1/4 cup sugar
- 1 tablespoon flour
- 1/2 tsp lemon zest
*For the Topping*
- 1/2 cup flour
- 1/2 cup brown sugar
- 1/2 cup oats
- 1/4 teaspoon ground cinnamon
- 1/4 teaspoon ground nutmeg
- 1/4 teaspoon ground cloves
- 1/2 cup cold butter
Instructions
Directions:
- Preheat the oven to 350ºF (177ºC)..
- Gently toss the filling ingredients together in an 8×8 baking dish.
- Mix the flour, brown sugar, oats, and spices together in a large bowl.
- Cut the cold butter into the flour mixture using a pastry cutter until the butter pieces are chunky and roughly the size of a large pea.
- Spread the topping evenly on top of the fruit filling.
- Bake for 35-45 minutes. The topping will be golden brown and juices from the fruit will be bubbly when it is done.
- Let the crisp rest for at least 15-20 minutes before serving. Serve warm on its own or with a scoop of vanilla ice cream.
Notes
- If you are using very ripe pears, your crisp could turn out a little watery. Increase your flour in the filling to 2 tbsp if your pears are very ripe.
- If you want to make a larger serving for a crowd, simply double the recipe and bake it in a 9×13-inch baking dish.
- Do not skip the rest period after it comes out of the oven. This allows the juices to thicken and the filling to set, which means no runny mess and better flavor. It’s hard to wait, but it’s worth it!
- If you’d like to make this dairy free, you can easily swap the butter for coconut oil in the crisp topping. It still gets golden and crisp, and the coconut adds a lovely flavor that works well with pear.


Leave a Reply