
Ready to preserve your harvest (either from the garden OR the farmer’s market) with confidence … and enjoy it year-round?
You CAN master home food preservation, even as a beginner, with proven techniques and a supportive community.Using the practical methods of homesteading, you’ll store your harvest safely and create delicious meals for your family.
Learn how to preserve food like a pro with Melissa K. Norris in this episode of The Coop.

Here’s what you’ll learn in this episode…
- The nine safe food preservation methods to store your harvest year-round
- A primer on preserving all kinds of fruits, vegetables, and meats
- How to make easy, grab-and-go meals in a jar
- An intro to the techniques of pressure canning & water bath canning
- Why you DON’T need to become a master gardener
Melissa reaches nearly a million people monthly with her practical tips on food preservation, gardening, and community-sufficient living. She’s also the author of Everything Worth Preserving, a complete guide to safely storing your harvest, and our featured writer in the August issue of Homestead Living.
Intro:
We believe food looks and tastes better when it comes from a mason jar and that every home should have a well used cast iron skillet. We believe in starting where you are in being a good steward, and that homesteading is a mindset. First, we believe that our great grandmothers were right about almost everything and that the best conversations happen around The Coop.
Anna Sakawsky:
Well welcome everybody to episode number eight of The Coop. Hard to believe we have been doing this for eight months now. So this is our live monthly show where we host educational and inspirational conversations with the homesteaders and writers that are featured in and contribute to Homestead Living Magazine, the ones who are at the forefront of this modern home setting movement that we are all a part of. So welcome. My name is Anna Sikowski and I am the editor in chief of Homestead Living Magazine. And today I am thrilled to be here with Melissa K. Norris, who is actually the co-founder of Homestead Living. Melissa is also a fifth generation homesteader from the Pacific Northwest, not too far from where I am actually. She’s also an author and host of the Pioneering Today Podcast, as well as the Pioneering Today Academy and her website, melissa k norris.com, as well as the Modern Homesteading Conference.
She’s a co-founder of, so she is busy, busy in the homesteading space and I’m sure that probably most of you, if not everybody, who is here joining us today knows Melissa in some capacity already. But today she’s going to be here talking to us about food preservation, which is a topic that is really near and dear to my heart. And actually Melissa was the first person who taught me how to preserve food a number of years ago now. So I’m really excited for this conversation. So here are a few things that we’re going to be touching on today. So we’re going to be talking about the nine safe food preservation methods to store your harvest year round, and I’m going to have to see if I can guess the nine. I was trying to go through them and figure, I think I was one off, but there are nine apparently.
So we’re going to go through the nine safe food preservation methods to store your harvest year round, a primer on preserving all kinds of fruits, vegetables, and meats, how to make easy grab and go meals in a jar, an intro to the techniques of pressure canning and water bath canning. So we’re going to kind of do a deep dive into canning, why you don’t need to be a master gardener or even have a garden at all to start preserving your own food. And then we’re going to talk about some tips and tricks to fit canning and food preservation into a busy schedule because I know that that’s something that we all struggle with. So we’re all super busy with things already and then you throw food preservation into that mix and it can be really overwhelming. So we’re going to talk about how to actually fit that in and make it manageable in our lives as well.
But before I properly introduce Melissa and bring her on, I would like you to know that the coop today is brought to you in part by the only food preservation book you’ll ever need. It’s Melissa’s book, everything Worth Preserving. So if you’ve always wanted to preserve your annual fruit, vegetable, and meat harvest but have been struggling to start, Melissa K. Norris has made that desire a reality for you. With this book, with step-by-step tutorials, recipes, and simple to understand charts, you can easily master the generational skill of preserving food for your friends and family. Head over to homestead living.com/ewp or you can click the link below the video. There should be a button right below the video, so if you have not got a copy yet, make sure that you grab a copy and it’ll be super helpful for you throughout the preserving season. It is actually one of the books that I reference often and I just actually made a batch of the Red Pepper and garlic jelly the other day out of this book, so it is a fantastic resource to have.
Alright, so without further ado, I would like to introduce Melissa K. Norris. So again, a fifth generation homestead, author and host of the Pioneering Today podcast and academy. She lives with her husband and two children on just under 15 acres in the North Cascade Mountains. Melissa reaches nearly a million people monthly with her practical advice on food preservation, gardening and community sufficient living. She’s also the author of Everything Worth Preserving and our featured writer, one of our featured writers in the August issue of Homestead Living. Melissa is actually a featured writer every single month, but in the August issue, she actually has some food preservation tips that she’s shared, some quick pickling recipes, which I have also been utilizing because I’ve been struggling with my cucumbers this year. So I’ve been getting one two at a time, so I’ve just been throwing them in the fridge and using some of Melissa’s recipes. She’s also a writer speaker and advocate for sustainable homemade living and shares practical skills to help homesteaders everywhere thrive. So welcome, Melissa.
Melissa K. Norris:
Hello. Hey. Hey,
Anna Sakawsky:
How are you today?
Melissa K. Norris:
I’m good. I’m super excited. Home food preservation is one of my favorite subjects and I joke that mason jars are how I express. They’re my love language, so I’m always excited to talk about food preservation.
Anna Sakawsky:
Well, like I said, you are actually the very first person who taught me how to preserve food about 10 years ago now. I canned my first batch of applesauce using your recipes, and I remember being, it was so nerve wracking when you’ve never done it before. And I did it all and I did it all correctly and I actually had no problem eating it and everything. But then I had done it while I was pregnant with my daughter and I remember she was born and later on when she started eating solid foods, that was one of the first foods I wanted to introduce to her. And I remember messaging you being like, I’m just so worried, and what if I killed my baby? It’s really scary when you don’t know what you’re doing and I just remember being too nervous to even feed at her.
I mean, it was fine looking back. And then of course you gain confidence over time. And then I pressure canned for the first time also using your recipe for pressure, canned green beans, and I hid around the corner in case it exploded. And then I was so afraid to eat any of it. I threw the whole first batch out and it’s like, but that’s part of the natural learning process as well. Nowadays I can hundreds of jars every year and meats and vegetables and fruits and all sorts of things. And so it really is about just kind of getting your feet wet with it. But so that’s kind of what we’re going to be talking about today is food preservation and safety tips and beginner tips for anybody who’s maybe never done this before. And we’re going to talk about some more kind of advanced tips as well.
So if there are people in the chat who have done some food preservation, we’re going to be talking about a little bit more advanced topics like canning full meals in a jar, how to fit it into your schedule, that sort of thing. So before we do get into it, I would love to know, and I love seeing where everybody is from, there’s people from all over North America. Again, please just pop in the comments. What is your level of food preserving experience? Is it none? You’ve never done anything outside of maybe freezing food or if you’ve done a little bit of water bath canning, maybe you’ve made a batch of jam or maybe you do the full on pressure canning. Maybe you’ve invested in the freeze dryer and you’re doing that already. So just I’d love to take the temperature and just see where everybody is at.
Zero intermediate, zero beginner, intermediate, canner, none, zero, none. Little bit of water, bath, canning, very little minimal. Awesome. Okay, great. Well, it’s so nice to see that there are so many beginners here and so many people that are interested in getting started with food preservation because it really is such a worthwhile skill to have, I think, not just for food security, which is a big thing, but obviously if you’re gardening, preserving the food that you’re growing, but then also I just find it really convenient to have things ready to go in jars on your shelf where they’re kind of prepped and ready to go already. Novice little water bath gang. Awesome. Okay, great. Okay, well we’re going to get into it. So right off the bat we’re going to talk about what are the different methods of food preservation. So there are nine and I was trying to think about what they are. So can I guess and see if I’m right. Okay, so that’s the case. We got freezing, is that right? Freezing was one of them. It’s probably the easiest one. We’ve got canning water, bath, canning pressure, canning, fermenting, dehydrating, freeze drying, root, cellaring, or cold storage. What am I missing here?
Melissa K. Norris:
See, okay, I was waiting. I’m like, are you done yet? So then we have infusions.
Anna Sakawsky:
Okay. Ooh, tricky one. Yep,
Melissa K. Norris:
Yep. And then salting and or smoking. And I put salting and smoking together because they’re very similar in their mechanism and how they’re used. So I put those two together. Yeah, so there are, there’s nine.
Anna Sakawsky:
Okay, so what is your favorite?
Melissa K. Norris:
Oh, this is such a hard one. This is such a hard one because I have favorites for different reasons, but I have to say, I think my overall favorite is honestly using root cellaring techniques, which you do not have to have a root cellar to do. I love that just because it’s so, so easy. It is the most simple way to store food. Of course, you can’t store all food that way. And so if I had to pick a second, I would say canning, mainly because canning for is completely shelf stable, meaning if the power goes out, I’m not worried and I don’t have to have water in order to rehydrate it like you do with dehydrated foods. And when our power went out until we got a generator that would run our pump, we’re on a private well, when the power went out, I didn’t have running water. And so when we had long periods of power outages, I was always so grateful for that home canned food because I didn’t have to worry about using our water resources in order to cook that food or to get it to an edible state. And I don’t know, there’s just something about a canning jar, a mason jar that I adore it. So those are my two.
Anna Sakawsky:
Awesome.
Melissa K. Norris:
I can pick one.
Anna Sakawsky:
So how do you then choose which method to use? Let’s talk a little bit about, well first let’s talk about the safety aspect of things. So when it comes to fruits, vegetables, meats, how do you know which method is safe to use for which ones? Can you walk us through some of the different methods and which ones are appropriate for those different foods?
Melissa K. Norris:
So not all forms of food preservation can be used safely on all types of food. Now when it comes to using the freezer, a deep freezer, any type of food you can put in a deep freezer, it’s going to be fine. Almost all types of food can freeze dry and it will be fine with the exception of pure fats and honey, which honey is shelf stable on its own. So it’s kind of silly. It’s already in perfect form. But when it comes to our root cellaring, if you don’t have a actual root cellar that has humidity and temperature control, so if it’s just your home, which is what I do, then you’re limited to onions, garlic, and pretty much winter squash for long-term storage just at room temperature because those don’t require specific humidity levels and they actually are more, if you have high humidity with those items, then that’s actually worse than if you have cold temperatures.
So they do fine at room temperature. When it comes to safety is really when we’re looking at things where we are dehydrating them and then when we’re canning, and for the most part with canning, it comes down to pH levels when it comes to being able to water bath or pressure can. And then believe it or not, not all items can even safely be pressure canned. So one of the things that I did in everything worth preserving, because it can be confusing if you don’t have all of that memorized or you’re a beginner, is we did everything in the book at the back by alphabetical order so that you could simply flip to say you have plums coming on, for example, and you can look and see, oh, I can water bath, I can steam can, I can dehydrate, freeze, freeze, dry ferment, et cetera, and know, okay, great, those are the options that is safe to preserve those.
And then you can just pick one and go from it because it can be hard in the beginning because for example, with pressure canning, we have to pressure can non acidic foods. And so the reason for that is when it comes to home food preservation, our biggest concern is going to be botulism. And I think that’s probably everybody, especially with pressure canning or canning where they have a little bit of fear is botulism. So botulism is a form of food poisoning that is actually a neurotoxin and is fatal and you have to get an antidote for it. Most hospitals don’t carry it. It’s something that they have to have brought in in order to treat you. And depending on how advanced the botulism is your system and by the time you get the anecdote et cetera as to your recovery, there’s varying degrees there and it can be a really long recovery.
So rightfully so, a lot of people are nervous about doing home food preservation because they don’t want to get botulism. Contrary to a lot of popular belief botulism is you can’t see it, you can’t taste it, you can’t smell it. So you can’t look at a jar of food and say that has botulism. Now there are signs that we can look at jars and say, don’t consume that, but those aren’t actually from botulism. Those are other types of spoilage from different types of things. So it’s not like salmonella or e coli where you’re just going to have a really upset stomach and feel really sick and have food poisoning that a lot of people have had at different times. They’re sick for 24 hours, that type of thing. So it’s understanding how botulism works. So we come in contact with botulism all the time. Botulism spores are everywhere they are, especially in the soil.
So root vegetables have a higher potential of having a botulism load on them, but what botulism is a food bacteria that in an anaerobic environment, so without oxygen, which is a sealed canning jar, it actually will grow and proliferate in that and that toxin will get produced and replicated a lot where a lot of bacteria has to have oxygen. And so in a canning jar it wouldn’t be able to grow, not all. So that’s the reason that we are concerned when it comes to canning with botulism, because you’ve got this sealed jar which makes food shelf stable when done properly, but also if not done properly can harbor that toxin and allow it to grow and multiply to a point that it could really make you sick if not kill you. The good news is, however, we have tested times and procedures for foods to know that if they are done to that time and pounds of pressure for that specific food, that if there were any botulism spores in that jar, they would be killed and therefore they can’t multiply, can’t create botulism, and we can’t get sick from them.
So if you’re nervous about botulism, then learning actually all of these things and making sure you’re using updated tested procedures, times, et cetera, and recipes, then that’s your absolute best insurance to make sure that you don’t get it. And it’s actually really easy to avoid if you follow all of the steps. And that’s why I don’t prescribe to Rebel Canning because it’s not worth it to me. We rely on our home canned food and especially in some type of an emergency, be it distribution issues where maybe transportation things go down. We’ve had mudslides that have taken out our main highways where we actually couldn’t get to hospitals and were cut off not only from our power being cut off, but actually being able to get out and that’s when we’re relying on our home canned food. And there’s no way that I would be willing to in an emergency situation like that, risk myself or my family’s health because I didn’t want to follow tested procedures. So that’s my stance. So anything that you’ll see in everything worth preserving or anything that I share comes from, we’re going to use the tested methods to make sure we don’t have to worry about anything.
Anna Sakawsky:
Yeah, that’s a really good point because I do see those groups out there and I see people sometimes going, well, I’ve done it this way forever and we’ve all always been fine, or My grandma did it this way and nobody ever died. But I always just feel like, well yeah, but is it worth risking it because it’s really not difficult to just do it the correct way
Melissa K. Norris:
Right.
Anna Sakawsky:
To not. Let’s talk just briefly about some of the things you just should not can at all because I do see some of those things out there that I think I wouldn’t be putting that in a jar and then keeping it on the shelf. So what are some things that you should just not bother canning, period?
Melissa K. Norris:
And my answer to that is that’s awesome that JAR didn’t have botulism toxin to begin with. And so it’s kind of like we all know those people who have smoked cigarettes or chewed tobacco and they’re in their nineties and never got cancer and that’s great, but that doesn’t mean that it wasn’t without risk and that everybody will have the same thing. So as to the do not cans even with a pressure canner, great question. So first off is understanding that when we’re canning with pressure, so non acidic foods, I feel like I need to back up just a moment. So botulism can’t grow in acidic environment specifically of 4.6 pH or lower. Remember the lower the number on the pH scale, the more acidic it is so it can’t grow in acidic environment. So that’s why we can safely water bath lots of fruits and we can do pickles because the vinegar is creating that pH environment.
So pH is a big part, but we also have density, so we have to keep that in mind. And even with pressure canning, the reason that we use a pressure canner for those non acidic foods is so that we can reach a high enough internal temperature to kill any botulism spores. However, all of the contents that are in that jar have to be able to come up to that temperature. And so that’s where density comes into play even with pressure, canned food. So for example, pickled eggs, they are pickled, so we’re like you would think, oh, acidity wise, they’re pickled. However, eggs are very dense and so you can pickle eggs, but that’s for cold storage, so that’s in the fridge. We don’t want to can pickled eggs and leave them at room temperature in a sealed jar because they have tested positive for botulism because the egg is so dense that the acidity can’t get to the center of the egg in order to raise the center of the egg all the way to that 4.6 pH level or less.
So don’t can your pickled eggs. And even with pressure canning, we have to keep density in mind. The next thing would be we don’t do with home pressure canning. And I say that with home pressure canning because commercial pressure caners can reach much higher temperatures than home canners can. And that’s why you’ll see on store shelves there are things like sweet and condensed milk is canned and pumpkin pie filling is canned, et cetera, but that’s because those are commercial and they have the ability to reach higher pounds of pressure than you can with a home pressure canner. So not doing any types of grains like rice, we don’t do those and that’s because of density and think about they swell
As well. And so you can’t ensure with the way that they absorb water and change during the canning process that you would be able to get the heat to penetrate all the way through those and you wouldn’t have a good end product. So it’s safety and end product as well. So like pasta, like chicken noodle soup or chicken and rice soup, those types of things. For example, we can the base of those without the pasta or without the rice and pasta and rice is already shelf stable, so that’s great. So what you can do is can you’re in with your broth, your chicken and your carrots and your onion and your celery and you have this base and then when you go to serve it, then you would add your rice and or your pasta at the time of serving. And so that way everything still stays safe. We still have shelf stable food. So none of your –
Anna Sakawsky:
Yeah, I was going to say, and with the pumpkin puree you mentioned we can’t do that at home, but you can cube it because then with the liquid around it, that’s a density issue. Then the heat gets to all of it evenly and then you can just puree it later, which is fine, right?
Melissa K. Norris:
Yeah. So pureed vegetables is another thing that you shouldn’t can’t with, and this is where there’s exceptions with the exception of a split pea soup recipe where some of the split peas and putting in the jar, but that recipe has been tested very specifically for the pureing and the time that it’s processed and the density, so we know it’s safe. So where we can’t do is like refried beans, you can beans and then puree at the time of serving to make homemade refried beans, but you can’t just puree up any type of soup or any vegetable pumpkin for example. And then pressure can it because of the density. So cubed pumpkin a hundred percent you can canned beans, do homemade canned beans. I do want to talk about the beans though for a moment because I see a lot of this shared online and you don’t take dried beans and put them in a jar in their dried format and then top it off with water and pressure, can it?
The reason for that is because we all know how hard dried beans are, it’s why you have to soak ’em and you have to cook ’em for a really long time to get them rehydrated and fully cooked all the way through. So our tested recipes for pressure canning beans has been from either doing a quick soak or a long soak method. So the long soak method is just like if you were soaking beans overnight to cook ’em in a soak cooker on your stove top all day. The hot method is where you put your beans, you cover ’em in a pot of water, bring it to a boil, let ’em boil for three minutes, turn it off and let ’em sit with the lid on for a specific amount of time, and then you rinse them and then you do bring them back up to what’s called a hot pack.
So that means the food is hot and has been heated to a specific temperature and goes in the jar and then directly into the canter and is processed. So that’s the difference between when someone says hot pack versus raw pack. Raw pack food is at room temperature usually includes boiling water or just off a boil water or some type of liquid when you’re doing raw pack, but the actual vegetable or the food in the jar is not precooked. So the reason that we don’t want to do that with dried beans and put it in the pressure canor is because you can’t ensure that that internal part of the bean one has gotten reconstituted enough to be held at the appropriate temperature that you’re reaching by the pounds of pressure for that processing time to kill botulism spores because all of the testing was done from those beans being soaked and rehydrated before they went into the jar and before you have begun canning them. So I am really leery when I hear people say anything about shortcuts or hacks when it comes to canning because most of the time they’re trying to take a shortcut, not understanding the science and the reason why that prep step was there and that it’s actual safety prep. So
Anna Sakawsky:
Yeah.
Melissa K. Norris:
Again, you can dried beans and those are great because we all know it takes a long time to cook beans, dried beans are shelf stable for a certain amount of time and then they can get really tough. So I love having dried beans and I do can my dried beans, but making sure I’m following those proper things so that when it’s a busy night or storm comes through, powers out, I don’t have water, I can just open up that jar, heat the beans, and then there we are without having that prep time.
Anna Sakawsky:
Yeah, for sure. Yeah, I love canned beans as well. We like to do baked beans and then take them camping with us for camping breakfast and stuff. But I’d imagine too that if you were canning them dried, they might swell and maybe either cause jars to break or seals lids to not seal. I’m sure there’s many reasons, but I think you’re right, just in general, especially when it comes to canning, just follow the proper procedures rather than take any shortcuts. I saw somebody actually said in the comments I didn’t know, you can’t pressure can pumpkin puree. I guess I’ll be throwing that out. So unfortunately that is part of the learning experience sometimes I do want to mention too, because I didn’t mention it first, but please if you do have questions as we go, pop them in the comments there and we’ll have some time for q and a at the end.
But if there are questions as we go about the topics that we’re talking about, we’ll go to some questions as well. Okay. So we’ve talked a little bit about safety and which methods to use for different things. So with our fruits in general, you said we can do when it comes to canning, we can do water bath canning because they are high acidity foods, whereas with our meats and vegetables they are low acidity foods. So we need to pressure can them, unless for example, if we’re talking about beans, I remember being confused about this at the beginning, but with green beans for example, you need to pressure can the green beans, if you’re just going to have them just as is where you’re going to eat, throw them in a super sink. But if you pickle them and they become pickled green beans because you’re adding that vinegar, you’re making them more acidic and then they’re safe to water, bath can correct,
Melissa K. Norris:
Correct, yes. Vegetables for high acid and high acid fruits, most fruits are high acid, some exceptions are going to be bananas. Bananas are not high acid, so therefore we’re not canning straight jars of bananas. There’s sometimes some melons. So just kind of double check and look at those. And then when it comes to Asian pears, Asian pears aren’t as acidic and so we can still safely water bath can them, but we’re adding in a little bit of extra acid. Same thing with white peaches. And so there’s a few little nuances and if you have Everything Worth Preserving, we’ve noted on any of those pages and recipes where that would be, but you simply are going to be adding bottled concentrated lemon juice and or citric acid to them and then they’re acidic enough and you can still water bath can them or steam can them. So you can use a steam canner for any recipe that would be safe to water bath can. And I love a steam canner just because it uses less water and so then it heats up faster and it’s not as heavy to move around and that type of thing. So I don’t think we mentioned steam canning when we first started.
Anna Sakawsky:
And it’s not something that I’ve ever tried, but I have heard, because I know there’ve been questions too that I’ve heard in the past about using an instant pot for pressure canning, that’s a no-no.
Melissa K. Norris:
That is a huge no-no,
Anna Sakawsky:
A pressure. So let’s just touch on that quickly because are pressure cookers and there’s pressure canner. So what is the difference? Are they
Melissa K. Norris:
Interchangeable? So you can pressure cook in a pressure canner, you cannot pressure can and pressure cookers, which I know sounds very confusing. So here’s the difference. A pressure canner, you have to have the ability to change the pounds of pressure because based upon your altitude, your pounds of pressure will change. So if you are sea level or below sea level to 1000 feet above sea level, then you will be pressure canning your meats and vegetables at 10 pounds of pressure. If you are 1001 feet above sea level and higher and you’re using the weighted gauge, then you’re going to be canning at 15 pounds of pressure. So an instapot for example, we have no way of changing or even knowing what pounds of pressure it’s operating at. There isn’t anything that allows you to select the pounds of pressure. So that’s kind of error or one of the reasons, no, we shouldn’t be using it.
But the second thing is a pressure canner when it reaches pressure, and it’s not until it actually reaches the pounds of pressure for the recipe and your altitude that you start your timer for the processing time and it has to stay at that pounds of pressure for the entire length of processing. So for example, with my altitude, which is about 600 feet above sea level at 10 pounds of pressure for doing pints of raw green beans, I need to be at 20 minutes. That means it has to be at that 10 pounds of pressure for the entire 20 minutes. If at minute 18 I drop below 10 pounds of pressure, I got to start over again. And the reason for that is because it’s been where it’s maintained at that pounds of pressure and that time for the entire time that we know any botulism spores would be destroyed.
So that’s why we can’t cut any canning times short and we have to maintain that pounds of pressure. Well, the way that pressure cookers like an electric Instant pot for example, is a brand name. The way that those operate is they don’t maintain the pounds of pressure the entire way through. So their pounds of pressure can fluctuate and that’s fine for cooking. Obviously I love an instapot, I use the instapot often, but you can’t use it for canning because it doesn’t maintain pounds of pressure nor does allow you to select palliative pressure based upon your altitude.
Anna Sakawsky:
Okay,
Melissa K. Norris:
Yeah,
Anna Sakawsky:
That makes a lot more sense. I actually didn’t know what the reason was. I know not to do it, but that makes a ton of sense. So quickly, I’m just going to go to a couple of questions. So Sherry had asked about pressure canning pears. So I know that pears are a fruit. Typically we’d be water bath, canning it, but you did mention that there’s a type of pear for example, that’s a lower acidity pear, and so you’re needing to add some lemon juice to acidify it. Would you ever just consider pressure canning something like pears or fruits?
Melissa K. Norris:
Yeah, so that’s a great question. So when it comes to using your pressure canner for fruits, you actually can, pressure can fruit, but you’re going to do it at five pounds of pressure, which equals to what you would be doing basically with water bath. The reason I personally typically don’t usually pressure can my fruit even at the five pounds of pressure is it can be really easy to overcook the fruit when you’re pressure canning and then it’s mosier and I don’t want my half of a pear slice or a peach slice when I pull it out of the jar to completely disintegrate, right? If I wanted pear sauce or apple sauce, then I would just do that from the get-go. So it can be easy to have more siphoning too with fruit. So siphoning is when you’ve followed the headspace indications of the jar and usually with fruit it’s anywhere from a half to a quarter inch depending on the recipe that you’re doing.
If it’s a jam or jelly or like I said, your have pears, peaches, et cetera. So siphoning is when after it’s processed and you pull the jar out of the canner, you’ve lost quite a bit of liquid, and if you’ve lost more than half of the liquid in the jar, then it’s not shelf stable and needs to be put in the fridge or consumed relatively quick or the freezer. As long as there’s at least half the liquid in the jar and it’s sealed, then it’s fine. You can put it on the shelf. The food that’s exposed above the liquid line in the jar will discolor. It’ll usually kind of turn brown or a more muted darker color. It doesn’t affect the safety, it just doesn’t look as pretty. So I just put those jars at the front personally if that happens, and we try to consume them first, but if you pressure can them even at the five pounds of pressure, siphoning can happen because our fruit has oxygen in it and that can affect the way that the liquid is pushed out of the jar during the canning process and more bubbles and siphoning issues.
So I don’t pressure can my fruit just for that reason, I don’t want it to get overcooked and I don’t want to deal with the siphoning issues, which typically are a little bit more
If you pressure can them. Now, when it comes to safety wise, like for doing Asian pears for example, and just wanting to pressure can those instead of water bath canning them, we don’t actually have a tested time on Asian pears if you were to not add the acid and pressure can them. So we don’t know how long without the added acid do we need to pressure can them to ensure they’re safe. So because we don’t have a tested time, that’s where we’re just still going to add the acid and water bath can them or you could pressure can at five pounds of pressure, which is the equivalent of water bath canning,
Anna Sakawsky:
But to kind of preserve the safety and the quality. Typically with the fruits we’re going to go with a water bath canning method and just add a little bit of lemon juice for acidity or something. What about tomatoes, because that’s an interesting one as well. First of all, okay, I guess this is the age old question. Are they a fruit or a vegetable in the case of canning and which method do you use? And talk to me about that and why we even need to consider that with tomatoes. I’ll let you take it before spoiling anything.
Melissa K. Norris:
Yes. Okay. So with tomatoes, tomatoes are borderline being acidic enough, so technically they’re a fruit. They’re not a high acid fruit and which is so mind boggling because I feel like we’ve been told our life how acidic tomatoes are. No, the fruit is much more acidic than tomatoes and tomatoes depending on the soil that they’re grown in at harvest time, if they’re under ripe, under rippe, fruit is typically higher in acidity than ripe fruit. There’s so many variances there that for tomatoes we’re always adding added acid to ensure that they’re about 4.6 pH or lower when it comes to canning. And no, an heirloom variety of tomato does not mean that it’s higher acid. I don’t know where that myth was born and gets kicked around the internet. So I only grow heirloom tomatoes. They are not higher in acid. I wish it was true, but that’s not the case. And so when it comes to our tomatoes, we are adding added acid to our tomato sauces, our salsas, any tomato juice, any of those products that we’re making with tomatoes. Now here’s where the thing comes into play where people are like, well, I’m just going to pressure canned my tomatoes. I don’t want to add added acid. The pressure canning times for tomatoes, my friends still includes acid.
Anna Sakawsky:
Right? Okay, you said it boggles my mind. So do you know why that is?
Melissa K. Norris:
Because if not, then your pressure canning time is that of soup. So instead of with added acid pressure, caning time, depending on if you’re doing tomatoes in their own juices where you’re really packing ’em super tight, or if you’re doing more like a hot pack method, there is a little variance on the time there. You would have to pressure can them, if you’re not adding acid like you were doing a vegetable soup, which is depending on the size of your jar, usually anywhere from an hour to an hour and a half processing time versus if you add your added acid and a pressure canning them, it’s like 25 to 35 minutes depending on again which type you’re doing.
Anna Sakawsky:
Right.
Melissa K. Norris:
Okay. So you have to double or even longer you’re processing time if you’re not adding acid. So the problem comes in when people see the pressure canning fried time for tomatoes and they don’t realize it still calls for added acid and they try to pressure can it to that lower time and they don’t add in the acid and they don’t realize that’s a problem because that time was established with the added acid.
Anna Sakawsky:
Got it. Okay. So you can, water bath can a lot of, not all but a lot of tomato products with added acid or you can pressure can, but you still have to add the acid. And that’s typically in the form of lemon juice, correct?
Melissa K. Norris:
Yeah,
Anna Sakawsky:
Bottles or citric acid ate right. And why can’t you squeeze? Yeah, fresh lemon.
Melissa K. Norris:
I love this question. I had it myself. I’m like, why does it always say bottled? So the reason for that is same thing, there’s different varieties of lemons and depending on where, at what time they are in their ripening stage, you harvest them, they have different pH levels, and so there’s no way that we could come up with a blanket time because of all the variances of the pH level. And unfortunately the little pH, like litmus test strips, paper test strips that you can measure pH levels with at home, those aren’t accurate enough for canning. I really wish that they were, but they’re not. So it’s not like you can just go and grab your lemon off your tree or from the store and litmus test it and be like, oh yeah, this is X, Y, Z pH, so therefore I can add this. So bottled lemon juice from concentrate, it’s all the same pH level, so that way they can safely say no matter what the recipe is, if you’re using bottled lemon juice from concentrate use, I’m just throwing this out there as a random example, use two tablespoons per jar and you’ll reach the pH level that’s needed using fresh lemons.
We can’t guarantee that. So that’s why it’s bottled lemon juice from concentrate just that straight across every bottle is the same pH level. Now you can use citric acid as well. So citric acid you can use and you can also use vinegar. When you’re using vinegar and canning, it has to be 5% acidity or higher. So you can use 6%, but you can’t use lower. So sometimes specialty vinegars, and I’ve seen a few photos online, I have not personally seen this in any of our grocery stores that some vinegar is now being made to 4% acidity. All of your canning recipes are done to a 5% acidity vinegar level. So make sure it says that. But typically what the bottled concentrated lemon juice amount is, you’re typically doubling that for vinegar to get the same acidity in the recipe. And there’s some recipes where that would be fine, like in salsa, usually see vinegar anyways because part of the flavor profile of canned salsa, and I like that. However, I don’t really want to taste vinegar in my tomato sauce, so I’m going to either use the citric acid or the bottled lemon juice, which you don’t taste in the end product, but those are your three forms of acid that you use in canning recipes,
Anna Sakawsky:
Right? So lemon juice is actually more acidic than vinegar, which is kind interesting. You can eat sour, but you can have some lemon juice, but you wouldn’t want to take a drink of vinegar. It feels like that’s
Intro:
Some
Anna Sakawsky:
Of these things are contradictory to what we would just naturally think would assume. Good to know the science behind it. Just quickly on that note, what about lime juice, bottled lime juice? Could you sub that for lemon juice, like in a salsa recipe for example?
Melissa K. Norris:
Yeah, in most cases, yes. You can bottled from concentrate again, bottled lime juice from concentrate you can sub in for. I do it with jam and jelly recipes. I love blueberry lime flavor versus lemon. And for example, yes, in salsa recipes I prefer lime juice with my vinegar versus lemon juice. I just think it’s a better flavor nuance.
Anna Sakawsky:
Cool. Okay. We have a few questions in the comments. I’m going to wait until the end just to go to a few of them. I want to touch on a few more things, but one question has come up that I think leads us into the rest of the conversation, kind of stalled on the canning, which is great. We were going to get into that anyway, but we were still kind of, let’s go back to talking about some of the different methods of preservation and which ones are safe or for different types of foods. So Josephine had a question about fermenting. She said, what can you use instead of vinegar to ferment vegetables? So let’s talk a little bit about fermenting ferment and how it works and what is safe to ferment and what that process looks like.
Melissa K. Norris:
Yeah, so that’s a great question. And actually we don’t use vinegar to ferment vegetables. Vinegar is used for pickling. However, fermented vegetables and pickled vegetables, often they’re both considered pickled and they have similar flavor profiles. But if you’ve ever had a vinegar pickled cucumber or a fermented cucumber, though they may be a little bit similar. They both have the puckery part, they are different flavor nuances between the two. So fermenting, you actually are using salt. And so when you’re canning, salt is just there for as a flavor agent, it has nothing to do with the safety of a recipe when it comes to canning. You can omit salt, no problem. However, when it comes to fermenting, you absolutely have to have the right salt ratio or you’re going to end up with something that rots and doesn’t ferment or so salty that it’s just not palatable.
Nobody can eat it. So what happens with fermenting, which is really fun, is we’re going to create a salt water brine. Now sometimes that’s where we’re mixing salt with water and pouring it over our vegetables. You can also ferment fruit, but typically we’re doing more vegetable items and you’re pouring that over and you’re letting it ferment at room temperature for a specific amount of days. And that fluctuates depending on how hot your house is. So think about red rising, excuse me, bread rising. I said that backwards rising, the warmer the room, the faster it rises, right? Same thing with fermenting. The warmer your room, the faster it’s going to ferment, and then we put it into the fridge for long-term storage so it doesn’t over ferment. Or if you’re doing it in the fall and you live in a northern or colder environment, a lot of times people will ferment it at room temperature and then they’ll move it to a backroom or maybe an insulated basement or insulated garage where it won’t freeze, but it stays at a cooler temperature. So it doesn’t have to be a fridge, it could be a crawl space, that type of thing, or a root cellar if you have one, right?
Anna Sakawsky:
Right.
Melissa K. Norris:
Yeah. But what happens is it’s really cool. So you have the salt, and the reason that we use the salt is because until our lactobacillus bacteria begins to grow and multiply and actually ferment our food, the salt is there to help keep it bay bad yeast and bad bacteria and molds. But as it ferments, it actually changes the pH level of the food and it lowers it to a more acidic environment. So we actually have acid at play in both canning and with fermenting, but different mechanisms and different ways that it happens. So the cool thing about fermenting vegetables and inside everything worth preserving, we have an entire section on fermenting charts, walking you through dry fermenting versus wet fermenting, all of those things, wet brines, dry brines. It’s really fascinating, but you can control your flavor profile. Also with fermenting, you get probiotics. There’s a lot of health benefits to fermented food.
And if you have small batches coming in, like you were talking at the beginning of the season and usually at the end of the season as well, we don’t have enough cucumbers to really necessitate during an entire ke full because you only have enough for maybe half a jar, maybe not even one jar or barely one jar. And I don’t can anything for one jar that’s not worth my time to be honest or resources. So unless I can get a decent amount done in a canner, I’m not going to bother. That’s where fermenting comes into play. It doesn’t heat up the house, which is lovely. You don’t have to have a ton of supplies, a mason jar, you can make your own weights, you can buy little weights. It’s really economical and easy to do, and it’s great for small batcher when you’re in a hurry. So I’ll actually be picking my first cucumbers tomorrow will be coming on, and I always ferment the first few jars because again, I don’t have enough to do more than maybe a quart at most in the beginning.
Intro:
So
Melissa K. Norris:
I love fermenting. If you’re pressed for time or you don’t have a lot of produce at the moment, it’s the perfect, my favorite way.
Anna Sakawsky:
Yeah, I actually did that last year where I had just little bits of a bunch of things and I made a fermented jar, so a little bit of cauliflower and a little bit of peppers, a little bit of carrots and a little bit of oregano or whatever was in there, and then fermented it all and it was delicious. And then of course with fermenting, there’s the added benefit of it being a fermented food and not being good for our gut health and that healthy bacteria and everything as well, right?
Melissa K. Norris:
Yes. Yeah. And it’s a lot cheaper than buying store-bought probiotic pills that oftentimes don’t even have the live bacteria or they’ve started to die off. So yeah, I’m a huge proponent. I love fermenting.
Anna Sakawsky:
Yeah, for sure. Me too. Okay, so we’ve done now canning, fermenting. We’ve talked a little bit about root and just storing foods at room temperature if you don’t have a root cellar or basement or whatnot. And then there was also dehydrating and freeze drying. So we won’t go too far down into that road right now. And actually we’re going to be having Carolyn Thomas on from home setting family on The Coop next month, and we’re going to be doing more of a deep dive into freeze drying. But can we just touch on those quickly? And first of all, what are the safe foods? You mentioned that most things are safe for freeze drying, but not everything for dehydrating. And what is the actual difference for people who might not know between just dehydrating and freeze drying foods?
Melissa K. Norris:
Yeah, there’s actually a fairly significant difference in both the process, the things that you can freeze dry versus dehydrating it, and the end product as well. So most people are very familiar with dehydrating. We have been as humanity dehydrating food is a form of food preservation since the beginning of humanity. It’s a very old form of food preservation. Same with fermenting and even root cellaring. Canning actually is relatively new. The canning jar was invented in 1850. It wasn’t really even widespread until the early 19 hundreds and as freeze drying at home really the past 10 years. So it’s kind of still at the brand new infancy stage as far as kind of mass across the home front. So when it comes to freeze drying versus dehydrating, they both are using the action that actually makes the food safe and shelf stable by removing the moisture.
So you’re removing the moisture and getting it to a specific moisture level where bacteria and harmful organisms, yeast molds, et cetera, can’t grow because there’s not enough moisture. So with dehydrating, we’re just simply pulling that out using sometimes air drying, depending on if it’s an herb, you can easily dehydrate herbs just at regular room temperature. When it comes to doing vegetables and fruits, most folks are using a dehydrator. Historically, they would’ve laid it out with screens in the sun for days on end and tried to get it down to that temperature. But a dehydrator takes that away and is much faster, and you can set the temperature for it. So it’s simply pulling the moisture out to a certain degree, and then usually it’ll be crispy when you take it out. But as you seal it up and over time, it kind of becomes chewy.
So dehydrated banana chips or apples or whatever slices, they’re kind of chewy when you do ’em at home, but they’re dried. So freeze drying, what it does first is it takes it down to a super cold temperature. So usually around negative 48 to negative 50 degrees Fahrenheit, so usually even a little bit colder than your deep freezer, but we’re talking a really cold temperature. So what that does is it’s called sublimation. So the moisture that’s in the food becomes vaporized. So inside the chamber where you’ve put your food, when it reaches that temperature, the moisture is vaporized, and then there’s a pump that kicks on and it sucks out the vapor. So it sucks the moisture out, and then it switches over and it dehydrates the food. So if there’s any moisture left, and it takes it out of the freezing state. So it’s going to basically take it from being frozen with the moisture out to room temperature, and then to whatever the dehydrating temperature is, which is usually about 125 degrees Fahrenheit on your freeze dryer, you can pick what that final temperature is. So it creates much less moisture content than dehydrated food, but it’s really crispy, and so it’s really crunchy and it stays that way, provided you’ve sealed it up in your storage, if it’s introduced to oxygen or air, it will start to absorb it and it can become kind of chewy. So it’s this really light, airy, crunchy texture, which I love. Like the apple chip, they’re actually crunchy. I freeze dry –
Anna Sakawsky:
Or bananas, you’re not chewing on them.
Melissa K. Norris:
And I freeze dry peppers like green bell peppers, and when I sprinkle ’em onto salads, it’s like a crouton, but it’s peppery and crunchy. And anyways, so I do love freeze dried food, but it is a different texture. Then of course you can rehydrate it and et cetera. So the interesting thing though, with freeze drying food, unlike food that’s being dehydrated or the moisture is being solely sucked out, it doesn’t shrink. So it is very lightweight. However, the size of whatever you put on the tray coming out will stay that size. And that was kind of surprise to me the first time because I’m used to dehydrated cherries, they shrink up freeze dried fruit, it stays the same size. So anyways, that surprised me. One of the other things with our freeze dried food versus dehydrated food is you can safely freeze dry raw meat.
Now, you wouldn’t eat it from raw, you would reconstitute it and then cook it. But with dehydrating, you can only dehydrate safely cooked eggs. For example, you can do raw eggs with freeze drying, which I love. So when the chickens are laying crazy in the summer months, I can freeze dry raw eggs, and then later I can use them in my baking, whereas dehydrated scrambled eggs you can’t use in baking, that’s weird and would taste gross. So there is some of those nuances with the freeze dried food, like I said, you can do raw meats, you can do all different kinds of leftovers that you really can’t do with dehydrated foods. So it gives you a larger range of things that you can do. And I prefer the texture. So think of the texture with freeze drying. If your purpose is to use it in cooking and not to just eat it in its freeze dried state, like a snack or something, it’s going to be frozen and then thawed vegetables when you go to cook it.
Whereas dehydrated vegetables, in my experience, even when you rehydrate them, there’s still a slightly chewier texture than just frozen vegetables that you’ve then t thought and cooked. So I prefer freeze dried and like, oh my gosh, freeze dried mushrooms. If you like mushrooms, you guys freeze dried mushrooms are divine. You just put a little bit of moisture on them and then cook them. And it kind of intensifies the mushroom taste, which if you like mushrooms, which I do, you’re like, oh, buddy. But I can put up a ton of mushrooms, even wild mushrooms with the freeze dryer in comparison to the dehydrator and canning, you can domestic mushrooms, you can’t can wild mushrooms because wild mushrooms, there’s so many different sizes and densities that there’s not been where somebody has actually tested each type like a lion’s mane versus a chandre versus morell to say, this amount of time at pounds of pressure is safe. So domestic mushrooms we can safely can at home, but not wild mushrooms. So I use my freeze dryer for all of our wild mushroom foraging harvest. Yeah.
Anna Sakawsky:
Okay. And then with freeze drying, I believe you can freeze dry a lot of dairy products safely, but is that not the case with dehydrating or
Melissa K. Norris:
It’s a different, oh my goodness. Words are hard. It’s a different texture wise too. And so I haven’t done a lot of regular dehydrating of my dairy products, but I do freeze dry milk. I freeze dry cheese, and then with dehydrating versus freeze drying. With freeze drying, you can’t freeze dry straight fat, so you can’t freeze dry a cube of butter, for example. But if you have butter in something or cheese in something, and you can freeze dry cheese because cheese isn’t straight butter. I mean, it has fat in it, but it’s not just the rendered fat. And so that I will do quite often, I’ll do lattes, those types of things for when we’re traveling or the power goes out where it’s just a quick homemade hot chocolate, I’ll make homemade hot chocolate so that I know exactly what’s in it out the junk from the store, and then we’ll freeze dry that so the kids can have just a fast, homemade hot cocoa freeze drying mix, that type of thing.
Anna Sakawsky:
Cool. Okay. Well, we’ll get into that in a lot more detail next month when we focus specifically on the freeze drying, but that’s really good to know. Okay. Now just real quickly, we’ll just go over just what’s your method for actually just deciding what methods to use? Because there are certain things that lend themselves to a lot of different types of food preservation methods. So for example, we went out and picked a whole bunch of strawberries this year, and then I was like, strawberries are one of the things that we just consume a ton of because there are so many ways to consume them. And so I actually really had to think about it before I dove in. How am I going to preserve these? How do we want to enjoy these throughout the year? And so we did a little bit of, we did some jam, we did some pie filling, we did some freeze drying, we did some dehydrating. I actually, because of the differences you just talked about, we want some that are freeze dried that we can throw in cereals, that sort of thing. But then I wanted some dehydrated because I like that texture for snacking. And then we just put some in the freezer as well for smoothies and stuff. So we did it in a bunch of different ways. So some of these foods do lend themselves to different methods. So what’s your strategy or what advice would you give somebody who’s trying to decide, what method do I choose for this?
Melissa K. Norris:
Yeah. One is exactly what you said, the end product. How do we like to eat this? How is it that we act? What is our favorite way of consuming this? And so that is my number one thing that I first look at. So for us, especially say with tomatoes too, and I also look at the versatility and I look at the storage space that I have. So for example, with tomatoes, I know that tomatoes will sit at room temperature for quite a while, actually, depending on their stage of ripeness. And so I’ll look at what we’ve harvested and I’ll be like, Ooh, are these almost close to being over ripe or are they just ripe and they’ve got a few days? If they’ve got a few days and I have other items that need to be dealt with right then and there, then I’ll deal with them.
But for the tomatoes, I know that for us, the most versatile thing for me is tomato sauce because I can then simmer that down to make tomato paste later. If I need tomato paste for a recipe, if I want to make tomato soup, then I’ll mix that with broth and make tomato soup at a later date. Spaghetti sauce, I can just add my spices. Same thing with pizza sauce. My main goal when it comes to the tomato harvest first is to make tomato sauce even before salsa or anything else. So then the next thing I look at is how much space do I have in my deep freezer? Because if I’ve got enough space in my deep freezer to toss the tomatoes, then when I pull ’em out in thaw, the skins just slip off. And so when I’m canning, then I don’t have to actually blanch them, hot water, bath, all of that.
It’s just a lot faster process for me and I can deal with them later. Whereas if cucumbers are coming on, you need to make your pickles as close to harvest as possible so that they stay crunchy and crisp. They can even in the fridge, they’re going to start to get that sogginess and you’re not going to have as crunchy pickle once they start to turn soft no matter what you do. So I like to look at what my options are with them as well as what that end product is. I pick the most versatile form first, and then once that quota of what I want us to have for that amount is then I’ll move on to the next based upon how we like to eat at, how I plan on using it and that type of thing. Your example with the strawberries was perfect example
Anna Sakawsky:
Of that, and it takes some time to figure out. I think too I’ve done in years where I’ve done not enough or whatever, I’m like, oh yeah, I know now that we need this many jars of jam. That’s usually our first go-to either the freezer, having them in the freezer or the jam. And then you’re right, once so we’ve hit that quota, then I know any excess, I can do the next thing and so on and so forth. Okay, I think we’re coming up on the hour mark and I still have some more questions, but so do our guests here. So I want to go to a few of these and make sure that we are answering some questions. So maybe we’ll, we’ll try to move through them quickly so that we have time to cover everything. Okay, Arlan, let’s go back to Arlan had asked about do you dry or wet pack potatoes for canning?
Melissa K. Norris:
I am so glad you asked this question. Arlan, we wet pack. The reason for this is because just because of canning jar, seals is a no way indicator that that jar is safe or not. Sealing is simply a vacuum action that happens from heat and then it cooling off. It creates a vacuum in the jar seal. So we do want our jars to seal so the oxygen can’t come in or any other bacteria on a finished product. However, I feel the need to say that first up and foremost because a lot of times people think if my jar’s sealed and stay sealed, then that means the contents are safe. And that’s not actually true. Now, dry pack versus wet pack. So if you’re not familiar with what that means, a dry pack is where you take potatoes in this instance and you put potatoes, just diced potatoes, put ’em in a canning jar, you’re putting a lid on in your band and processing them.
Whereas wet pack is potatoes go in the jar and then water that’s the wet part is poured over them and then they’re processed. So when it comes to pressure canning our vegetables, vegetables not meat, there are times that you can do meat because meat has liquid in it and will produce enough on its own. When you’re doing a raw pack on some types of meat, you should not dry pack can your vegetables. And here’s the reason why the liquid is the way that heat is conducted to get to the center of that food to ensure that all botulism spores and bacteria is killed. So I want you to think about this for a minute. If you have boiling water, which is only 212 degrees fahrenheit, doesn’t matter how long you boil it, boiling water hits your skin or steam, which is also moisture, right? But think about boiling water hits your skin.
You instantly are going to blister and burn. However, think about your oven 350 degrees Fahrenheit for regular baking. It’s summertime. I have short sleeves on and I’ll have a oven mitt on, but I can put my bare arm in that dry heat of the oven to put my food in and take it out. And yeah, I leave it in there long enough, it’s going to start to get hot, but my skin isn’t instantly burned, like boiling water on is instantly burned. So that’s the difference in heat conductivity that you have wet versus dry. So that’s why dry canning vegetables for the love please do not do because the heat cannot get all the way into the center of it that is needed and that is why we wet pack them.
Anna Sakawsky:
Okay, perfect. All right, that makes sense. All right, so let’s go to another one. So Karen, oh, hold on. How do I remove that one now? Maybe our, oh, there we go. Our tech support helped me. So Karen asks, what about canning? I guess at high altitude? So 5,200 feet.
Melissa K. Norris:
Yeah, Karen. So totally fine. When you are water bath canning, which I will say every single recipe in everything worth preserving states for your altitudes, water, bath, canning and or steam canning, we increase time because you can’t increase the temperature of boiling water, but you increase the time that the food that’s high acid in a water bath or steam canner is kept at that temperature. When it comes to pressure canning, we increase the pounds of pressure based upon our altitude. So Karen, you would increase time for water bath. When it comes to pressure canning, you’re simply going to increase your pounds of pressure. But yes, you can safely and it’s broken down in increments based upon your altitude. So I’m just going to pull up peas here. For example, in the book, your altitude adjustment for pressure canning is if you are using a dial gauge, then you increase by one pound for every additional 2000 feet in altitude. If you’re 1001 feet above, if you’re using the weighted gauge, you simply just go to 15 pounds of pressure.
Anna Sakawsky:
Perfect. Okay, that makes sense. Alright, let’s go to Christie. Who asked, is there a type of bean that works better for canning pork and beans? So just beans in general. Are there certain beans that are better to can than others or speak to that?
Melissa K. Norris:
Yeah, I’ve canned all kinds of beans. It really is just the size of the beans. So if you’re doing something like a fava bean that’s really big, then follow the instructions for those larger beans. But your regular dried beans, so like kidney, navy, black, those beans, all of them work. So usually I will do for pork and beans, I’m looking at, usually I’m doing a type of a kidney bean or a red bean,
Anna Sakawsky:
A red. But
Melissa K. Norris:
They all work, they all work equally. It’s just really just your flavor preference on that.
Anna Sakawsky:
Okay, perfect. Okay, here’s another good one. I have an electric stove, Stacy said, so when I’m pressure canning, I’m having a hard time keeping the pressure. Most of the time it’s always higher. How do you keep it to pressure? So I know that this is a question that I’ve seen come up before too is with electric stoves, because like the instant pot feature that you mentioned, they kind of cycle on and off. So there’s questions sometimes about whether they’re safe to can on,
Melissa K. Norris:
Yeah, they’re a hundred percent safe to can on canned on an electric stove for 20 years. It was only in the last four years that we got a propane gas stove. So it’s fine if it’s a little bit higher, it’s not safe when we go under now you don’t want it a lot higher because it’s going to overcook the food, which isn’t necessarily a safety issue. It’s just we want to have a good end product that people enjoy eating, right. The danger is if it gets too high of pressure, then you’ll blow your pressure over relief plug, which just means that that batch of course then is no longer good. You can replace that, your canner will be fine. So if you’re a couple of pounds higher, but that’s because your electric stove is fluctuating staying one or two pounds higher to ensure that you’re staying at that pounds of pressure and not swinging beneath it. Totally fine. I would not worry about a couple of pounds of pressure because if you are not using the dial gauge, your only way of incrementing based upon altitude is by five pounds of pressure to 10 to 15. So if you’re using a dial gauge and you’re just a few pounds over, say the 10 pounds of pressure, say it’s like at 12, it’s really not an issue at all. You’re fine
When you are changing temperature, once the counter is brought up a couple things is make sure you’re not heating it too high. Oftentimes I see people want to get in a hurry with pressure canning, and so to get it up to the pounds of pressure, they crank it all the way up to higher, almost high. And then when it reaches pressure, then they want to bring it back down to say medium, but it takes it a while to equalize inside the canner and so you are going to read over. And so it’s better to heat your canner and bring it up to pressure more that medium on your burner than having it swing too high. So make sure that because we don’t want big fluctuation changes in temperature, that can also, siphoning can become an issue if you’re swinging too much. So always just change it a little bit in increments, but air on the side of being one to two pounds over versus the danger zone which is going under.
Anna Sakawsky:
Okay, yeah, that makes sense. And maybe I was thinking because right, and I count on an electric stove as well and have never had an issue, but I know that there are certain types of newer stoves and maybe it’s like the glass top ones and stuff that will kind of cycle on and off. So in that case with pressure canning, is there a danger there that if it’s cycling off and losing pressure,
Melissa K. Norris:
So if it loses pressure and you go beneath, then yeah, you wouldn’t be able to can on it. But they do make, you can get electric burners. I have one that I use outside, actually we don’t have air conditioning in our house and so in the middle of the summer it’s super hot, so I’ll can outside and I have an electric burner that you could plug into your house that’s not going to cycle on and off or you could use outside. So there’s definitely ways around it if your stove is cycling so much. Yeah.
Anna Sakawsky:
Okay, perfect. Alright. Oh Sherry, here we go. Asked about eggplant cubed, sliced pressure, canned, what do you do with eggplant?
Melissa K. Norris:
All right, well we are going to go to E and everything with preserving, because I don’t use a lot of eggplant. It’s not one of the ones that we do a ton of. So I’m going to look it up. It’s on page two 11 and you can safely water bath can and steam can eggplant. There is no tested time for pressure canning eggplant by itself. You can dehydrate it, freeze it, freeze, dry it, or ferment it.
Anna Sakawsky:
There you go. Perfect. Alright, let’s see. Okay, let’s go to Wendy. Who says the bottled lemon juice from concentrate. Can you use bottled lemon juice? That does not say from concentrate.
Melissa K. Norris:
No, because you don’t, if it’s not from concentrate, it could vary in its pH.
Anna Sakawsky:
So
Melissa K. Norris:
It me to say from concentrate. Yeah, great question.
Anna Sakawsky:
Okay, cool. And then on that same note, let’s go to Sarah who says if we juiced our own lemons and limes and got a concentrate and then tested the bottled tested and bottled ro and I believe and it was the same pH, could we use our own or does the commercial concentrate have other things in it?
Melissa K. Norris:
Well, one, you’d have to have a way of actually lab testing the pH level because as I said, the little test strips and stuff aren’t considered accurate enough when it comes to canning. And you would have to know the exact pH level that the concentrate commercial is done to. So being able to contact one of those companies and et cetera. So there’s a lot of nuance there that’s going to be hard to do at home to ensure, so I use my lemon and limes for all types of things and you can use them, like I said, for jams and jellies that are in high acid fruits where it’s more flavoring or to help get this set, you can use it if you’re not buying pectin, you can use lemon and limes as a pectin source and flavoring agent to help get a jam set on jellies and jams. Excuse me. So I would just use it that way. There’s too many nuances to say yes, this is a hundred percent safe.
Anna Sakawsky:
Yeah, that’s kind of like I do homemade apple cider vinegar and sometimes canning recipe will call for apple cider vinegar, but again, you want to make sure that you’re having that store-bought 5% acidity vinegar. So I just buy the stuff from Costco for canning purposes, but then if I am adding it to dressings or other meals, whatever,
Melissa K. Norris:
Fresh cooking, all
Anna Sakawsky:
Those things, or even when I’m doing my broth right, because it’s good to add a little splash of vinegar in to help extract all those minerals and nutrients from the bones, I’ll add my own homemade for that. But then just for the canning we use store bought.
Okay,
Couple quick fermenting questions here. So one actually Sarah had mentioned as well, and then there’s another one that kind of goes hand in hand with it. So Sarah had said, are fermented foods less vinegar than pickled foods? I’m assuming she means like vinegar, pickled foods, one reason I don’t like sauerkraut, et cetera, is the vinegar taste. So keep that in mind. And then on the flip side of that, Carlin had said, my fermented pickles are too salty. How can you reduce the salty taste? So let’s talk about the kind of balance there that we’re trying to achieve and how we get that.
Melissa K. Norris:
Yeah, so the great thing is with home fermented foods, you depend upon how sour it is based upon your flavor preference. So as soon as it’s tasting that right amount of sour for you, and again fermented food done with salt brine, which is a true fermented food, they’re not the same as vinegar though they will be sour. But it’s different on the palette. I just want to, it is sour, but it’s not the same as vinegar. However, once it’s reached the point of sour you like that’s when you move it into the fridge for cold storage to drastically reduce the rate of fermentation that kind of holds at that flavor. So you control that. And so I don’t actually like most store-bought fermented foods, in all honesty, I don’t like sauerkraut from the store. However, I love my homemade because I control the sourness of it now for the salty part.
So Carlin, so one is making sure you’re using the correct salt percentage to your fermented foods. We’ve got charts in Everything Worth Preserving that go through what the percentage should be, how much salt to ensure bad bacteria doesn’t grow based upon the foods. So beet kvass is 2%, sauerkraut is 2%, whereas hot sauce is 5%. So there’s different percentages. And we also have, if you’re like, well I don’t know what 2% is, we’ve done that for you, it’s five grams of salt to one cup of water. So we’ve got massive charts in here, so I don’t know what fermented pickle recipe you necessarily were using or the salt type. So it could be too much salt for that. Also letting it ferment long enough. So if you do your saltwater brine and you were to taste test something like day one or two, especially with cucumbers, it would be too salty.
You’d be like, whew. But as it ferments, that does tend to mellow a little bit. So without knowing what type of salt, the percentages you were using, the recipe, et cetera, I don’t know if it was too much salt or not, but generally that’s the case. The other thing that you can do of course is if you’re like, oh, I think these are too salty. So say you have a batch you did and you’re like, well, I don’t want to throw ’em out, but they are salty is to simply rinse them at the time of use. So pull out the cucumber, give it a good rinse, and then if you’re eating it on something like think in chicken salad or tuna salad or a potato salad, then you would just not put as much salt in to that food. Or if you’re having it on a hamburger because you’ve got the cheese and all the other flavors that you would get in a hamburger, then if it’s somewhat salty, it’s not as noticeable.
Intro:
So
Melissa K. Norris:
There’s a couple different ways you could still use that food if it was too soft.
Anna Sakawsky:
Perfect. Okay, makes sense. Okay, Sandy just said, I tried ferment cranberries, I’m afraid to try them. So real quickly, we’ve talked about canning and the safety considerations with canning. What sort of safety considerations are there with fermenting? I know that this comes up quite often, literally just putting food in a jar and submerging it beneath the saltwater brine, but then we’re leaving it there and it’s aging. And I think sometimes that gets confused with rotting or how do we know if it’s gone bad with fermenting? And if it’s safe
Melissa K. Norris:
With fermenting, you’ll know it’s went bad because it will smell so putrid that there would be no way you could even taste test it. Now fermented food does smell fermented, so there is a sour scent to it, but that’s different than putrid
Gag in your mouth at the first whiff, so you’ll really know. Now with fruit, I do have even fruit. I do a fermented cranberry sauce. Oh my gosh, it is so good with fruit though, because it has a higher sugar content obviously than vegetables. You typically don’t ferment it as long as at room temperature. And then with fruit it doesn’t mean it’s bad, but what can happen is if it over ferments, it gets effervescent, which I like in a kombucha where I’m trying to get in a drink, I don’t necessarily want the mouthful of the cranberries fizzing in my mouth. That’s kind of weird and it’s usually a little too sour. So that’s kind of it. So usually with our fruit ferments, you’re just letting ’em be at room temperature for a day or two and then you’re going to bop ’em into the fridge. But you’ll know because it will smell so bad and generally look so bad that you’re like, Lord, no, I can’t even taste it. That’s how gross.
Anna Sakawsky:
Yeah, that was my first batch of sauerkraut. I remember I didn’t have it all submerged, right, and it smelled like feet and it was pink and sludgy. Okay, let’s just get back, I want to cover a few more things here and then we’ll finish up the questions before we wrap up. Okay, so let’s talk a little bit about combination meals. So when it comes to pressure canning, you can pressure can, we’ve already got over, you can pressure can vegetables, you can pressure canned meats, you can pressure canned broth for example, but you can also pressure can all these things together. So first of all, we’ve kind of touched on some of the things that you shouldn’t can, like for example, you mentioned chicken soup. We don’t want to add the noodles or the rice if we’re doing wild rice soup or something like that. We’ll add those later. But you can all of those other elements together. Now again, if you’re following a tested recipe, usually that should all be in there the correct time zone. But what is the general rule? What is the golden rule when it comes to canning things in combination with each other? How do we know if all of the things that are in there are safe to can and how long we should be canning it for, et cetera?
Melissa K. Norris:
Yeah, so that’s a great question. So when you’re doing a combination recipe is all the ingredients have to be ingredients that have their own tested singular processing time. So for example, we don’t pressure canned broccoli. One, it would be so mushy, it would be disgusting, there is no safe tested time for it, et cetera. So I love a chicken and broccoli cheddar soup, but there is no safe canning time for dairy nor broccoli. So I know I can’t can that soup. I will also say pressure canning is not a way of preserving your leftovers. And the reason for that is because your leftovers are fully cooked. And we have already talked about even with pressure canning, there is density issues that come into play with safety. And that’s why we’ve got the specific times and procedures of hot pack versus raw pack for each of these vegetables.
So for the meat and vegetables that are already have approved safe canning times, you can do a combination of them provided that you’re canning to whatever the longest pressure canning time is ingredient. And so you can follow tested recipes. In fact we’ve got combinations, some soup recipes in everything worth preserving and you’ll see those. But that’s the key part. So for example, if I’m wanting to do a vegetable soup and I’ve got potatoes and green beans, all of those have individual canning times tomatoes, right? That’s fine. But I can’t can it to the green bean time, that’s only 20 minutes. I’ve got to go to that longest ingredient processing time. So usually for most of your soup recipes, depending on the ingredients that are in it, it’s going to be a minimum of 60 minutes in pint size. And also when you’re doing combination recipes, depending on the food that’s in there, and again the density, some recipes will say and only give a pint time and not give a quart. If it doesn’t give a quart, you can’t put it in a quart and can it to that pint time, it has to be done to the jar size time indicated.
Intro:
Now
Melissa K. Norris:
If it set a quart, this is for any canning. If it says a quart, you can always go to a smaller size jar, but you process it at the same time for the quart, that’s fine, but we can’t scale up and process it at the same processing time. Okay.
Anna Sakawsky:
Alright. And so that all being said, too combination meals, is it safe to can our own combination meals then if we’re following that rule and just going, okay, this is all the ingredients in here are safe to can on their own or there’s tested canning times for each ingredient and the ingredient that needs the longest time is such and such. So can it to that, is that all we need to know then to safely can our own meals or would you still recommend finding a tested combination meal recipe and following those specific instructions?
Melissa K. Norris:
Yeah, I mean in the beginning I would recommend that if you’re brand new to pressure canning, I would not recommend coming up with your own soup combination recipe as your first go round. I would definitely look at some of the tested recipes first and do those look at the times that are listed and the way they tell you to pack the ingredients and then see what that looks like when it’s coming out so that you’re kind of building some confidence where you’re following everything and it’s already been tested and is safe. That being said, there’s some soup recipes that maybe it calls for peas and I don’t have peas in the garden, but I have green beans. I know green beans can safely be canned by themselves
As an individual ingredient and in soups. So it’s fine if I swap a green bean out for a pea for example, in a recipe like that. But until you really deeply understand all of the science and the reasonings and the procedures that we use per ingredient for soups or combination recipes, I wouldn’t start just developing your own until you’ve got that really deep knowledge base first just to be on the safe side and to make sure that you like what it is that you’re putting up and you have the confidence to eat it and not be worried about it.
Anna Sakawsky:
And just to clarify, for anybody who might not know, when we talk about a tested recipe, who is doing that testing, where would you recommend that people look outside of Everything Worth Preserving? Of course, because all of these are tested recipes. Of course, of course, yes. But who is the kind of holy grail of the tested recipes? What’s a good source?
Melissa K. Norris:
So this is a super interesting question. I actually have done an entire podcast on this because there’s a lot of misconception or just not understanding on it. So our tested recipe sources are going to be extension offices, so like county agriculture, extension offices, universities. The majority of our recipe, any new recipe testing that happens these days is from a university. So University of Georgia does actually quite a bit of home food preservation testing in the states, which is where I live. And so that’s of course what I can speak to. And then you’ve got the national Center of Home Food Preservation, and then you have ball and Ball does test recipes as well. And so the Canadian or international version of Ball is, I’m going to probably mispronounce it. Bernadine I believe.
Anna Sakawsky:
Yeah, bernardin, yeah, that’s what we have in Canada.
Melissa K. Norris:
And so they are like sister companies with ball. And so I know that they test and share tested recipes and share resources. So those are really our only sources that are still actively testing most of our information on our recipe testing, especially from the USDA, which is the National Center of Home Food Preservation website in our extension offices and all those different things that testing with a few things that they did some additional testing in the early, late 1990s, early two thousands was primarily done in the 1940s because they were needing people at home during World War II to can their food and people were getting sick. And so they did testing so they could say, can your food this way? Because all of the commercially canned food needed to go to the troops overseas. So the government testing done at that time was when they wanted people to, can I hear so many things that people will inaccurately say, oh, they saying you can’t can that because they don’t want you to can and have food independence. And it’s like, no, actually that testing was done when they really
Intro:
Needed us
Melissa K. Norris:
To
Anna Sakawsky:
Have independence in this case.
Melissa K. Norris:
Yeah, it’s actually the opposite, but that’s why we don’t have a lot of tested times for certain things because there’s no money to be made in it anymore and the government doesn’t have a reason for diverting funds to
Anna Sakawsky:
It.
Melissa K. Norris:
So some of the things we just don’t have a tested time for it to say, if you do it to this time and pounds of pressure, it is safe. It’s just not been tested. And so we don’t have a universal way of knowing what it’s, so, yeah.
Anna Sakawsky:
Okay. Yeah, that makes sense. Okay. Alright. So let’s talk a little bit about just some logistical tips and advice for people trying to fit this into real life. So everybody is super busy. You have been preserving for food for a long time and I know that you used to work a job full-time outside the home. Now you’re home, but you’re running multiple businesses like you are busy and you’re still finding a way to fit food preservation into your life. So what are some tips that you have for people for how to actually make this work without being super overwhelmed by it?
Melissa K. Norris:
Yeah, that’s a great question. So I still follow the principles honestly that I used when I was commuting 36 miles and working a day job. And so I very little do I have two to three hours straight that I can devote to canning something start to finish. So what I mean by that is typically what we’ll do is in the morning I’ll go out or sometimes it’s at night for the next day, and this is if you’re harvesting it yourself or maybe this is you going to a farmer’s market and getting the produce or you’re ordering it in bulk from Azure Standard or something. And so I’ll go out and I’ll do that part. So I’ll gather in all of the stuff that needs to be harvested and I’ll do kind of that immediate triage when I get in the house with it. So if it’s cucumbers, if it sits at room temperature overnight, they’re not going to be crisp pickles.
So I know those immediately go into a saltwater bath, they immediately go into fermenting or they go into the CRISPR drawer of the fridge for just a day or two. If it’s green beans for example, then I’ll throw those in the fridge or we’ll sit and snap them. I might have time to snap them. We grow string beans, so I have to string them and then snap them. If you don’t have string beans, it would simply be snapping ’em that I would do and put ’em in a bowl and throw ’em in the fridge if I didn’t have time to can ’em that night. So I kind of break it up into what do I have time to do in these things? Because oftentimes I can find a half hour in the morning and another half hour in the evening, but I don’t have a full hour on either side of that and then proceed.
So for example, I would harvest the beans in the morning that night after dinner would string and snap, and then maybe that next morning I’d pull ’em out of the fridge, do a raw pack and get ’em pressure canned. So that would be three different spots of time. And then while those green beans are processing for 20 minutes in pints at my sea level, that’s when I would be chopping up the cabbage to do some fermented tito or sauerkraut. So you have to listen and pay attention when it’s canning and be in the room, or maybe it would be doing up the brine to do the pickles as soon as the beans get done, that type of thing. So I try to triage what has to be produce wise dealt with immediately, and then batching that out into different pockets of time over the next few days.
Anna Sakawsky:
Yeah, that’s a great tip. And then what about things that maybe don’t need to be preserved in the way that you want it to preserve them, but maybe I think you mentioned throwing your tomatoes in the freezer. What are some things that you can do that with and then come back later and preserve?
Melissa K. Norris:
Yeah, definitely can do it with tomatoes and with any type of berry if you wanted, dehydrate it later or even freeze dry it, especially with berries, if you want to dehydrate it, we want to do what’s called checking, which is where you’re piercing the skin so that as it’s dehydrating, it dehydrates faster. I found the fastest way to do that. There is no way I’m going to sit and poke every single berry with a safety pit. So I throw it in the freezer until it’s flash frozen, then I pull it out, put it on me dehydrator trays, let it saw and dehydrate it. And that’s a fast way of checking. So I’ll do that. I’ll throw berries in the freezer or if I’m going to make jam or jelly or syrup out of them, I’ll throw ’em in there. If it’s pie filling, I have found that.
And then thawing, it’s mushy, and I don’t want mushy pie filling. So if it’s pie filling, I’m going to can it then and there into it. If it’s winter squash, I will just make sure that’s cured stem on. And then if I have a few that are starting to turn bad later in winter, then I know I need to take what’s remaining and I’ll peel it. Qubit and pressure can it, but I know it’s fine in that form for quite a while. So it kind of depends on what the food is and what I’m going to be turning it into if freezing and then thawing is going to have an appealing texture.
Anna Sakawsky:
Yeah, okay. That makes sense. Okay. And what about for those folks that don’t maybe have a garden? Is it worth it? I’d say more from, because you go to the farmer’s market, you buy in season. In your opinion, is it worth it from a financial standpoint to be doing food preservation if you’re not growing and producing it yourself? Or are there other factors that factor into why you might want to still preserve your own food even if you are not actually growing it?
Melissa K. Norris:
Yeah, I mean think about the price of apples, for example, in summer and early fall versus September, January, excuse me, December, January, they go way up. And I have found where we live, we’re not super, super hot. So peaches don’t always do really well here, but they do on the east side of the mountain. So I frequently am buying a few boxes of peaches in order to can up so that we can have ’em year round. But because I’m buying ’em in bulk, I’m buying usually, oh gosh, 10 to 20 pounds of peaches, if not a little more depending on what we’re putting up. Even though I’m purchasing them, it’s way cheaper for me to do that and to can them than it is for me to try to even find a peach in the middle of winter to have. So it definitely is still frugal. And then there’s the whole part too, of knowing what is exactly in that, the ingredients that have went into it, which is important to me also being if we’re talking about canning where it’s in a glass jar instead of tin, where it can be lined with different things. And so I think that it still provides a lot of financial benefits to can even if you are purchasing it.
Anna Sakawsky:
Yeah, yeah, for sure. I was just thinking as you were talking about that too, to obviously everybody’s going to have to make this decision for themselves and what works best for them where their values lie. But for me, one of the reasons I like to purchase things that I might not be growing enough of to preserve is just because then those dollars are staying in my local community. I’m supporting local farmers rather than going to the grocery store, maybe buying it there. So buying it in season, like you said, the health aspects of it, if waste is something that is important to you, again, those glass jar can be recycled over and over and over again, where if you’re buying something from the store, you’re tossing it or recycling it, Lord knows where that stuff goes for real. But yeah, so lots of good reasons. I think that even if you’re not, maybe because something that I’ve heard from a number of people too is like, well, I’m not growing enough tomatoes or whatever the item in question is to preserve it, so what’s the point? Why wouldn’t I just go buy it from the store? But I think it just, you have to weigh out the pros and cons, and I think that there’s still a lot of pros to canning and preserving your own food even if you’re not necessarily producing it.
Melissa K. Norris:
Yeah, a hundred percent.
Anna Sakawsky:
Okay, so before we wrap up, let’s go. We still have a number of questions. Hopefully we can get through them all. So we’ll kind of try to move quickly. Coming up on an hour and a half, I knew this one was going to go over. This is a very popular topic.
Melissa K. Norris:
I have three minutes before I have to jump off.
Anna Sakawsky:
Oh, okay. Okay. Let me just go through and let me just find, okay. Okay, let’s ask, let’s go to Sherry quickly, who had a freeze drying question. Actually, I’ve been thinking about getting a freeze dry. I’m wondering if lettuce and other veggies, it would be good once you rehydrate them or does the texture change kind of a quality issue there? I would like to try and make some salad in a bottle. What’s your recommendation on this one?
Melissa K. Norris:
Yeah, I don’t bother with lettuce to be honest. So you can pressure canned greens and you can freeze dry greens. Lettuce is mainly water. It doesn’t have a ton of nutritional value. So if I’m going to put the work of preserving something, then I’m going to do a green that has more nutritional value in it and that I can use in a variety of ways. So I will do things like kale, I’ll do things like spinach and that type of thing, and I will definitely freeze dry those and then I can use them as a green powder. There’s more nutritional benefit to that. And then I’ll even take freeze dried kale and I will use that as layers and lasagna because with the sauce it will actually rehydrate that and provides good texture. Again, the nutritional aspects. I love lettuce, but I do not try to preserve lettuce in any way, shape or form.
Anna Sakawsky:
Yeah, that’s a tough one, tough one to preserve.
Melissa K. Norris:
Beet green, Swiss chard, those things I will preserve because there’s some nutritional benefit to it. I don’t feel like that with lettuce.
Anna Sakawsky:
Okay, good tip. But you
Melissa K. Norris:
Do have canning greens, pressure, canning greens, which ones and how to do that in everything. Worthing. Yeah,
Anna Sakawsky:
Her your greens. Okay. So I’m going to just actually do something a little bit different right now because we want to wrap up and respect Melissa’s time. So I know there’s a few more questions in the comments. A few of them are actually about freeze drying. So once again, we’re going to have Carolyn Thomas do a deep dive on freeze drying next month. So make sure that you join us on next month’s episode of the coop. But if you do have other questions, Melissa is a regular contributor to Homestead Living Magazine, and so I would highly encourage you to email us, actually maybe our tech support can put right in the comments. They’re the best email address to send it to and they can filter through to us and then that will help us to come up with some good topics for maybe Melissa to touch on in future issues.
So there’s certain questions that you have or things that you want to know about food preservation. There you go. Right there. he***@*************ng.com. So email us your questions and for anybody who was wondering, there will be a replay. So if anything happened or you had to step away, we’ll be sending replay out after this. So just to wrap up, again, if you don’t have a copy of everything worth preserving yet, there is a button right beneath the video there. So grab a copy now. You’ll still get it in time to help you with preserving the harvest this summer. And if you are not yet subscribed to Homestead Living Magazine, you can also do that below. There should be a link there, and if you subscribe right now, you will still be in time to get the September issue. So you need to subscribe by August 6th to get the September issue.
But if you do that now, then you’ll make sure that you get that in your mailbox next month. So thank you so much, Melissa, for joining me here today and go in the full hour and a half with us and you answered so many questions that people had and have sparked so many more. I know even with me, who I’ve now been doing this for a number of years, thanks to you, there were so many things that I’m like, oh, we could go down that rabbit trail. There’s so much to know about home food preservation, but really the best way to get started is that is just to get started. So thank you for the encouragement and advice today, and we’ll see everybody again back here on the coop next month. Carolyn Thomas Homesteading family, we’ll talk all about freeze drying. So thank you everybody for joining us guys. Bye.
Resources/Links
- Download Episode Audio File
- How Do You Know if a Canning Recipe is Safe
- https://melissaknorris.com
- Follow Melissa on YouTube
- Follow Melissa on Instagram
- Follow Melissa on Facebook
- Subscribe to Homestead Living Magazine
Brought to you by
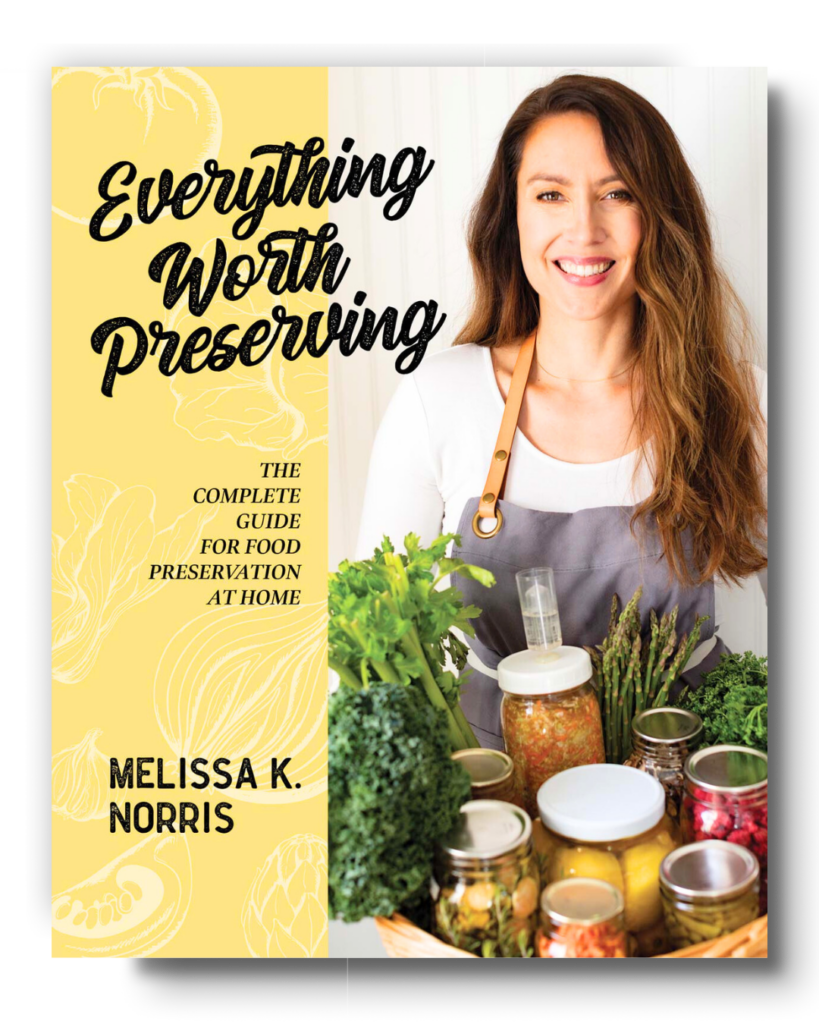
EVERYTHING WORTH PRESERVING BY MELISSA K. NORRIS
This gorgeous book is your ultimate guide to mastering nine home food preservation methods, from canning to fermenting. Popular podcast host and 5th-generation homesteader Melissa K. Norris shares step-by-step tutorials, over 80 recipes, and easy-to-use charts to safely preserve fruits, vegetables, and meats for year-round eating.


Leave a Reply