Interest in culinary and medicinal mushrooms has increased dramatically over the past ten years. But like most things in pop culture, this fascination with fungi is often leveraged to sell elaborate, expensive, confusing gear and education to the would-be home mushroom grower. While the world of mushroom cultivation can be extraordinarily high-tech and scientifically exacting, it can also be relatively simple and affordable at a homestead, or even apartment-stead scale. The aim of this article is to provide a pathway for new mushroom growers and the myco-curious to get started on a mushroom-growing journey that can scale up or down to meet your space, time, and budgetary needs.
Think Like A Mushroom
Before you get started growing mushrooms, it’s helpful to understand exactly what mushrooms are, how they grow, and why they act the way they do. This will help you to understand what they need, and what you need in order to grow them successfully. So, what are mushrooms anyway?
Mushrooms are the “fruiting body” of organisms of the fungi kingdom. For the purpose of understanding their lifecycle, it can be helpful to compare fungi with plants. A gross oversimplification of the fungal life cycle is roughly as follows:
Spore: Kind of like a seed—a single mushroom can produce millions.
Mycelium: Sort of like roots—not really, but it works for our current purposes.
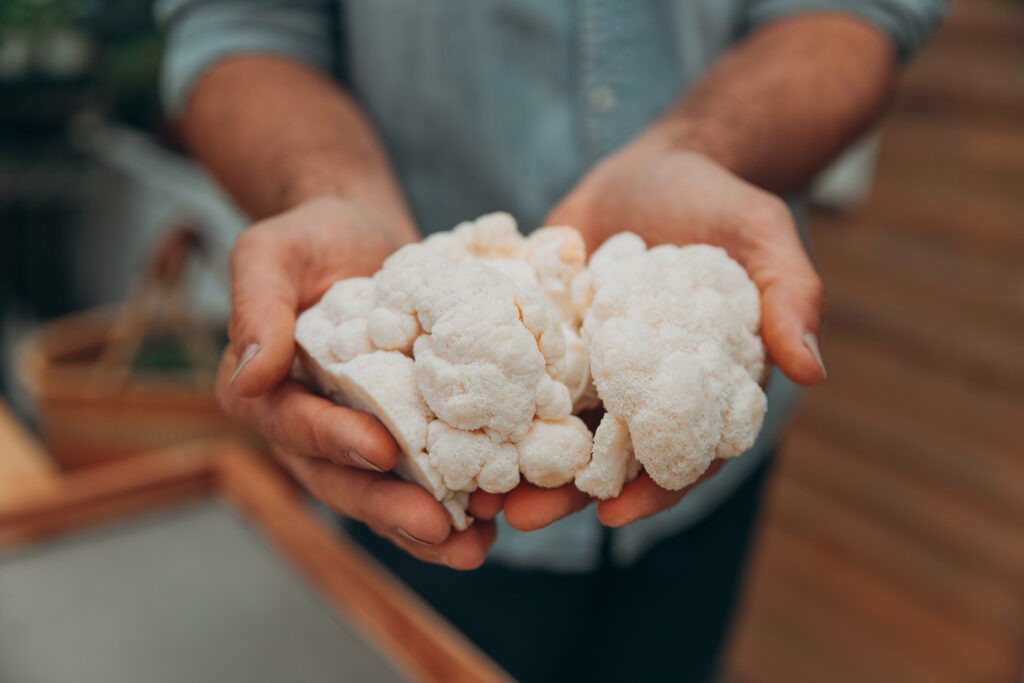
Fruiting body: What we call “mushrooms,” whether it is a gilled cap, bracketed polypore, or jelly-fungus—the above-ground, reproductive parts of fungi.
Spores germinate—male and female—and form hyphae, and when those hyphae hook up, they make mycelium. Mycelium is the primary mode of life for all fungi. We don’t see it much because it happens in the dark, unseen places, but it’s nonetheless true. You know how advanced gardeners and farmers wind up saying that they are “soil farmers” more than plant or animal farmers? It’s kind of like that. Mushroom farmers’ primary concern is their “herd” of mycelium.
Mycelium eats nutrients and, when conditions are right, produces fruiting bodies, which ultimately drop a million new spores to start the whole thing over again. The main goal of mushrooms is reproduction, which is one theory why they taste good and have so many health benefits! If people pick them and transport them, it helps them spread and reproduce over a larger area with more diverse conditions. Survival for them, delicious for us!
What mycelium needs to thrive:
- A high-carbon substrate (like wood, cardboard, or straw)
- Some nutrition (like rye or millet grain)
- Darkness, humidity, 60-90ºF(16-32ºC) temperature, and some airflow
What mycelium needs to produce mushrooms:
- Diminishing nutrition
- Decreased temperatures
- Increased light exposure (no direct sunlight)
- Increased airflow
- Increased humidity

That may sound like a lot to remember, but let’s pause for a moment to think like a fungus. If you’re happily cruising in your mycelial state at a static 70°F (21ºC), maybe munching on the underground roots of a dead elm tree, you have plenty of food with the right nutrients and a cozy atmosphere. You’re going to be pretty happy in that state. But what happens when spring rolls around just as you’ve eaten up all that yummy elm root? And at the same time, an armadillo or lawnmower exposes part of your lovely mess of white fluff. You’re going to say to yourself, “Things are getting crazy around here. It’s time to hatch our escape plan and get outta dodge!” Only you’re mycelium and you have no legs, so your best bet is to shift your energy toward producing a mushroom (the fruiting body) that will, in turn, launch its spores far and wide to find some new elm roots to feast upon and keep trucking along.
Phew, that was wild! Let’s take off our fungal thinking caps and get back into our human minds now. The biologically important factors for a mushroom farmer are simple: give them what they need to thrive and, when the time is right, create the conditions to induce successful fruiting. Cultures have accomplished this in countless ways across millennia, but most modern mushroom farming looks something like this:
- Obtain fungi species and either clone it or capture its spores.
- Introduce a sterile, fertile seed bed, producing grain spawn.
- Mix colonized grain spawn with pasteurized bulk substrate.
- When ready, induce fruiting conditions.
A quick note on sterilization versus pasteurization: sterile means “devoid of life,” whereas pasteurization indicates merely “diminished microbial activity.” Steps one and two of the above process require sterility (cleanliness and a highly controlled environment), whereas steps three and four can be achieved in a much wider and more casual context. For the following growing process, we will skip steps one and two, and begin at step three.
How to Grow Your Own Mushrooms
Now for the fun stuff: how to actually grow mushrooms! It’s a pretty simple process, really:
- Pasteurize bulk substrate.
- Mix grain spawn with bulk substrate.
- Pack into grow buckets.
- Induce fruiting.
- Harvest, and enjoy!
Materials
When it comes to mushroom farming, the status quo is single-use plastic and high-input, costly raw material. We can do better than that. This protocol will guide you toward infinitely reusable materials and free, local, and abundantly available ingredients. More on that as we go along. (For more details and assistance with materials and method, please visit the websites at the end of this article.)
1/2 Gallon of Pearl Oyster Grain Spawn (Pleurotus ostreatus)
Buying commercially available grain spawn allows the beginning grower to skip all sterilization and syringe-y steps, which is great for newbies, folks without a canner or Instant Pot, and folks who already have too many hobbies! It’s also possible to grow your own grain spawn, but that’s a topic for a future article.
Make sure you get grain spawn, not liquid culture or a grow kit. Grain spawn is sterilized grains (or seeds) colonized by mycelium. This gives your grow a head-start against other competing fungi and microorganisms. Some sources for grain spawn are in the links below, but I’ve moved toward sourcing from labs within my community and surrounding area. Check around! There may be someplace right down the road from you.
After you have a few successful grows with Pearl Oyster, you can branch out to other hardwood-loving varieties of Oyster, as well as certain other species like Reishi. Be aware that some species, like Lion’s Mane, are less vigorous, and thus have higher sterility requirements than the following simple pasteurization methods.
5 Gallons Bulk Substrate
There are many options when it comes to your substrate (aka. your growing medium). I like to use a 50/50 straw/sawdust mix, or a mix of different sizes of wood waste including sawdust from our mill, planer shavings, and smaller wood chips. You might include:
- Organic Straw (chopped)
- Hardwood Chips/Sawdust Mix (fresh, untreated)
It’s a great idea to have a range of sizes, from fine sawdust to chunks 3/4 of an inch and smaller. Using all fine materials can cause your substrate to compact too much and prevent it from breathing. All big chunks won’t have enough contact to make your mycelium sing.
Most species of hardwood work, with mixes sometimes doing better than single species. What do you have on hand? What can you get? Can’t find organic straw or woody material? All good. This is the fun part where you find out what your ecology/community can provide. Look for something that is woody/carbonaceous, maybe various sizes and kinds of material. You can technically use cardboard here, but be aware that it’s not organic and often has unknown adhesives in the mix, and that stuff can come through your mushroom crop.
You can experiment with supplements like gypsum, hydrated lime, bran, etc. But for now, let’s keep it simple and skip these additives.
Food-grade Buckets with Lids
You’ll need five one-gallon buckets for this recipe, but feel free to scale up or down. These can often be obtained second-hand from your local baker or grocer. Look for the recycling code PP5 to indicate that it’s food-grade.
Once you have your buckets, add about eight half-inch holes around the side walls, avoiding the very top and the very bottom. Think of a sparse cumberbund of holes around each bucket. I use a step drill bit for this, but use what you have.
You don’t have to use buckets—almost anything that you can sanitize will work. I currently use stackable 14x20x4 airline tubs which serve as both bin and lid. This allows me to make use of the mycelium for other purposes after harvest.
Micropore Tape
This is commonly used as medical tape. The paper kind works, but I prefer the poly kind, as the paper kind can transmit contaminants into the inner chamber when wet.
Isopropyl Alcohol in a Spray Bottle & Paper Towels
Use isopropyl alcohol to sanitize your buckets. There are other options for sanitizing surfaces, but this works well and dries fast.
Large Brew-Bag
Or an old pillowcase to pasteurize and hang-dry our bulk substrate.
Large Cooler
To pasteurize your bulk substrate.
Hot Water (180°F/82ºC)
You can heat the water in a large pot with a rocket stove, a propane burner, or on a cooktop.
Large Bin
To mix grain spawn and bulk substrate.
Helpful (but not strictly necessary):
- Gloves
- Long thermometer
- Mask
- Immersion heater
Method
Step 1: Pasteurize Your Bulk Substrate
Mix five gallons of bulk substrate with a gallon or two of hot water until absorbed. Put the damp mixture into a brew bag, tie it up, and place it in the cooler. Add 180°F (82ºC) water until the bag is completely submerged. Weigh the bag down with a paver, brick, or similar item. Close the cooler lid and monitor temperature. Pasteurization requires the water temperature to stay between 140°-180°F (60-82ºC) for at least one hour. If it drops below 140°F (60ºC), use more water or use an immersion heating element. After one hour has passed, remove the bag from the cooler and hang it to drip dry for about an hour, or until dripping stops.
Step 2: Mix Grain Spawn with Bulk Substrate
With sanitized hands or gloves, remove pasteurized bulk substrate from the bag and spread it into your sanitized mixing bin. Spread your 1/2 gallon of grain spawn over the bulk substrate and mix thoroughly
Step 3: Pack into Grow Buckets and Colonize
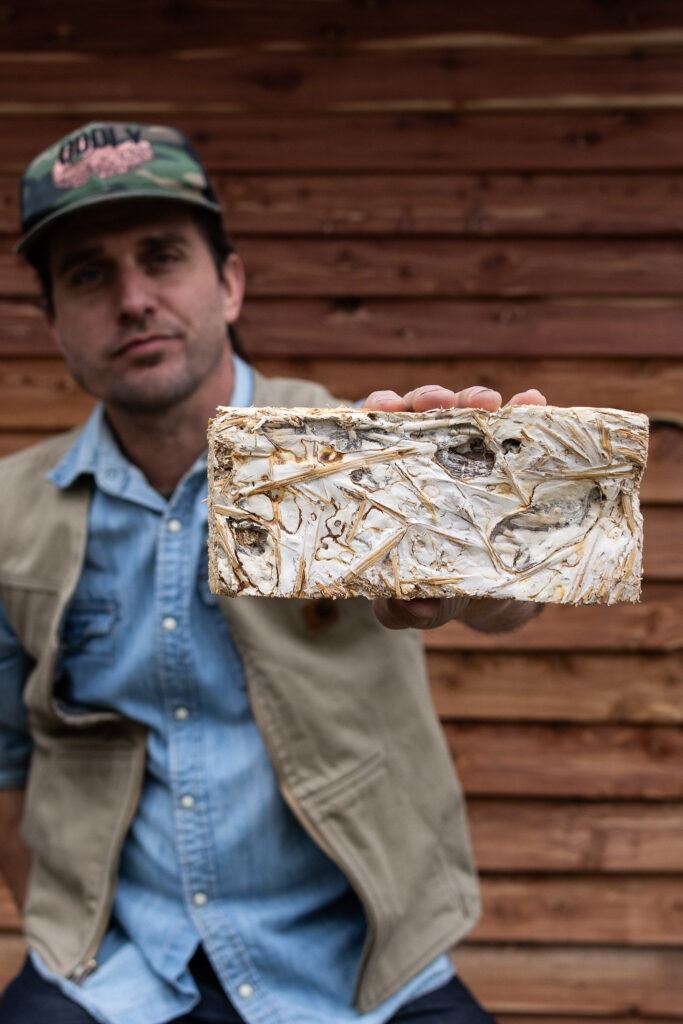
Place a strip of micropore tape over each hole in your buckets. Sanitize each bucket and lid, inside and out, then pack the bulk substrate/grain spawn mixture into your buckets, dividing evenly. Pack firmly and put lids on your buckets. Now the hard work is done and the waiting begins!
Step 4: Place Buckets in an Area out of Direct Sunlight, with Relatively Consistent Temperatures
Pearl Oyster grain spawn prefers 75°F (24ºC), but general “room temperature” will work. Inoculation will probably take a couple weeks, depending on conditions. Feel free to ignore your buckets completely, or if you must, peek under a lid every few days. When they’re about ready to fruit, the surface will be covered in white fluff (aka. mycelium!). If there’s a teensy bit of black or green mold, you can let it ride until harvest—this will not affect your mushrooms. If more than 1/4 of the surface has mold, remove it from the others. You can compost it, or do what I do: half-bury it in a shady spot near the garden, and you can often get a mushroom crop!
You’ll know they’re ready for the next step when baby mushrooms (pinheads) start trying to poke through the taped holes. Don’t remove the tape, as this can damage the pinheads.
Step 5: Induce Fruiting
When pinheads start poking out, move your buckets to a location that meets as many of the aforementioned fruiting conditions as possible. Reminder, we’re looking for a cooler, more humid location with more airflow and more light exposure (no direct sunlight). Some options are the floor near your shower, against a northern-facing wall outside your house, or just inside your back kitchen door.
Too dry? Increase humidity by misting the surrounding area (not spraying the mushrooms directly) several times per day. You can also put them in a shallow tray of water or a wet, folded towel.
Step 6: Harvest
Fruiting takes about a week. When a number of mushrooms are the size of your fist, they’re ready to harvest and enjoy!
If you are interested in learning more, the best online homestead-scale mushroom farming school out there right now is offered by the good folks at Milkwood Permaculture. Special thanks to Nick Ritar at Milkwood for his inspiration in my own mushroom-growing journey over the years. Check out Milkwood’s free and paid classes, articles, guides, and other resources at milkwood.net.
I am also indebted to the work of Paul Stamets, especially his books Growing Gourmet and Medicinal Mushrooms, and Mycelium Running. If you keep growing, you’ll eventually want to get these books!
Wanna talk about this article? Join the discussion at permies.com/mushroom, where we talk about mushroom farming, myco-insulation, permaculture, and homesteading all the time.
Want to learn in person? Join me at this year’s Permaculture Technology Jamboree! Check out permies.com/s/ptj-beau to learn more.


Leave a Reply