

Hunkered down in a little rental apartment at the edge of the woods, I lit a candle and pulled out my sewing basket. It was late October 2012, and Superstorm Sandy had snuffed out the power earlier that afternoon. Somehow it crossed my mind that, despite the lack of electricity, I could sew—by hand!
So that evening, I cut out a simple chambray skirt and threaded a needle by candlelight. It was more of an amusing experiment than anything—surely I couldn’t really sew an entire viable skirt by hand? But with each minute, more stitches accumulated beneath my fingers, and they looked promising. By the time I went to sleep, I had a new skirt and a deepened respect for what my hands were capable of.
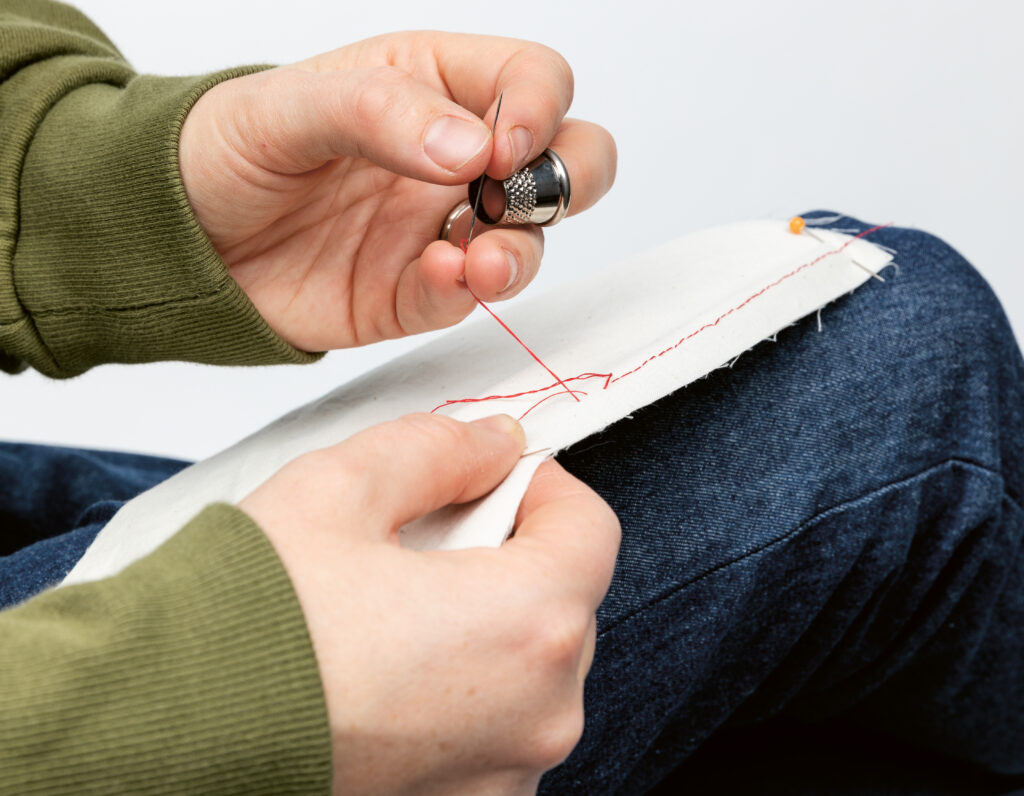
Six or seven years later, working in the scurry and waste of New York’s fashion industry, I noticed that most of my personal sewing had also become rather slapdash. I would draft up a new pattern for myself and then machine sew the garment together as quickly as I could. These me-made garments were accumulating too fast, I realized, and yet I truly loved to make them. How could I slow myself down enough to justify continuing my creative practice?
Re-enter hand sewing. It occurred to me that for tens of thousands of years before the invention of the sewing machine, people had been stitching everything by hand. Absent a hankering for speed, there was no reason I couldn’t apply those same techniques now. And as far as I was concerned, that slowness could be a great benefit.
Of course, I had practical questions. Would hand stitches be strong enough to hold together modern garments? Would hand-sewn garments require special laundering? And wouldn’t it take approximately forever to sew an entire adult-sized garment by hand?
In recent years, I’ve hand-stitched dozens of garments and found satisfying answers to these questions. Eventually, I began teaching garment hand-sewing classes and even wrote a couple of books on the subject: The Handsewn Wardrobe (released last month) and Hand Sewing Clothing: A Guide (published in 2021).
Hand sewing has so much to offer—it’s portable, inexpensive, quiet, deliberate, beautiful, soft, strong, empowering, and, above all, fun. Today, I’d love to share some of what I’ve learned with you.
Practical Questions
“Fine,” you may be thinking. “Hand sewing clothing is possible, sure. But is it practical?” My answer is that it can be, as long as it’s aligned with your lifestyle.
How much time does it take to sew clothes by hand?
It depends on what you’re sewing, which techniques you choose, and what your personal stitching speed happens to be. For me, it tends to take two or three times as long to stitch a project by hand as it would using a machine. A pair of leggings might take me three hours to stitch by hand, while a T-shirt could take closer to 10, and an involved jacket might require 20 hours or more. However, because I can bring my hand sewing with me and stitch in little odd moments, I often complete a project sooner stitching it by hand than if I have to wait for dedicated blocks of time in front of a sewing machine.
How durable are handsewn clothes?
Many newcomers to hand sewing worry about its durability. Can it hold up to the abuses of daily wear? Can it withstand a washing machine? Yes and yes! As long as you’re using stitches appropriate for the particular garment area, and as long as your thread isn’t old and prone to breakage, a handsewn seam should hold up every bit as well as one sewn by machine (if not better). A washing machine and dryer should be fine, too, as long as the fabric you’ve used is okay with machine laundering.
How can I fit hand sewing into daily life?
Hand sewing isn’t for everyone. It takes time, much like knitting or quilting. So if you truly don’t have the time (or patience) for some of those other long-form crafts, then you may prefer to stick to machine sewing or buying pre-made clothes. Having said that, there are lots of in-between options. You can machine sew your structural seams and then finish your hems by hand, for example. Or you can machine sew everyday staples but hand sew special occasion outfits. The right balance will look different for each person. These days, I do whatever works for me in the moment. If I have the time and interest, I sew by hand. If I need something done quickly, I sew by machine.
Tools and Materials
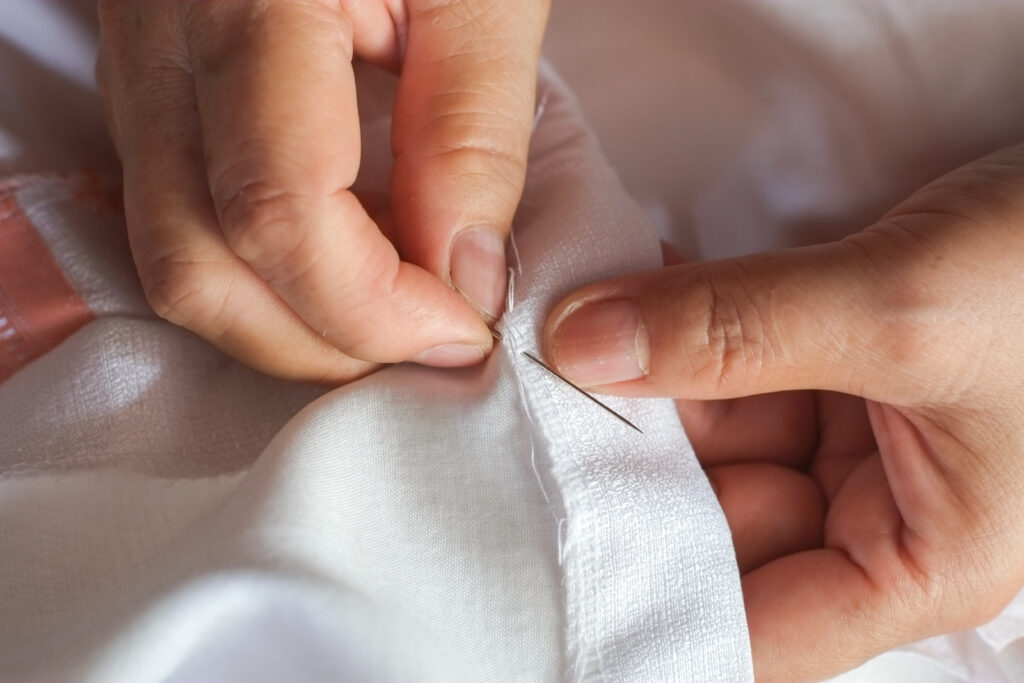
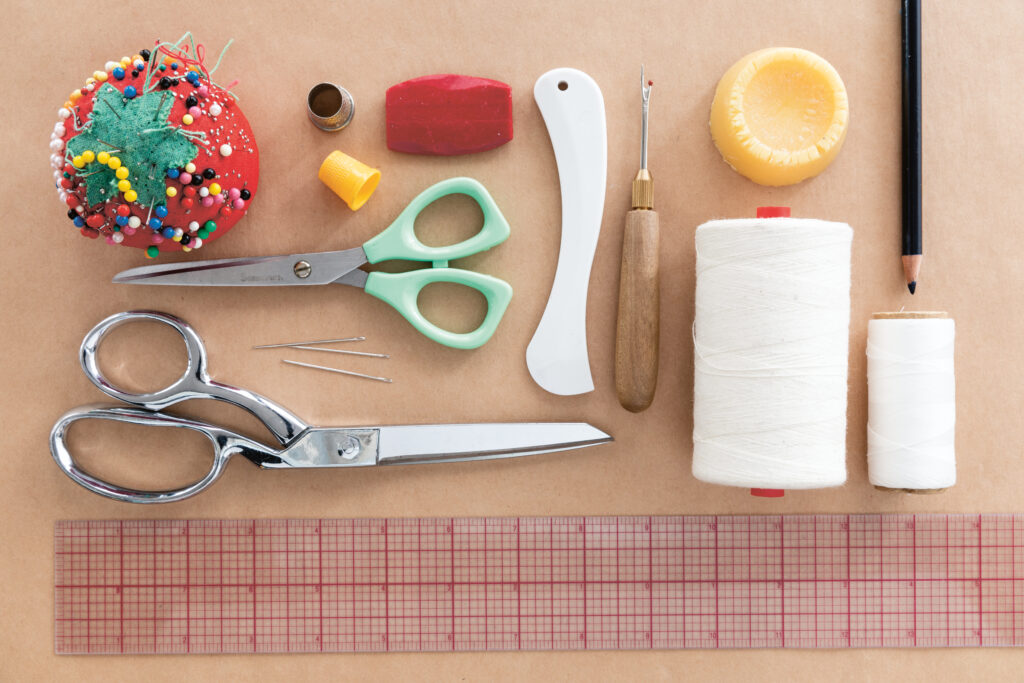
One of the biggest benefits of hand sewing is that you don’t need much to get started. Here are the most important tools and materials I’d recommend:
- Hand sewing needles in different sizes (sharps for wovens, ballpoint for knits)
- Thread
- Pins
- Fabric shears
- Iron
- Ruler and/or tape measure
- Thimble (optional but very helpful)
Useful Stitches
There are plenty of hand stitches you can learn if you want to get really fancy, but even just two or three stitches are enough to build lovely, strong clothes. On the following page, I’ll teach you three basic stitches that I find especially useful, including an even backstitch, hemstitch, and overcast stitch.
Additionally, it’s helpful to know a few techniques for finishing seams. Three that I use often include the flat-felled seam, French seam, and overcasting. While there’s not enough space to include full instructions for all of these seam finishes here, you can find tutorials for seam finishes in my book The Handsewn Wardrobe.
HandSewn Clothes for Everyday Life
If you’re ready to try your hand at sewing your own clothing, I’d highly recommend hand stitching modern, everyday staples that you’ll reach for frequently. Farmwear? Sure! Clothes for exercising? Certainly. Clothes for running errands, raising children, dancing, grieving, worshiping, mopping, making dinner, planting seeds? All of it. Hand stitches are strong enough, and what’s more, if you wear hand-stitched clothing often, you’ll be able to study and learn from how they hold up to the rigors of your daily life. The more you wear these hand-stitched clothes, the more knowledgeable you’ll become.
Even Backstitch
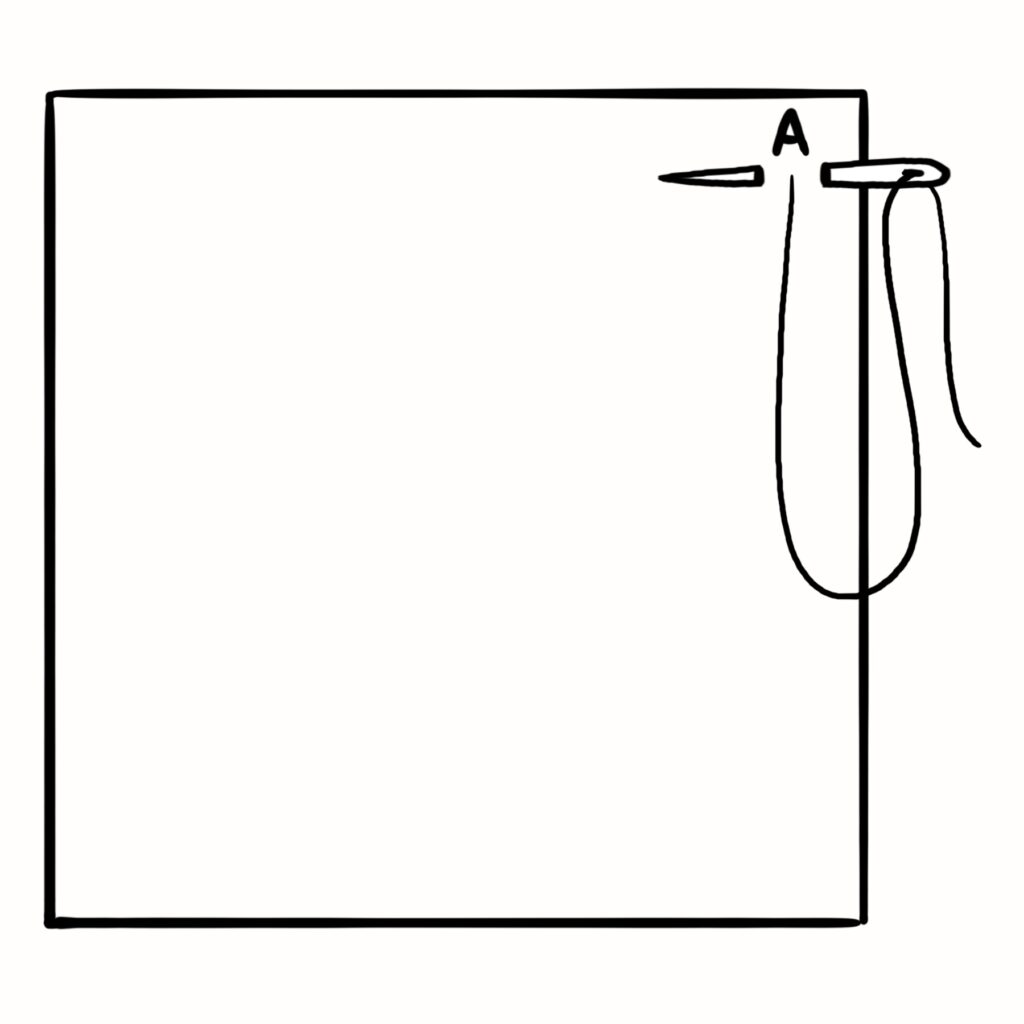
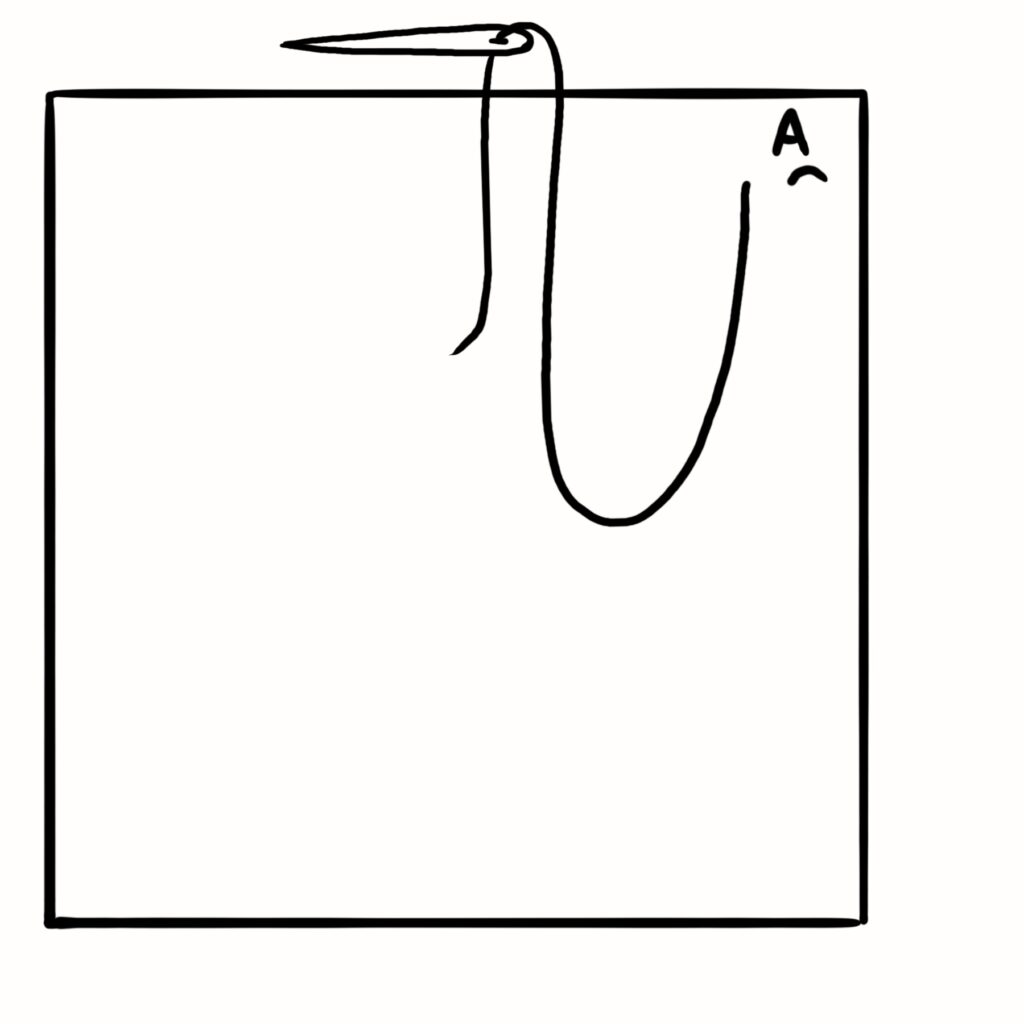
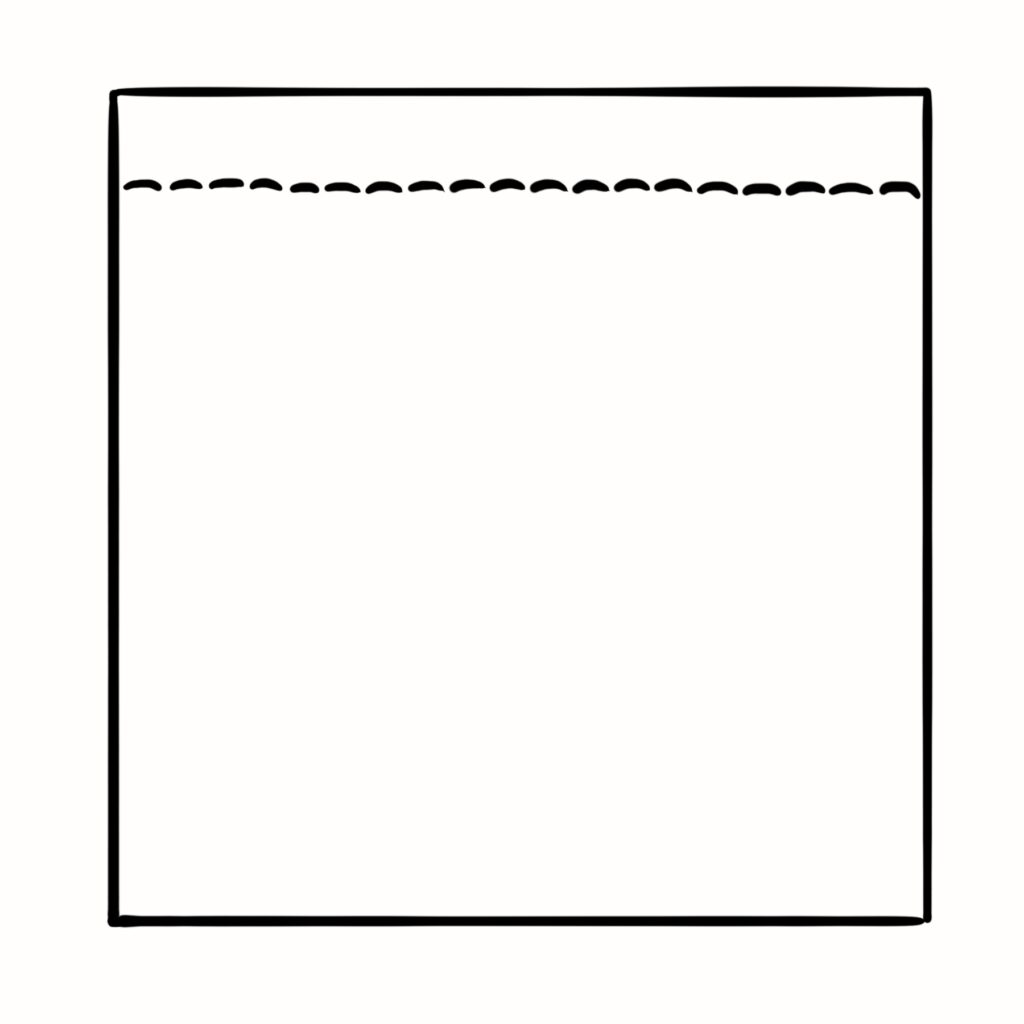
This is one of the most powerful stitches in your toolkit. It’s very strong and sturdy, with great stretch potential. It’s almost always a great choice for structural seams, whether you’re working with wovens or knits. The sewing machine’s straight stitch was developed to imitate the backstitch, and they look a lot alike when viewed from the top.
How to do it:
- Anchor your thread where you intend to sew. Notice where your thread has just emerged from the cloth (let’s call this Point A). Insert the needle tip one stitch length before Point A, and push the needle tip out one stitch length after Point A. [Fig. 1]
- Pull the needle and thread through. You’ve just completed a single backstitch. [Fig. 2]
- Repeat steps 1 and 2 for each backstitch. [Fig. 3]
Hemstitch
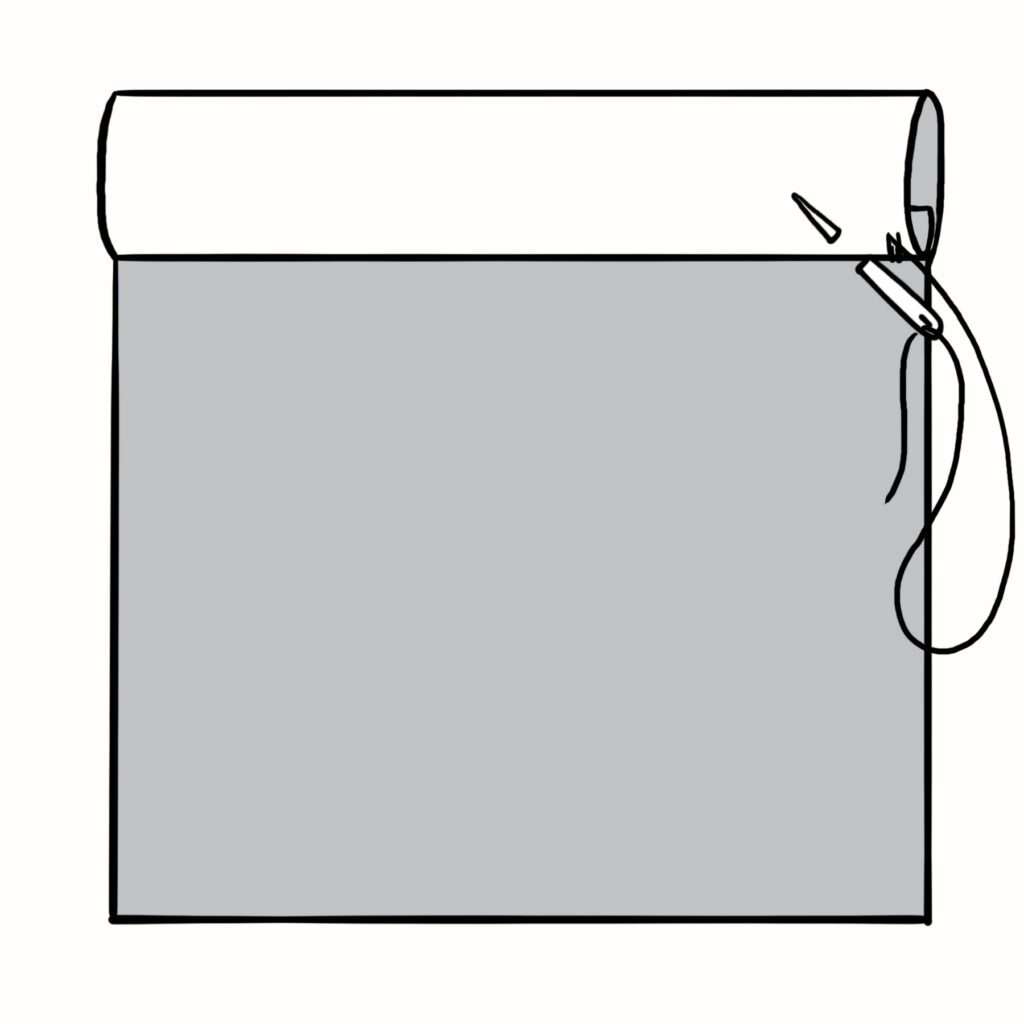
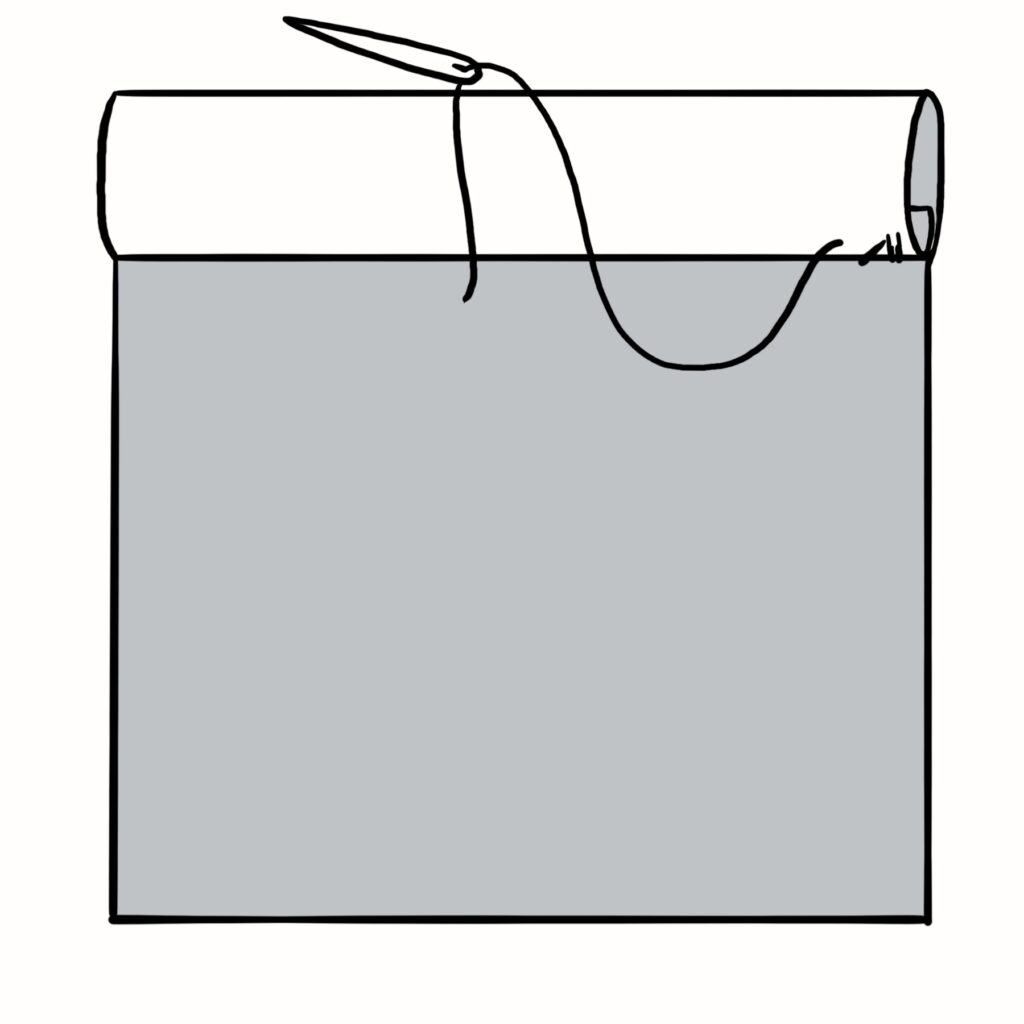
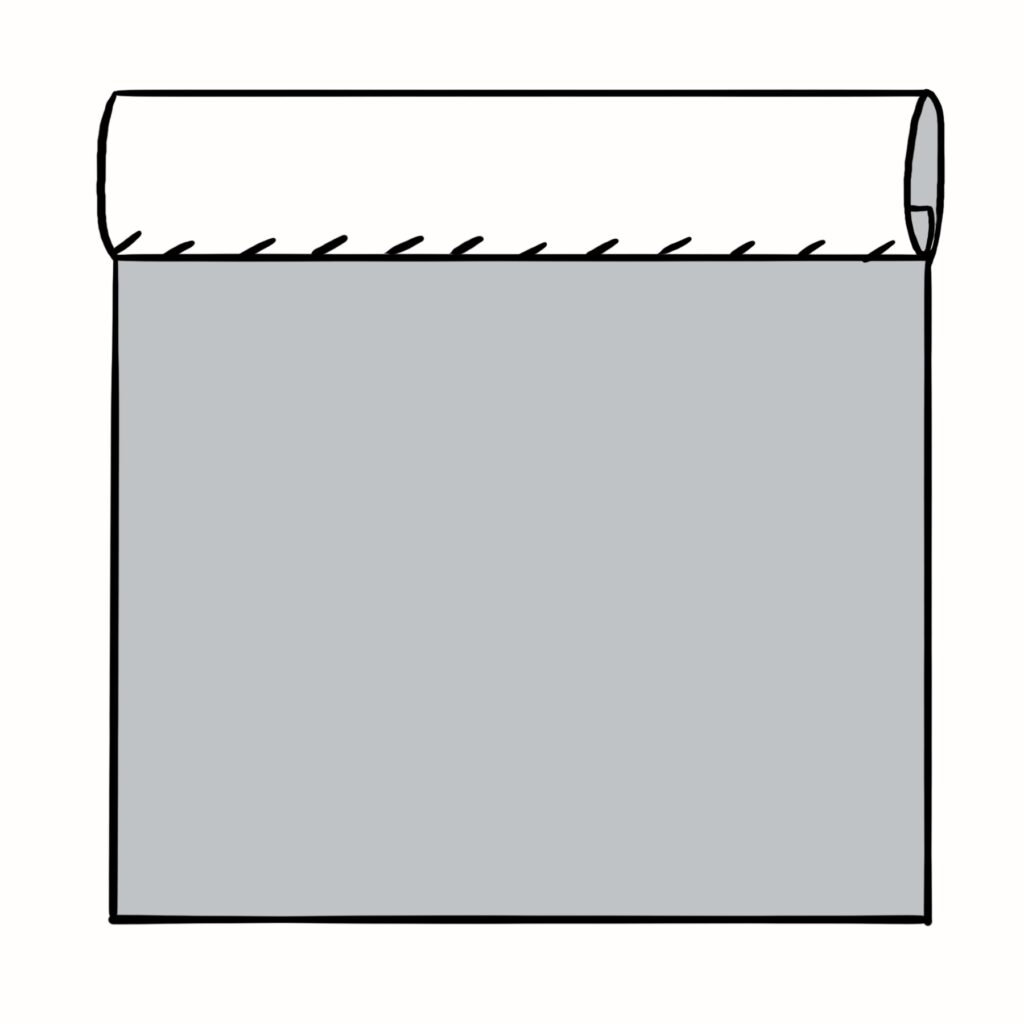
I use this stitch all the time, especially on woven fabrics. It’s a fast, tidy way to secure layers together—for example, when hemming, attaching a patch, or felling a seam. It creates a zigzagging band of thread along your fabric, offering a bit of stretch potential, while remaining a visually subtle option.
How to do it:
- Anchor your thread along the edge that you’re joining.
- Advance a short distance along the edge and insert your needle into the underlayer only, very close to the folded edge. Then hold the needle at an angle to the edge so that it points toward where you’re advancing, and push the needle tip through all layers so that it emerges up on the edge. [Fig. 1]
- Pull through until the thread lies smooth against the fabric. [Fig. 2]
- Repeat steps 2 and 3 to produce more hemstitches. [Fig. 3]
Overcast Stitch
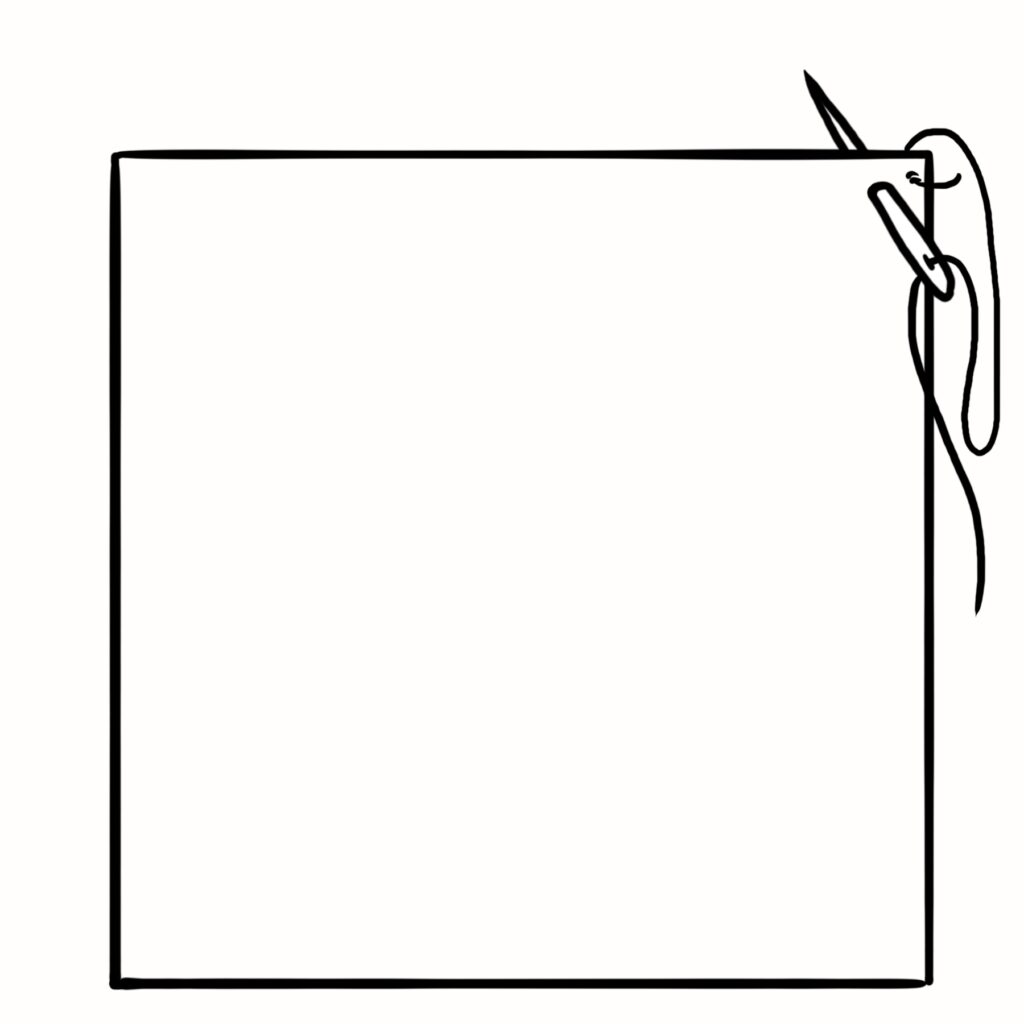
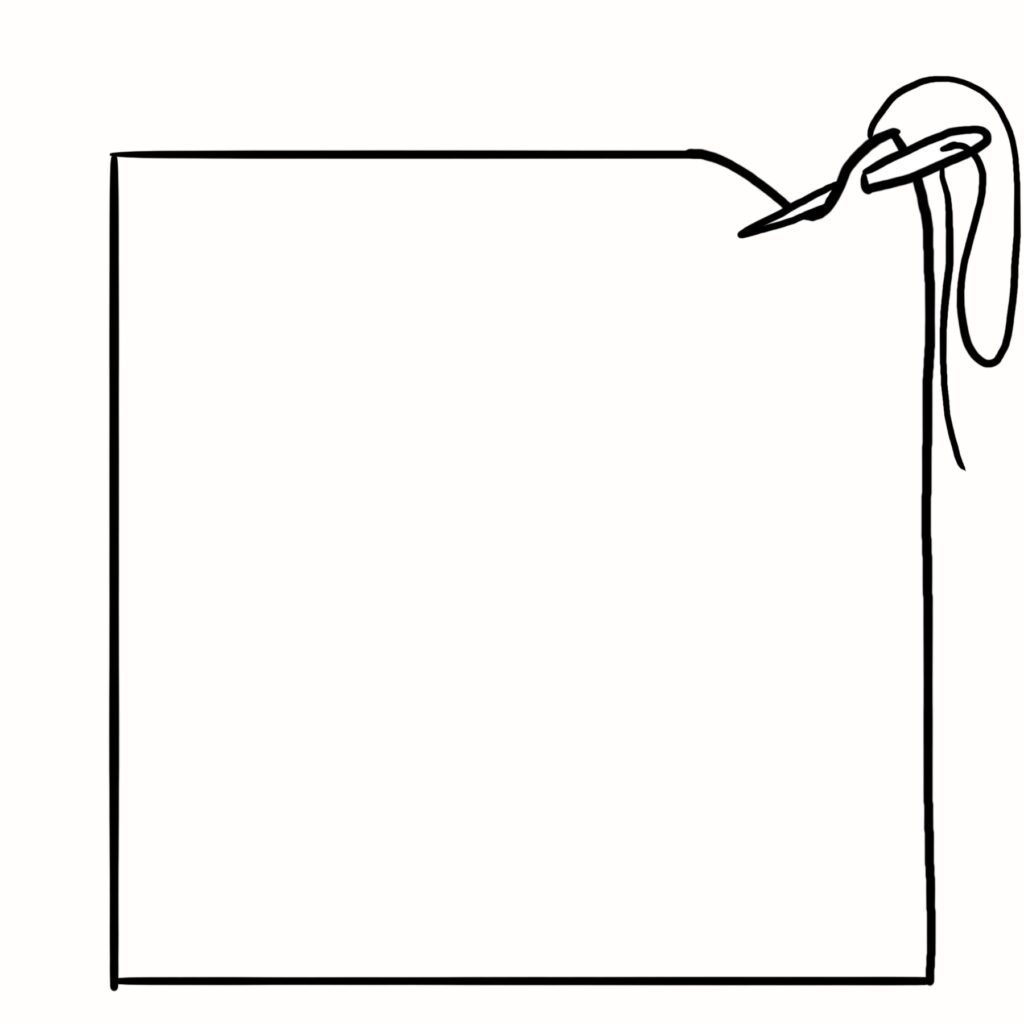
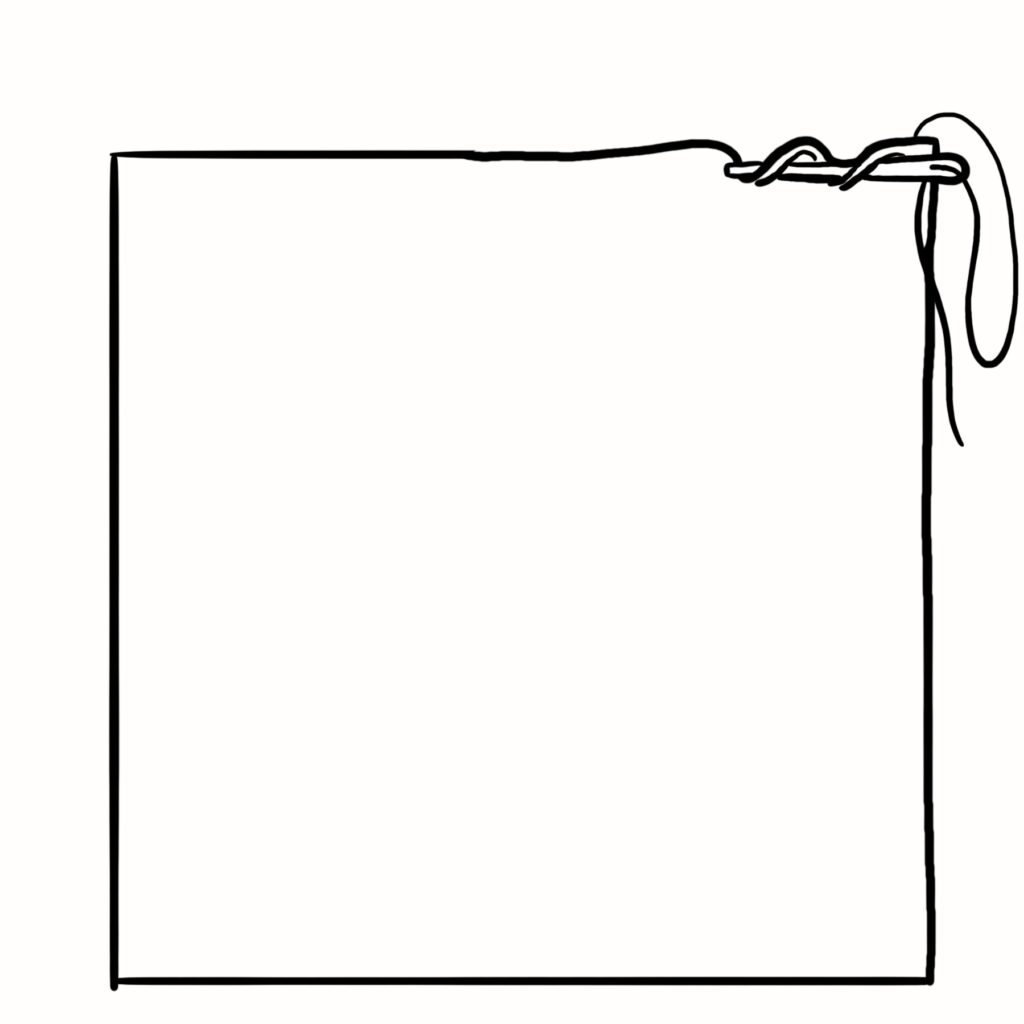
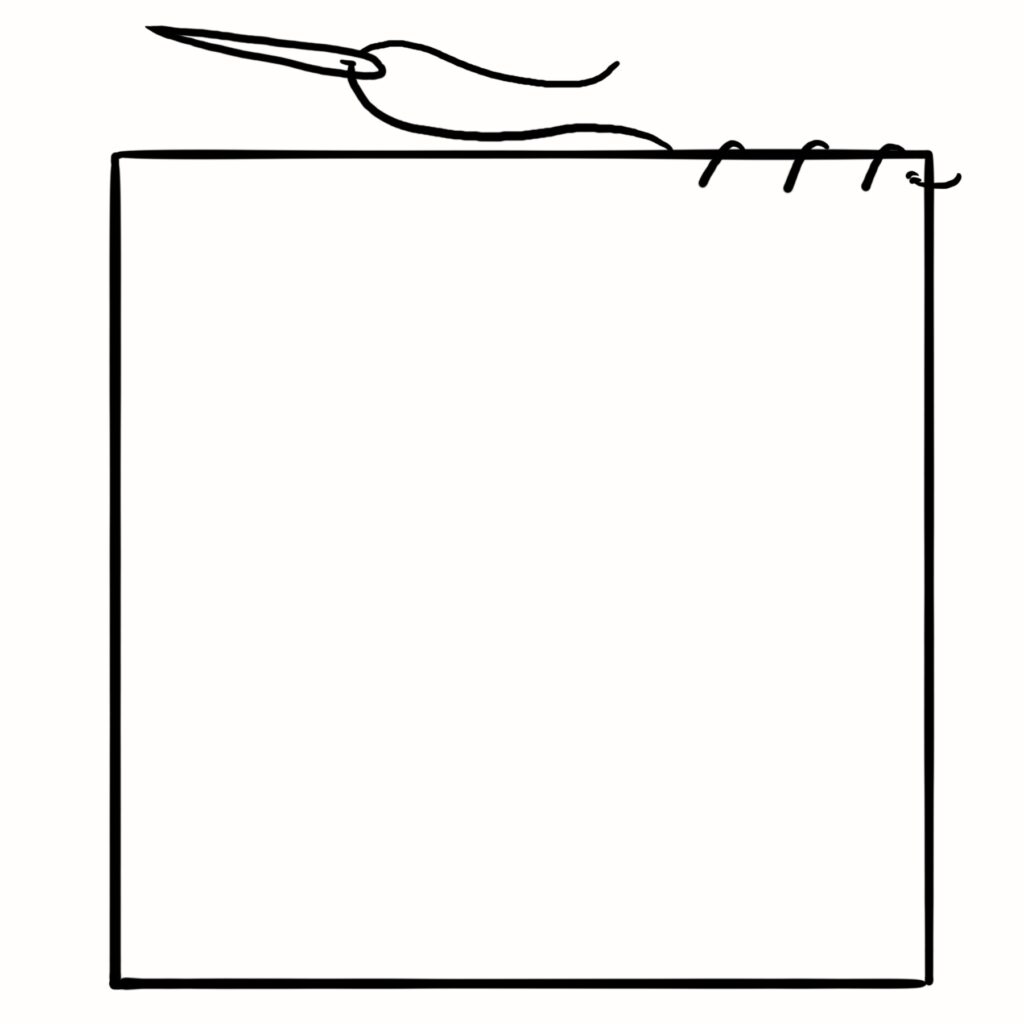
This stitch is a quick, effective way to finish a raw edge by thread-binding it, just as you might do with a sewing machine’s zigzag stitch, or with a serger’s overlocking. Overcasting allows seam allowances to remain malleable and minimally bulky, unlike most other edge finishing options. It’s quick to do, too, because you can load up your needle with several stitches at once. Use it for knit or woven fabrics.
How to do it:
- Anchor your thread near the edge you’re thread-binding.
- Insert the needle from front to back, close to the edge. The distance from the edge is up to you and may depend on the density and stretch of the fabric. I usually try something like 1/8 inch (3 mm) from the edge as a starting point. [Fig. 1]
- Do not push the needle all the way through; instead, spiral the needle’s tip around the top of your raw edge so that it is on top of your work again. [Fig. 2]
- Advancing slightly along the raw edge, insert the needle again from front to back, close to the edge, as in step 2.
- Repeat steps 3 and 4 until you’ve loaded your needle with several stitches. [Fig. 3]
- Pull through, and then massage the fabric briefly so that the fabric and thread lie flat and smooth. [Fig. 4]
- Repeat steps 2 through 6 to advance across the entire raw edge. [Fig. 5]



Leave a Reply